Filling your RV’s fresh water tank is crucial for a comfortable trip. It ensures you have clean water for drinking, cooking, and bathing.
Traveling in an RV offers freedom and adventure. One essential task is filling the fresh water tank. Many new RV owners find this process confusing. Don’t worry; it’s simpler than you think. Having a full tank means you won’t run out of water on the road.
This guide will show you step-by-step how to do it right. From connecting the hose to checking for leaks, you’ll learn everything you need. Enjoy your journey with peace of mind, knowing you have clean water on board. Let’s dive in and make this task a breeze!
Credit: blog.campingworld.com
Preparing Your Rv
Preparing your RV for a trip involves several important steps. One of the key tasks is filling the fresh water tank. Clean water is essential for drinking, cooking, and cleaning. Before you start, make sure your RV is ready for the process. Here’s how you can prepare your RV for filling the fresh water tank.
Inspecting The Fresh Water Tank
First, check the fresh water tank for any damage. Look for cracks or leaks. A damaged tank can lead to water loss. Inspect the tank’s connections and hoses. Ensure they are secure and in good condition. This step helps prevent issues during your trip.
Gathering Necessary Supplies
Next, gather the supplies needed for the task. You will need a clean hose. Make sure it is safe for drinking water. A water filter can also be useful. It ensures the water is clean. You may also need a water pressure regulator. This helps control the water flow into the tank.
Having a water hose storage bag can help keep things organized. Collect these supplies before you start filling the tank. Being prepared makes the process smoother and faster.

Credit: www.rvwithtito.com
Choosing The Right Water Source
When it comes to filling your RV’s fresh water tank, choosing the right water source is crucial. The quality of water you use can affect not only the taste but also the health and safety of everyone on board. Let’s dive into the options available, so you can make the best choice for your adventures.
Public Water Sources
Public water sources are often the most convenient option for RV travelers. These include:
- Campgrounds: Many campgrounds provide potable water hookups. This is usually safe to use, but always check for signs indicating water quality.
- Rest Areas: Some rest areas offer water stations for RVs. They can be a great stopover for refilling your tank.
- City Water Connections: If you’re staying in an urban area, city water connections are typically reliable and safe.
Personal Experience: On a road trip through California, I found that almost every campground had clean and safe drinking water. It saved me from the hassle of searching for water sources.
Think about this: What’s more important to you, convenience or ensuring the highest water quality?
Private Wells
Private wells can be a viable option, especially if you’re traveling through rural areas or staying on private property.
- Farm Stays: Many farms offer RV parking and access to their private wells. Always ask about water testing and filtration systems.
- Friends and Family: If you’re visiting someone with a private well, inquire about the water quality before using it.
- Boondocking Sites: Some boondocking sites have access to well water. Check reviews and ask locals about the water safety.
Personal Experience: During a stay at a friend’s property in Oregon, I had access to their private well. The water was crystal clear and tasted great, but I made sure to ask about its quality first.
Consider this: Are you confident in your ability to assess the safety of well water?
In conclusion, whether you choose public water sources or private wells, always prioritize the quality and safety of the water you are filling your RV’s fresh water tank with. Making informed choices will ensure a pleasant and healthy travel experience.
Connecting To The Water Supply
Filling the fresh water tank on an RV involves connecting a clean hose to the water supply. Turn on the faucet, and let the tank fill up. Ensure the hose is securely connected to prevent leaks.
When you’re ready to hit the road in your RV, one of the essential tasks is ensuring your fresh water tank is filled correctly. Connecting to the water supply may seem straightforward, but taking the right steps can save you from potential headaches down the road. Let’s dive into the details of how to do this effectively.Attaching The Hose
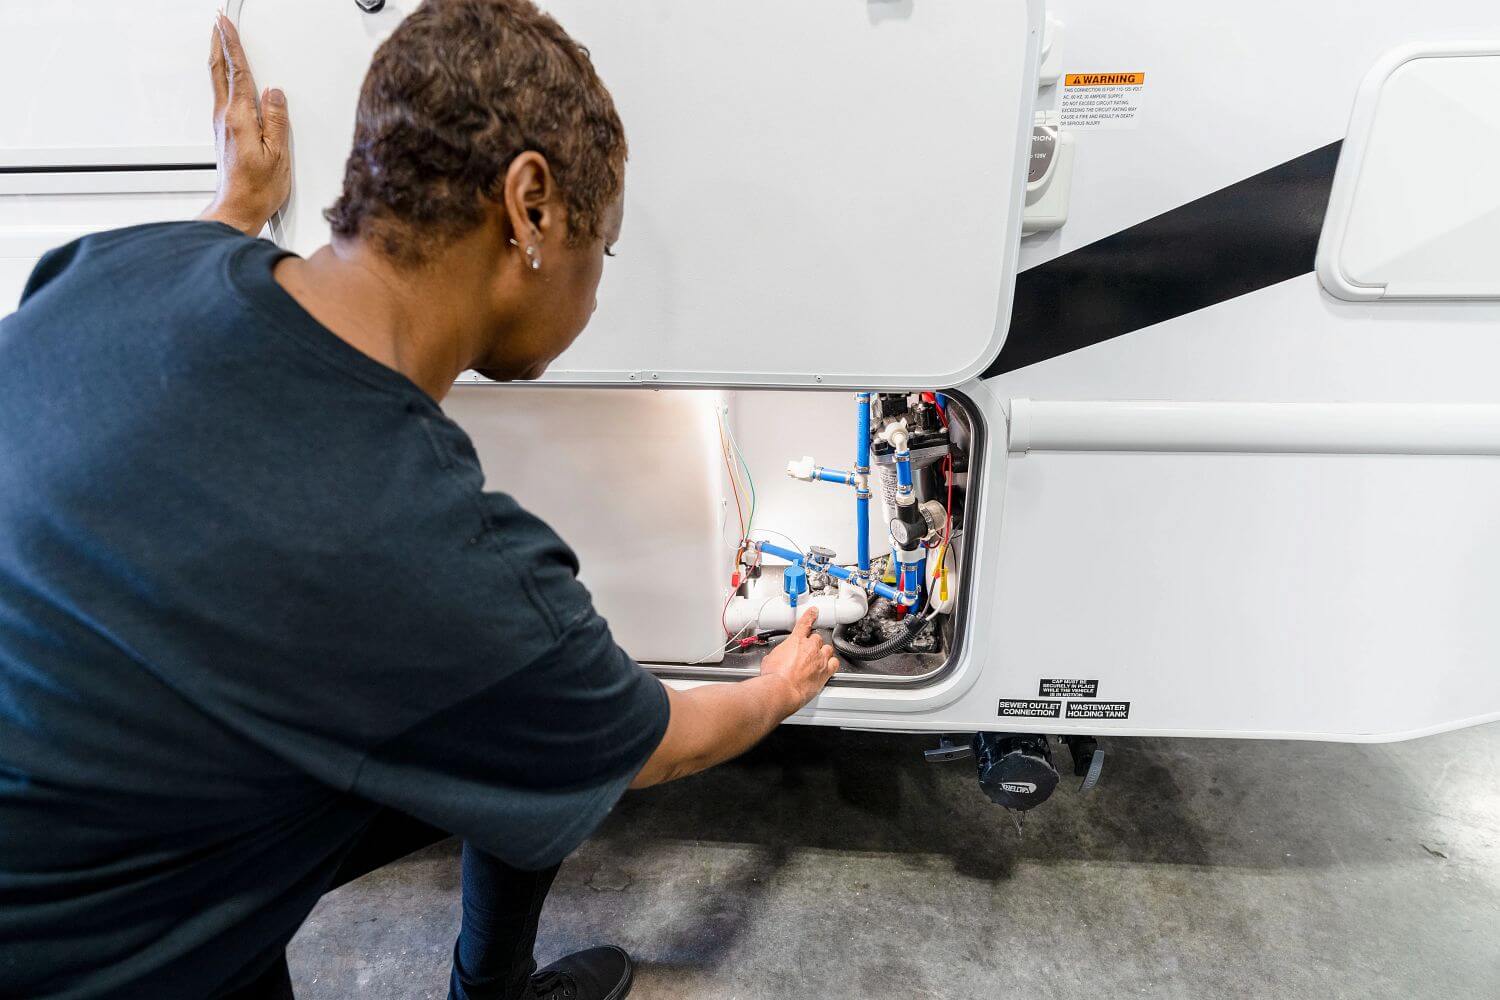
Begin by locating your RV’s fresh water inlet. It’s usually labeled and can be found on the side of the vehicle. Use a clean, potable water hose—this is crucial to ensure your water stays safe for drinking. When I first started RVing, I mistakenly used a regular garden hose, and the water tasted off. Since then, I’ve always kept a dedicated potable water hose in my RV toolkit. It’s a small investment for peace of mind. Attach one end of the hose to the water supply spigot. Before connecting the hose to your RV, run the water for a few seconds to clear out any debris or stagnant water. This simple step can prevent unwanted particles from getting into your fresh water tank.Securing Connections
Once the hose is attached to the spigot and the other end is connected to your RV’s inlet, it’s time to secure the connections. This is vital to avoid leaks and ensure a smooth flow of water. Tighten the connections by hand, but don’t overdo it. Over-tightening can damage the threads, leading to leaks. If you notice water dripping, use a pair of pliers to gently tighten the connections a bit more. A water pressure regulator can be a lifesaver. It prevents high-pressure water from damaging your RV’s plumbing system. Simply attach the regulator between the spigot and the hose. Have you ever experienced low water pressure while showering in an RV? It can be frustrating. This often happens when the connections aren’t secure. Double-checking each connection can save you from such annoyances. Remember, these steps are easy but crucial. Attaching the hose correctly and securing the connections properly ensures that your fresh water tank fills up efficiently, giving you one less thing to worry about on your adventure. Are you ready to connect your RV to the water supply like a pro? Share your thoughts or experiences below!
Credit: www.classacustoms.com
Filling The Tank
Filling the fresh water tank in your RV is crucial. It ensures you have clean water for various needs. Follow these steps for a smooth process.
Monitoring Water Levels
Always check the water levels before filling the tank. Most RVs have a water level indicator. Use it to monitor the current level. If the indicator shows low, it’s time to fill the tank.
Avoiding Overfilling
Overfilling the tank can cause problems. It may lead to leaks or damage. Fill the tank slowly and watch the indicator. Stop once it shows full. This helps prevent overfilling.
Using Water Filters
Filling your RV’s fresh water tank is easy with a water filter. Attach the filter to the water source. Then connect it to your RV to ensure clean, safe water.
When it comes to filling your RV’s fresh water tank, using water filters is a game-changer. Clean water is not just about taste; it’s about health and maintenance. In this section, we’ll dive into the world of water filters, helping you to understand the different types and how to install them efficiently.Types Of Filters
Choosing the right water filter can be overwhelming with so many options available. Here’s a quick rundown of the most common types: – Sediment Filters: These are great for removing dirt, rust, and large particles. They are often the first line of defense in a multi-stage filtration system. – Carbon Filters: These filters are excellent for removing chlorine, bad tastes, and odors. Carbon filters can significantly improve the quality of your drinking water. – Ceramic Filters: These are effective at removing bacteria and other microorganisms. They are reusable and can last a long time with proper maintenance. – Reverse Osmosis Systems: Although more expensive, these systems provide the highest level of filtration, removing almost all contaminants. They are ideal for those who want the purest water possible. Each type serves a specific purpose, so consider what you need based on your water source and usage.Installation Tips
Installing a water filter might seem daunting, but it’s quite straightforward with the right guidance. Here are some practical tips to ensure a smooth installation: 1. Read the Manual: Always start by reading the manufacturer’s instructions. Every filter system has its nuances, and the manual will provide specific details. 2. Choose the Right Location: Install the filter as close to the water source as possible. This ensures maximum efficiency and protects your plumbing system. 3. Use Quality Hoses: Invest in good-quality hoses to connect your filter. Cheap hoses can leak or burst, causing more problems than they solve. 4. Check for Leaks: After installation, run water through the system and check for leaks. Tighten connections if necessary, but be careful not to overtighten. 5. Regular Maintenance: Keep an eye on your filter’s performance. Regularly clean or replace filters as recommended to ensure they continue to function effectively. Have you ever thought about how much cleaner your water could be with the right filter? By taking the time to choose and install a suitable system, you can ensure a steady supply of clean, safe water for all your adventures. Remember, the key to a successful installation is preparation and attention to detail. So, take your time, follow these tips, and enjoy the benefits of filtered water in your RV.Maintaining Water Quality
Keep your RV’s fresh water tank clean by filling it properly. Use a clean hose and run the water until clear. Regularly check for contaminants to ensure safe drinking water.
Maintaining Water Quality Keeping the fresh water tank clean in your RV is crucial for ensuring you have safe, drinkable water on your adventures. This task might seem daunting, but with a few simple steps, you can maintain water quality and enjoy your travels without worry. Let’s dive into the essentials of maintaining water quality with a focus on regular cleaning and preventing contamination.Regular Cleaning
Regular cleaning is your first line of defense against water contamination. I remember the first time I neglected this step, I ended up with a foul taste in my water that almost ruined my trip. Here’s how you can avoid this mistake: – Drain and Flush: Begin by completely draining your fresh water tank. Then, flush it with clean water. This removes any sediment or build-up. – Sanitize: Mix a solution of 1 cup of bleach with 4 gallons of water. Pour this solution into your fresh water tank. Fill the tank with clean water and let it sit for at least 12 hours. – Rinse: After the sanitizing period, drain the tank again and flush it with fresh water until you no longer smell bleach. This ensures all traces of bleach are removed. Doing this cleaning routine every few months ensures your water stays fresh and safe.Preventing Contamination
Preventing contamination is equally important. A few precautions can save you from the hassle of dealing with dirty water. – Use Clean Hoses: Always use a clean, food-grade hose to fill your tank. Store it in a clean place to avoid dirt and bacteria. – Avoid Shared Water Sources: Be cautious about the water sources you use. Filling your tank from questionable sources can introduce contaminants. – Install a Water Filter: A good water filter can catch impurities before they enter your tank. Consider installing one between the hose and the tank. One time, I filled my tank from a rest stop faucet without a filter, and I ended up with murky water. Since then, I never skip this step. Ever faced an unexpected issue with your RV’s water? What steps did you take to resolve it? Regular maintenance and a few preventative measures can ensure that your RV’s water is always safe and clean. Next time you fill your fresh water tank, remember these tips to maintain the quality of your water. Safe travels!Troubleshooting Common Issues
Filling your RV’s fresh water tank can sometimes present challenges. It’s essential to address common issues to ensure a smooth process. Understanding these problems and their solutions will help maintain your RV’s water system efficiently.
Low Water Pressure
Low water pressure is a frequent problem in RVs. First, check the water source. Sometimes, the campground’s water supply may be weak. Ensure the water pump is switched on. If the pump is on and there’s still low pressure, inspect the filter. A clogged filter can restrict water flow. Clean or replace it as needed. Lastly, check the hose. A kinked or damaged hose can reduce water pressure. Straighten or replace the hose if necessary.
Leaking Connections
Leaking connections can waste water and cause damage. Start by inspecting all connections for signs of leaks. Tighten any loose fittings using a wrench. If the leak persists, check the O-rings. Worn-out O-rings can cause leaks. Replace them with new ones. Also, ensure you use plumber’s tape on threaded connections. This tape helps create a watertight seal. If leaks continue, consider replacing the entire connection.
Tips For Efficient Water Use
Efficient water use in your RV ensures you have enough for your trip. It also helps reduce waste and saves money. Follow these tips to make the most of your water supply.
Conserving Water
Use water-saving showerheads to reduce water use. Take shorter showers. Turn off the water while lathering soap or shampoo. Fill a basin with water to wash dishes instead of running the tap. Rinse all dishes at once to save water. Collect excess water for other uses, like flushing the toilet.
Managing Water Waste
Fix leaks immediately. Even small drips waste water over time. Check all connections regularly. Use a water pressure regulator to prevent bursts. Store greywater for flushing the toilet. This reuses water and reduces waste. Monitor your water tank levels to avoid overfilling. This prevents spillage and waste.
Frequently Asked Questions
How Do I Fill My Freshwater Tank In My Rv?
To fill your RV’s freshwater tank, connect a potable water hose to a clean water source. Open the tank’s fill valve and monitor the water level. Stop filling once the tank is full. Ensure all connections are secure to prevent leaks.
How Do I Add Water To A Fresh Water Tank?
Locate the fill port on your fresh water tank. Attach a clean hose to the port. Turn on the water supply. Fill the tank until it reaches the desired level.
Can I Fill My Rv Water Tank With A Garden Hose?
Yes, you can fill your RV water tank with a garden hose. Ensure the hose is clean and safe for drinking water.
How Do I Know When My Fresh Water Tank Is Full On My Rv?
Check the tank’s gauge for water level. Listen for a change in the filling sound. Monitor overflow indicators if available.
Conclusion
Filling your RV’s fresh water tank is simple with the right steps. Always check for leaks and secure connections. Use clean hoses and follow sanitation guidelines. Regular maintenance ensures safe and fresh water. Practice these steps to enjoy hassle-free RV adventures.
Happy travels and stay hydrated!