
Removing a window screen may seem tricky at first. But it’s actually simple.
Most window screens are designed for easy removal. First, identify the type of window screen you have. Screens can vary based on the window model. Next, you’ll need to locate the tabs or pins that hold the screen in place.
These small parts are essential for removing the screen without causing damage. Knowing how to remove a screen properly can save you time and effort. Whether you’re cleaning, repairing, or replacing it, this guide will walk you through the process step-by-step. With just a few tools and some patience, you’ll have that screen out in no time. Ready to get started? Let’s dive in!
Tools Needed
Removing a screen from a window requires a flathead screwdriver, utility knife, and safety gloves. Carefully follow the steps to avoid damage.
When it comes to removing a screen from a window, having the right tools is essential. Not only does this make the process smoother and more efficient, but it also ensures that you don’t damage the window or the screen. Let’s dive into the tools you need to get this job done right.Essential Tools
You’ll need a few basic tools to remove a window screen. Here’s a list to get you started: – Flathead Screwdriver: This tool helps you pry the screen from the frame without damaging it. – Utility Knife: A sharp blade can cut through any stubborn sealant. – Pliers: Use these to grip and remove any clips or fasteners holding the screen in place. – Putty Knife: This tool can help you loosen the screen from the frame. – Replacement Clips: If the old clips are damaged, you’ll need new ones to secure the screen back in place. I remember the first time I attempted to remove a window screen without the right tools. I ended up bending the frame and tearing the mesh. Trust me, having these tools handy makes a world of difference.Safety Gear
Safety should always be your top priority. Removing a window screen might seem like a simple task, but there are potential hazards. Equip yourself with the following safety gear: – Gloves: Protect your hands from sharp edges and broken glass. – Safety Glasses: These will shield your eyes from any debris or dust. – Work Boots: Sturdy footwear can prevent injuries if you drop any tools. Using the right safety gear can prevent accidents and injuries. Have you ever thought about how something as simple as a pair of gloves can save you from a nasty cut? It’s these small precautions that make a big difference. Removing a screen from a window doesn’t have to be a daunting task. With the right tools and safety gear, you’ll be able to tackle this project with confidence and ease. Are you ready to get started?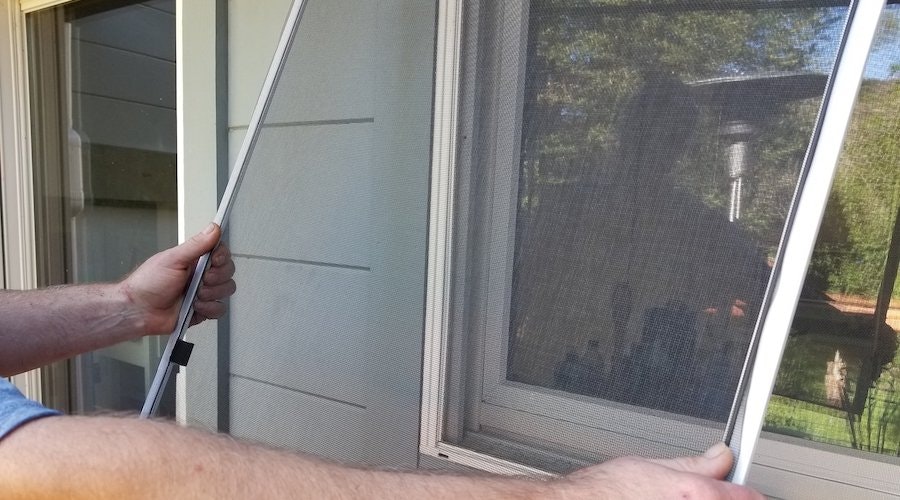
Credit: brennancorp.com
Preparation Steps
Removing a screen from a window might seem straightforward, but a little preparation can make the process smoother and prevent any potential damage. Whether you’re dealing with a standard window or a custom design, taking the time to get organized will save you effort and frustration.
Clear The Area
First things first: ensure your workspace is tidy. This means moving away any furniture, plants, or decorations that might obstruct your access to the window.
- Place a soft cloth or towel on the floor beneath the window. This protects the screen if it falls and makes cleanup easier.
- Keep all necessary tools within reach. A small flathead screwdriver or butter knife can be handy for prying loose stubborn screens.
Have you ever tried fixing something only to realize you’re missing tools halfway through? It’s frustrating, right? Avoid this by checking you have everything ready before you start.
Inspect The Screen
Before you start removing the screen, take a close look at it. Understanding its condition and how it’s secured will help you avoid any surprises.
- Look for any visible damages. A torn or bent screen might need special care or replacement.
- Identify how the screen is held in place. Screens can be secured with springs, clips, or screws. Knowing the method helps you approach removal correctly.
Imagine struggling with a screen, only to find it’s screwed in place—frustrating, right? Avoid this by inspecting first.
Are the clips rusted? This can make removal tricky. Consider applying a bit of lubricant to ease the process.
Taking these steps not only saves time but also reduces the risk of damaging your screen or window frame. Plus, you’ll feel more confident tackling the task.
Ready to get started? Let’s move on to the actual removal process!
Removing The Screen
Removing the screen from your window might seem like a simple task, but it can be tricky if you’ve never done it before. Knowing the right steps can save you time and prevent damage to your screen or window frame. Let’s dive into the process of removing a screen, ensuring you get it right the first time.
Identify Screen Type
The first step is to identify the type of screen you have. Screens come in various types, such as:
- Fixed Screens: These are attached permanently and can’t be removed without tools.
- Adjustable Screens: These can be resized and are typically easier to remove.
- Sliding Screens: Common in double-hung or sliding windows, they slide up and down or side to side.
- Retractable Screens: These roll up into a housing when not in use.
Knowing your screen type will guide your approach and help you locate the right mechanisms for removal.
Locate Tabs Or Pins
Once you’ve identified the screen type, the next step is to locate the tabs or pins that hold the screen in place. These are usually found on the screen frame and can be small and easy to miss. Here’s a quick tip: look for small levers, handles, or pins along the perimeter of the screen.
For sliding screens, you might find tabs on either side of the screen. Pressing these tabs typically allows you to slide the screen out of its track. If you have a fixed screen, you might need a flathead screwdriver to carefully pry the screen away from the frame.
Adjustable screens often have easy-to-find handles or levers. Simply pull or push these to adjust the screen and remove it. Retractable screens might require you to unlock the housing unit before you can pull the screen out.
Have you ever struggled to find the tabs or pins? Sometimes they blend in too well with the screen frame. When this happens, gently feel around the edges with your fingers, or use a flashlight to get a better view. You’ll often find them in the most inconspicuous places.
Successfully locating and using these mechanisms ensures a smooth removal process. Have you ever removed a screen and found the task easier or harder than you expected? Share your experience in the comments below! This community thrives on shared tips and tricks.
Remember, taking your time to understand the screen type and locating the tabs or pins will make the removal process straightforward and hassle-free. So next time, approach it with confidence and a little bit of patience.
Credit: www.youtube.com
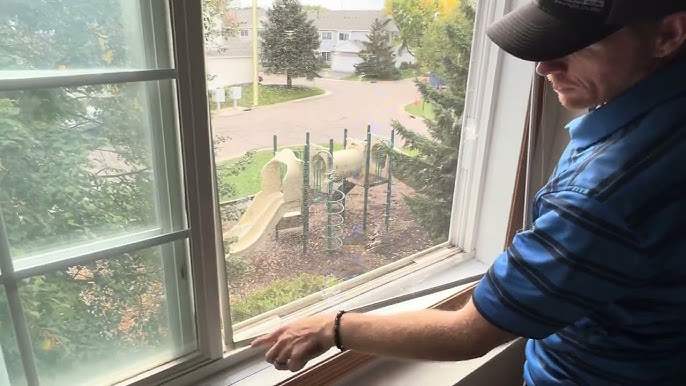
Removing Window Screens With Tabs
Removing window screens with tabs may seem challenging, but it’s simple. Many modern windows have screens with tabs for easy removal. Understanding the process helps you clean or replace your window screens efficiently.
Release Tabs
First, locate the tabs on the window screen. Usually, they are on the sides or bottom. Press the tabs inward with your fingers. This action releases the screen from the window frame. Be gentle to avoid bending the screen.
Lift Screen Out
Once the tabs are released, hold the screen firmly. Lift the screen upwards to remove it from the window frame. If the screen does not come out easily, check if the tabs are fully pressed. Wiggle the screen slightly if needed. Your screen should come out smoothly.
Removing Window Screens With Pins
Removing window screens with pins can be a straightforward task. Many window screens use pins to stay in place. Knowing how to remove these screens can be helpful. Follow these steps to remove your window screen with pins.
Remove Pins
First, locate the pins on your window screen. They are usually on each corner. Use your fingers or a flathead screwdriver. Gently pull the pins away from the frame. Be careful not to bend or break them. This will release the screen from the frame.
Pull Screen Free
After removing the pins, the screen should be loose. Hold the screen firmly by its edges. Slowly pull the screen out of the window frame. If the screen sticks, check for any remaining pins or obstructions. Carefully adjust and pull until the screen comes free.
Cleaning The Screen
Removing a window screen involves lifting the tabs gently and tilting it out. Ensure to grip the frame firmly. Avoid bending the screen while handling.
### Cleaning the Screen Cleaning your window screen is essential to maintain a clear view and allow fresh air into your home. Over time, screens can accumulate dust, dirt, and debris, which can obstruct airflow and diminish the appearance of your windows. While it may seem like a simple task, giving your window screens a thorough clean can make a significant difference. Let’s dive into the steps you need to take, focusing first on dusting the screen and then washing it.Dusting The Screen
Before you start washing the screen, it’s important to remove any loose dust and dirt. You might be surprised at how much grime can accumulate on your window screens. 1. Remove the Screen: Carefully remove the screen from the window frame. Lay it flat on a clean surface, such as a table or the ground. 2. Brush Off Dust: Using a soft brush, like a paintbrush or a handheld vacuum with a brush attachment, gently brush off the dust and debris. Make sure to brush both sides of the screen. 3. Inspect for Damage: While you’re dusting, take a moment to inspect the screen for any tears or damage. This is crucial because a damaged screen won’t serve its purpose well and might need replacement. Isn’t it surprising how much dirt can cling to something so delicate? Dusting the screen not only makes the subsequent washing easier but also helps in spotting any potential repairs needed.Washing The Screen
Once the dust is gone, it’s time to give the screen a thorough wash to remove any stubborn dirt and grime. 1. Prepare Cleaning Solution: Mix a few drops of mild dish soap with warm water in a bucket. Avoid using harsh chemicals as they can damage the screen. 2. Scrub the Screen: Dip a soft brush or sponge into the soapy water and gently scrub the screen. Be sure to clean both sides and focus on any particularly dirty areas. 3. Rinse Thoroughly: Rinse the screen with a garden hose or under running water. Ensure that all soap residue is washed away to prevent streaks. 4. Dry the Screen: Shake off excess water and let the screen dry completely before reinstalling it. You can prop it up against a wall or lay it flat on a clean surface. Have you ever noticed how a clean screen can brighten up a room? It’s a small detail that can have a big impact on your living space. Taking the time to properly clean your window screens can improve airflow and keep your home looking fresh. When was the last time you cleaned your window screens? If it’s been a while, now is the perfect time to give them some attention. Remember, clean screens not only enhance the appearance of your windows but also contribute to a healthier indoor environment.Reinstalling The Screen
Reinstalling a window screen can seem tricky at first. But with a few simple steps, you can get it done quickly and easily. Follow this guide to align the screen and secure the tabs or pins.
Align The Screen
First, hold the screen frame. Ensure it is right side up. You will notice the tabs or pins on one side. These should face towards the window. Carefully place the screen frame into the window track. Gently press to fit it in place. Ensure all sides are aligned perfectly.
Secure Tabs Or Pins
Next, check the tabs or pins on the screen frame. If your screen has tabs, push them into the slots on the window frame. Make sure they snap into place. If your screen uses pins, pull the pins outward. Then, fit them into the holes on the window frame. Release the pins to secure the screen.
Lastly, check if the screen is snug and secure. Press lightly on each corner. The screen should not move or pop out. If it does, readjust the tabs or pins. Repeat the process until the screen is firmly in place.
:max_bytes(150000):strip_icc()/WindowWithScreen-8f60aa3d6e1f4f39b7c3b6920f773cdc.jpg)
Credit: www.thespruce.com
Troubleshooting Tips
Removing a screen from a window can sometimes present challenges. Especially if the screen is stubborn or damaged. This guide will help you troubleshoot common problems. Follow these tips to make the process smoother and easier.
Stubborn Screens
Stubborn screens can be frustrating. First, check if the screen is locked. Some screens have small latches or clips. Unlock them before attempting to remove the screen.
If the screen is stuck, try using a flathead screwdriver. Gently pry around the edges. Be careful not to bend the frame. Sometimes, dirt or debris can cause the screen to stick. Clean the edges with a soft brush or cloth.
Still stuck? Apply a small amount of soapy water to the edges. This can help loosen the screen. Remember to dry the area afterward to prevent damage.
Damaged Screens
Damaged screens need a different approach. If the screen is torn, handle it carefully. You don’t want to make the damage worse. Use gloves to protect your hands from sharp edges.
If the frame is bent, it might be harder to remove. Try to straighten the frame gently. Use pliers if necessary. Be patient and work slowly to avoid further damage.
For screens with broken clips, you may need to replace them. Check your local hardware store for replacements. Fix the clips before attempting to remove the screen again.
In some cases, it might be best to replace the entire screen. This is especially true for severely damaged screens. Measure your window carefully before purchasing a new screen.
Frequently Asked Questions
How To Take A Screen Out Of A Window Without Breaking It?
To remove a window screen without breaking it, first unlock the screen. Lift the screen and tilt it slightly inward. Gently pull it out from the frame.
How To Take Window Screen Off With Tabs?
Pull the tabs on the screen frame towards the center. Gently lift and tilt the screen out of the window frame.
Are There Window Screens That Can’t Be Removed?
Yes, some window screens are fixed and can’t be removed. These are usually found in high-rise buildings for safety.
How To Remove A Screen From A Double Hung Window Without Tabs?
To remove a screen from a double hung window without tabs, first raise the lower sash. Next, pull the screen gently towards you, then lift it out from the bottom. Finally, tilt and maneuver the screen out of the window frame.
Conclusion
Removing a window screen isn’t difficult. Start by lifting the screen’s tabs. Carefully pull the screen out. If it’s stuck, gently wiggle it. Ensure you don’t damage the frame. Store the screen in a safe place. Clean the window and the screen for good maintenance.
Regular checks can prevent damage. With these steps, you can remove a window screen easily. Keep your windows looking great and functioning well. Enjoy a clear view and fresh air.