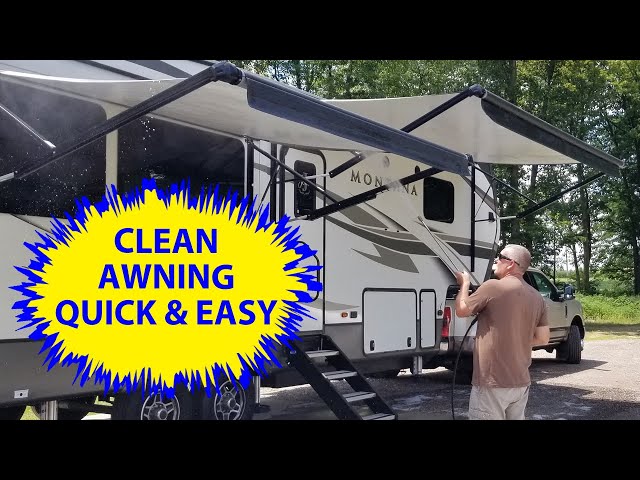
Cleaning a camper awning can seem like a tough task. But with the right steps, it becomes easy and quick.
A camper awning provides shade and comfort on your travels. Over time, it collects dirt, mold, and debris. Proper cleaning keeps it looking great and extends its life. Whether you’re a seasoned camper or a newbie, knowing how to clean your awning is essential.
In this guide, we’ll walk you through simple steps to make your awning spotless. You’ll learn what tools to use, the best cleaning solutions, and tips to prevent future grime. Ready to make your camper awning shine again? Let’s dive in!
Preparing Your Cleaning Supplies
Gather mild soap, soft brush, and water hose. Ensure all cleaning supplies are within reach before starting. This preparation makes cleaning your camper awning easier and more efficient.
Cleaning your camper awning is essential for maintaining its durability and appearance. Before you dive into the cleaning process, it’s crucial to gather all the necessary supplies. This step can save you time and ensure that you have everything you need to do the job right. Let’s explore the essentials you’ll need.Essential Tools
To get started, you need a set of basic tools. Here’s a list of must-haves: – Soft-bristle brush: Gentle on the fabric but effective in removing dirt. – Bucket: Handy for mixing cleaning solutions. – Hose with a spray nozzle: Makes rinsing off the soap and dirt easier. – Ladder: If your awning is high, a sturdy ladder is essential. – Microfiber cloths: Perfect for drying and detailing the awning. The right tools make the job easier. You won’t risk damaging the awning fabric, and you can clean more thoroughly.Cleaning Solutions
Selecting the right cleaning solution is equally important. Here are some options: – Mild soap and water: A simple yet effective solution. Mix a few drops of mild dish soap with warm water in your bucket. – Commercial awning cleaner: These are specially formulated to tackle tough stains and mildew on awnings. – Homemade solution: Combine 1/4 cup of baking soda, 1/4 cup of hydrogen peroxide, and 1 gallon of water for an eco-friendly cleaner. When I first cleaned my camper awning, I used a mild soap and water mix. It worked well for light dirt, but for tougher stains, I found a commercial cleaner to be more effective. Have you ever tried a homemade solution on your awning? It’s a cost-effective alternative and often just as good as store-bought cleaners. By preparing your cleaning supplies, you ensure a smooth and effective cleaning process. It saves you from unnecessary interruptions and helps you achieve the best results. So, gather your tools and solutions, and get ready to see your awning looking as good as new!
Credit: everrv.com
Safety Precautions
Wear protective gloves and safety goggles while cleaning the camper awning. Use a sturdy ladder to prevent falls. Ensure the area is dry to avoid slipping.
Cleaning your camper awning can be a straightforward task, but it’s crucial to prioritize safety precautions. Ensuring your safety while dealing with chemicals and handling equipment can prevent accidents and ensure a smooth cleaning process. Below are essential safety measures to keep in mind.Protective Gear
Wearing the right protective gear can make a significant difference. When cleaning your camper awning, consider using gloves, safety goggles, and a face mask. These items protect your skin and eyes from harmful chemicals and prevent inhalation of fumes. For example, I once attempted to clean my awning without gloves. The cleaning solution irritated my skin, and I had to stop midway to rinse my hands. Since then, I always ensure to wear gloves. Think about it: Would you rather spend a little time putting on protective gear or deal with the aftermath of a chemical burn?Handling Chemicals
Handling chemicals requires careful attention. Always read the labels and follow the instructions provided. Use only the recommended amount and never mix different chemicals unless specified. Mixing solutions can create dangerous reactions. When I first cleaned my camper awning, I thought adding extra cleaner would enhance the results. Instead, I ended up with a strong, unpleasant smell and had to air out the awning for hours. Are you aware of the potential hazards of the chemicals you’re using? Ensure the area is well-ventilated, and if possible, conduct the cleaning outdoors. Ventilation helps disperse fumes, reducing the risk of inhalation. In summary, prioritizing safety precautions, wearing protective gear, and handling chemicals correctly can make your camper awning cleaning task safer and more efficient. Are you ready to implement these safety measures in your next cleaning project?Initial Inspection
Keeping your camper awning clean ensures its longevity. The first step in this process is an initial inspection. This step helps you understand the condition of the awning and what cleaning methods will be most effective. Let’s break down the process further.
Checking For Damage
Start by unrolling your awning fully. Look for any tears, holes, or wear. Pay special attention to the edges and corners. Damages here can worsen over time. If you find any damage, consider repairing it before cleaning. This prevents the issues from getting worse.
Assessing Dirt Levels
Next, take a good look at the surface of the awning. Note any areas with heavy dirt or stains. Check both sides of the awning. Dirt and mildew can hide underneath. Identifying these areas helps you focus your cleaning efforts. This makes the cleaning process more efficient.

Credit: www.youtube.com
Removing Loose Debris
Start by sweeping or brushing away loose debris from your camper awning. This simple step prevents damage and makes washing easier. Regularly removing dirt helps maintain the awning’s appearance and longevity.
Cleaning your camper awning is essential for maintaining its longevity and ensuring it looks great during your travels. One of the first steps in this process is removing loose debris. This might seem straightforward, but it’s crucial to do it correctly to avoid damaging your awning. Here’s how you can effectively remove loose debris from your camper awning. ###Sweeping Off Leaves
Leaves can accumulate on your awning, especially if you camp under trees. These leaves can hold moisture and lead to mold or mildew. To sweep off leaves, use a soft-bristled broom or a leaf blower. Start from one end and work your way to the other, ensuring you remove all the leaves without damaging the fabric. While camping in the fall, I noticed a significant amount of leaves on my awning every morning. Instead of letting them sit, I made it a habit to sweep them off each day. This not only kept my awning clean but also prevented any potential damage from the wet leaves. ###Brushing Away Dust
Dust can settle on your awning even if you don’t see it. Over time, this dust can cause staining and wear. Use a soft brush to gently remove dust from the surface. Brush in a gentle, circular motion to lift the dust without grinding it into the fabric. On a recent trip to a dusty campsite, I found that my awning looked grayish due to the dust. A quick brush-down each evening kept it looking fresh and prevented any long-term buildup. Removing loose debris regularly not only keeps your awning looking good but also extends its life. Have you ever thought about how much easier it is to clean when you stay on top of the small stuff? Next time you set up your camper, take a few minutes to sweep off the leaves and brush away the dust. Your future self will thank you!Applying Cleaning Solution
Gently apply the cleaning solution to the camper awning. Use a soft brush or cloth to scrub away dirt. Rinse thoroughly with water.
When it comes to maintaining your camper awning, applying the right cleaning solution is crucial for both longevity and appearance. If you’ve ever struggled with stubborn stains or mildew, you’ll know the importance of this step. Let’s dive into how to choose the right solution and apply it effectively.Choosing The Right Solution
Not all cleaning solutions are created equal. Some are specifically designed for camper awnings, while others might be too harsh and damage the fabric. I once used a generic cleaner that left my awning looking worse than before—lesson learned. – Awnings Materials Matter: Different materials require different cleaning solutions. Vinyl and fabric awnings, for instance, shouldn’t be treated with the same product. – Eco-Friendly Options: Consider eco-friendly cleaners. They are not only better for the environment but also safer for you and your family. – Test First: Always do a spot test on a small, inconspicuous area of your awning. This ensures the cleaner won’t cause discoloration or damage.Proper Application Techniques
Proper application of the cleaning solution can make a significant difference in the results you achieve. Here’s how to do it right. – Dilute As Needed: Some solutions need to be diluted with water. Read the instructions carefully. Over-concentration can harm your awning. – Apply Evenly: Use a spray bottle for even distribution. This ensures every part of the awning gets treated. I once missed a spot, and the mildew returned in just a few weeks. – Use a Soft Brush: Scrub the awning gently with a soft brush. Avoid hard bristles that could tear the fabric. Circular motions can help lift stains effectively. – Let It Sit: Allow the solution to sit for the recommended time. This usually ranges from 5 to 15 minutes. Be patient—rushing this step can mean less effective cleaning. – Rinse Thoroughly: Use plenty of water to rinse off the solution. Residual cleaner can attract dirt, making your next cleaning session even harder. Are you still using the same old cleaner without checking its compatibility with your awning material? It might be time for a change. With the right solution and application techniques, you can keep your awning looking like new for many adventures to come.Scrubbing The Awning
Cleaning your camper awning is essential for maintaining its longevity. After rinsing off loose dirt, the next step is scrubbing the awning. This step helps to remove any stubborn stains and dirt that didn’t wash away. Proper scrubbing ensures your awning looks fresh and clean.
Using A Soft Brush
Use a soft brush to scrub the awning gently. This prevents damage to the fabric. Begin at the top and work your way down. This ensures you cover all areas. Dip the brush in soapy water frequently. This helps remove dirt effectively. Use circular motions for better results.
Targeting Stubborn Stains
Stubborn stains need special attention. Apply a bit more pressure when scrubbing these spots. Use a cleaning solution designed for awnings. Let it sit for a few minutes before scrubbing. This loosens the stain, making it easier to remove. Rinse thoroughly to avoid residue.
Rinsing Thoroughly
Rinsing your camper awning thoroughly is essential for a proper clean. This step ensures all soap and grime are removed. Proper rinsing prevents residue buildup and keeps the awning looking new. Let’s explore how to rinse your camper awning effectively.
Using A Hose
A garden hose is the best tool for rinsing. First, attach a spray nozzle to your hose. Set the spray to a gentle but steady stream. Begin rinsing at the top of the awning. Work your way down to ensure all soap is washed away. Move the hose back and forth in a sweeping motion. This method prevents streaks and ensures an even rinse. Take your time to cover the entire surface area. Check for areas that may need extra attention.
Ensuring No Residue
Residue can cause damage over time. After rinsing, inspect the awning for any leftover soap. If you see any, rinse those areas again. Pay special attention to folds and seams. These areas often trap soap and dirt. Use your hand to feel for any slippery spots. A residue-free awning will last longer and look better. Make rinsing a thorough process to maintain the awning’s quality.
Credit: everrv.com
Drying And Maintenance
Drying and maintaining your camper awning is crucial to ensure its longevity and functionality. Proper drying prevents mold and mildew, while regular maintenance keeps it looking good and working well. Let’s dive into some practical tips and insights for drying and maintaining your camper awning.
Air Drying Tips
After cleaning your awning, it’s essential to dry it thoroughly. Moisture left on the fabric can lead to mold and mildew, which can be challenging to remove. Here are some effective air drying tips:
- Open it fully: Ensure the awning is fully extended to allow maximum air circulation. This helps the fabric dry evenly and quickly.
- Choose a sunny day: Sunlight is a natural disinfectant. A sunny, breezy day is perfect for drying your awning. If the weather isn’t cooperating, consider using a portable fan to speed up the process.
- Flip it if necessary: If your awning has multiple layers or sides, flip it over halfway through the drying process to ensure both sides dry completely.
By following these tips, you can effectively dry your awning and avoid any moisture-related problems. Have you ever had to deal with mold on your awning? It’s not fun!
Regular Maintenance Practices
Regular maintenance is key to extending the life of your camper awning. Here are some easy-to-follow practices:
- Inspect for damage: Regularly check your awning for any signs of wear and tear. Look for small tears, loose stitching, or frayed edges. Early detection means easier repairs.
- Clean regularly: Dirt and debris can cause damage over time. Use a soft brush and mild soap to clean your awning every few months. Rinse thoroughly to remove all soap residue.
- Lubricate moving parts: The arms and joints of your awning need to be lubricated periodically to ensure smooth operation. Use a silicone-based lubricant for best results.
- Store properly: When not in use, make sure your awning is completely dry before rolling it up. Store it in a clean, dry place to prevent any mold growth or physical damage.
Implementing these maintenance practices can save you time and money in the long run. Imagine not having to replace your awning as often because you took good care of it. Isn’t that a great feeling?
Do you have any unique tips for drying and maintaining your camper awning? Share your thoughts and experiences with us!
Frequently Asked Questions
What Is The Best Thing To Clean Rv Awnings With?
The best cleaner for RV awnings is a mix of water and mild dish soap. Use a soft brush to scrub gently.
How Do You Get Mold And Mildew Off A Camper Awning?
Clean mold and mildew off a camper awning using a mixture of water and mild detergent. Scrub gently with a soft brush. Rinse thoroughly and let it dry completely.
Can You Use Dawn Dish Soap On Rv Awning?
Yes, you can use Dawn dish soap on your RV awning. It effectively removes dirt, grime, and stains without causing damage.
How Do I Remove Stubborn Stains From My Rv Awning?
To remove stubborn stains from your RV awning, use a mixture of water and mild detergent. Scrub gently with a soft brush. Rinse thoroughly and let it dry. For tougher stains, try a specialized awning cleaner. Avoid harsh chemicals to prevent damage.
Conclusion
Cleaning your camper awning is easy and rewarding. Regular maintenance prevents mold and damage. Start with a simple rinse. Use mild soap and soft brushes. Rinse thoroughly to remove all soap residue. Dry the awning completely. Proper care extends its life.
Enjoy your trips with a clean, fresh awning. Happy camping!