Blowing out RV water lines is essential for winterizing your RV. It prevents freezing and damage.
Every RV owner knows the importance of proper maintenance, especially before winter hits. Blowing out water lines is a crucial step in this process. It ensures that no water remains in the pipes, which can freeze and cause costly damage.
This task might seem daunting, but with the right guidance, it can be straightforward. In this blog post, we will walk you through the steps to effectively blow out your RV water lines. You will learn what tools you need, the steps to follow, and tips to ensure you do it right. Stay with us, and keep your RV in top shape all year round.
Preparing Your Rv
When it comes to preparing your RV for winter, one crucial step is blowing out the water lines. This process ensures that any remaining water is removed, preventing potential damage from freezing temperatures. Before you dive into this task, proper preparation is key. Let’s walk through the essential steps to get your RV ready.
Gather Tools
Before you start, make sure you have all the necessary tools. This will save you time and frustration. Here’s a handy checklist to help you:
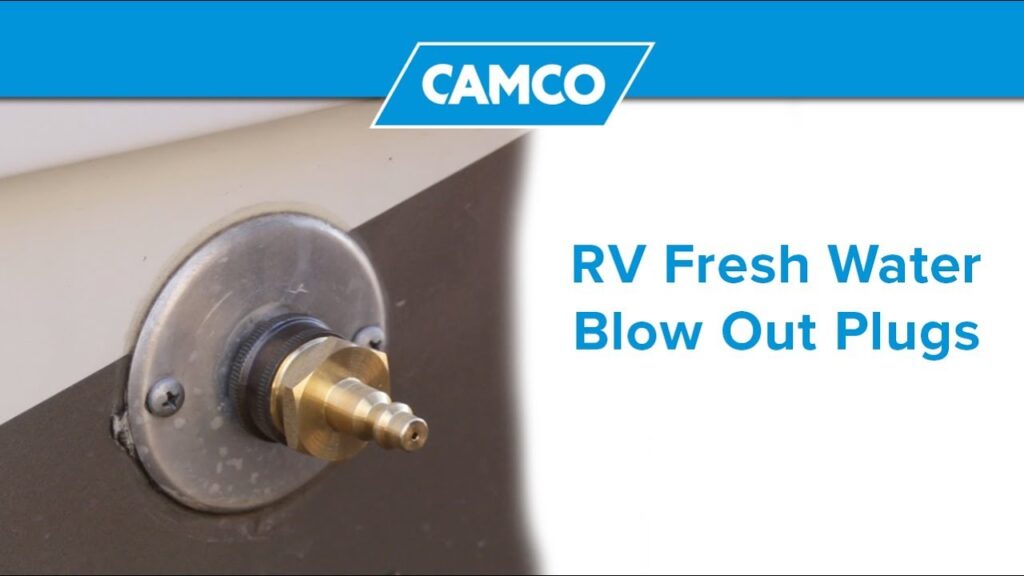
- Air compressor: Essential for blowing out the water lines.
- Blowout plug: Connects the air compressor to your RV’s water system.
- Adjustable wrench: Useful for tightening connections.
- Protective eyewear: Safety first!
- Gloves: Protects your hands from cold and sharp edges.
Having these tools ready not only makes the job smoother but also helps you feel more confident. Personally, I always double-check my list before starting. It’s amazing how often a small item can be forgotten.
Safety Precautions
Safety should be your top priority. Here are a few critical precautions to take:
- Turn off the power: Ensure that your RV is disconnected from any electrical sources. This prevents accidents and keeps you safe.
- Release pressure: Open all faucets to release any built-up pressure in the water lines. This step is crucial to avoid sudden bursts when you start blowing out the lines.
- Wear protective gear: Always wear gloves and protective eyewear. This might seem over-cautious, but it’s better to be safe than sorry.
When I first started winterizing my RV, I skipped the protective eyewear, thinking it was unnecessary. A sudden spray of water changed my mind quickly. Trust me, taking these precautions will save you from potential mishaps.
Are you ready to take the next steps to ensure your RV is winter-ready? Remember, preparation is half the battle. With the right tools and safety measures in place, you’ll find the process much smoother and stress-free. What other steps do you take to prepare your RV for winter?

Credit: www.funkyjunkinteriors.net
Locate Water Lines
Blowing out RV water lines is crucial before winter. It prevents pipes from freezing and bursting. The first step is to locate the water lines. This ensures you can properly blow out each line.
Main Water Line
Start by finding the main water line. This line connects to your RV’s water source. It’s usually near the water pump. Check your RV manual if unsure. Knowing the location helps you target the primary water flow.
Secondary Lines
Next, locate the secondary lines. These lines branch off from the main line. They supply water to sinks, showers, and toilets. Trace each line to ensure you blow out all water. Missing a line can cause damage.
Pay attention to hidden lines. Some RVs have lines for outdoor showers or other features. Check all connections and fittings. Ensure every line is clear of water.
Drain Water System
Blowing out RV water lines prevents damage in freezing weather. Use an air compressor to clear remaining water. Proper maintenance keeps your RV’s plumbing safe and functional.
Draining the water system is crucial for maintaining your RV. It prevents damage during cold weather. It also ensures the water lines stay clean and functional. Follow these steps to drain your water system effectively.Turn Off Water Supply
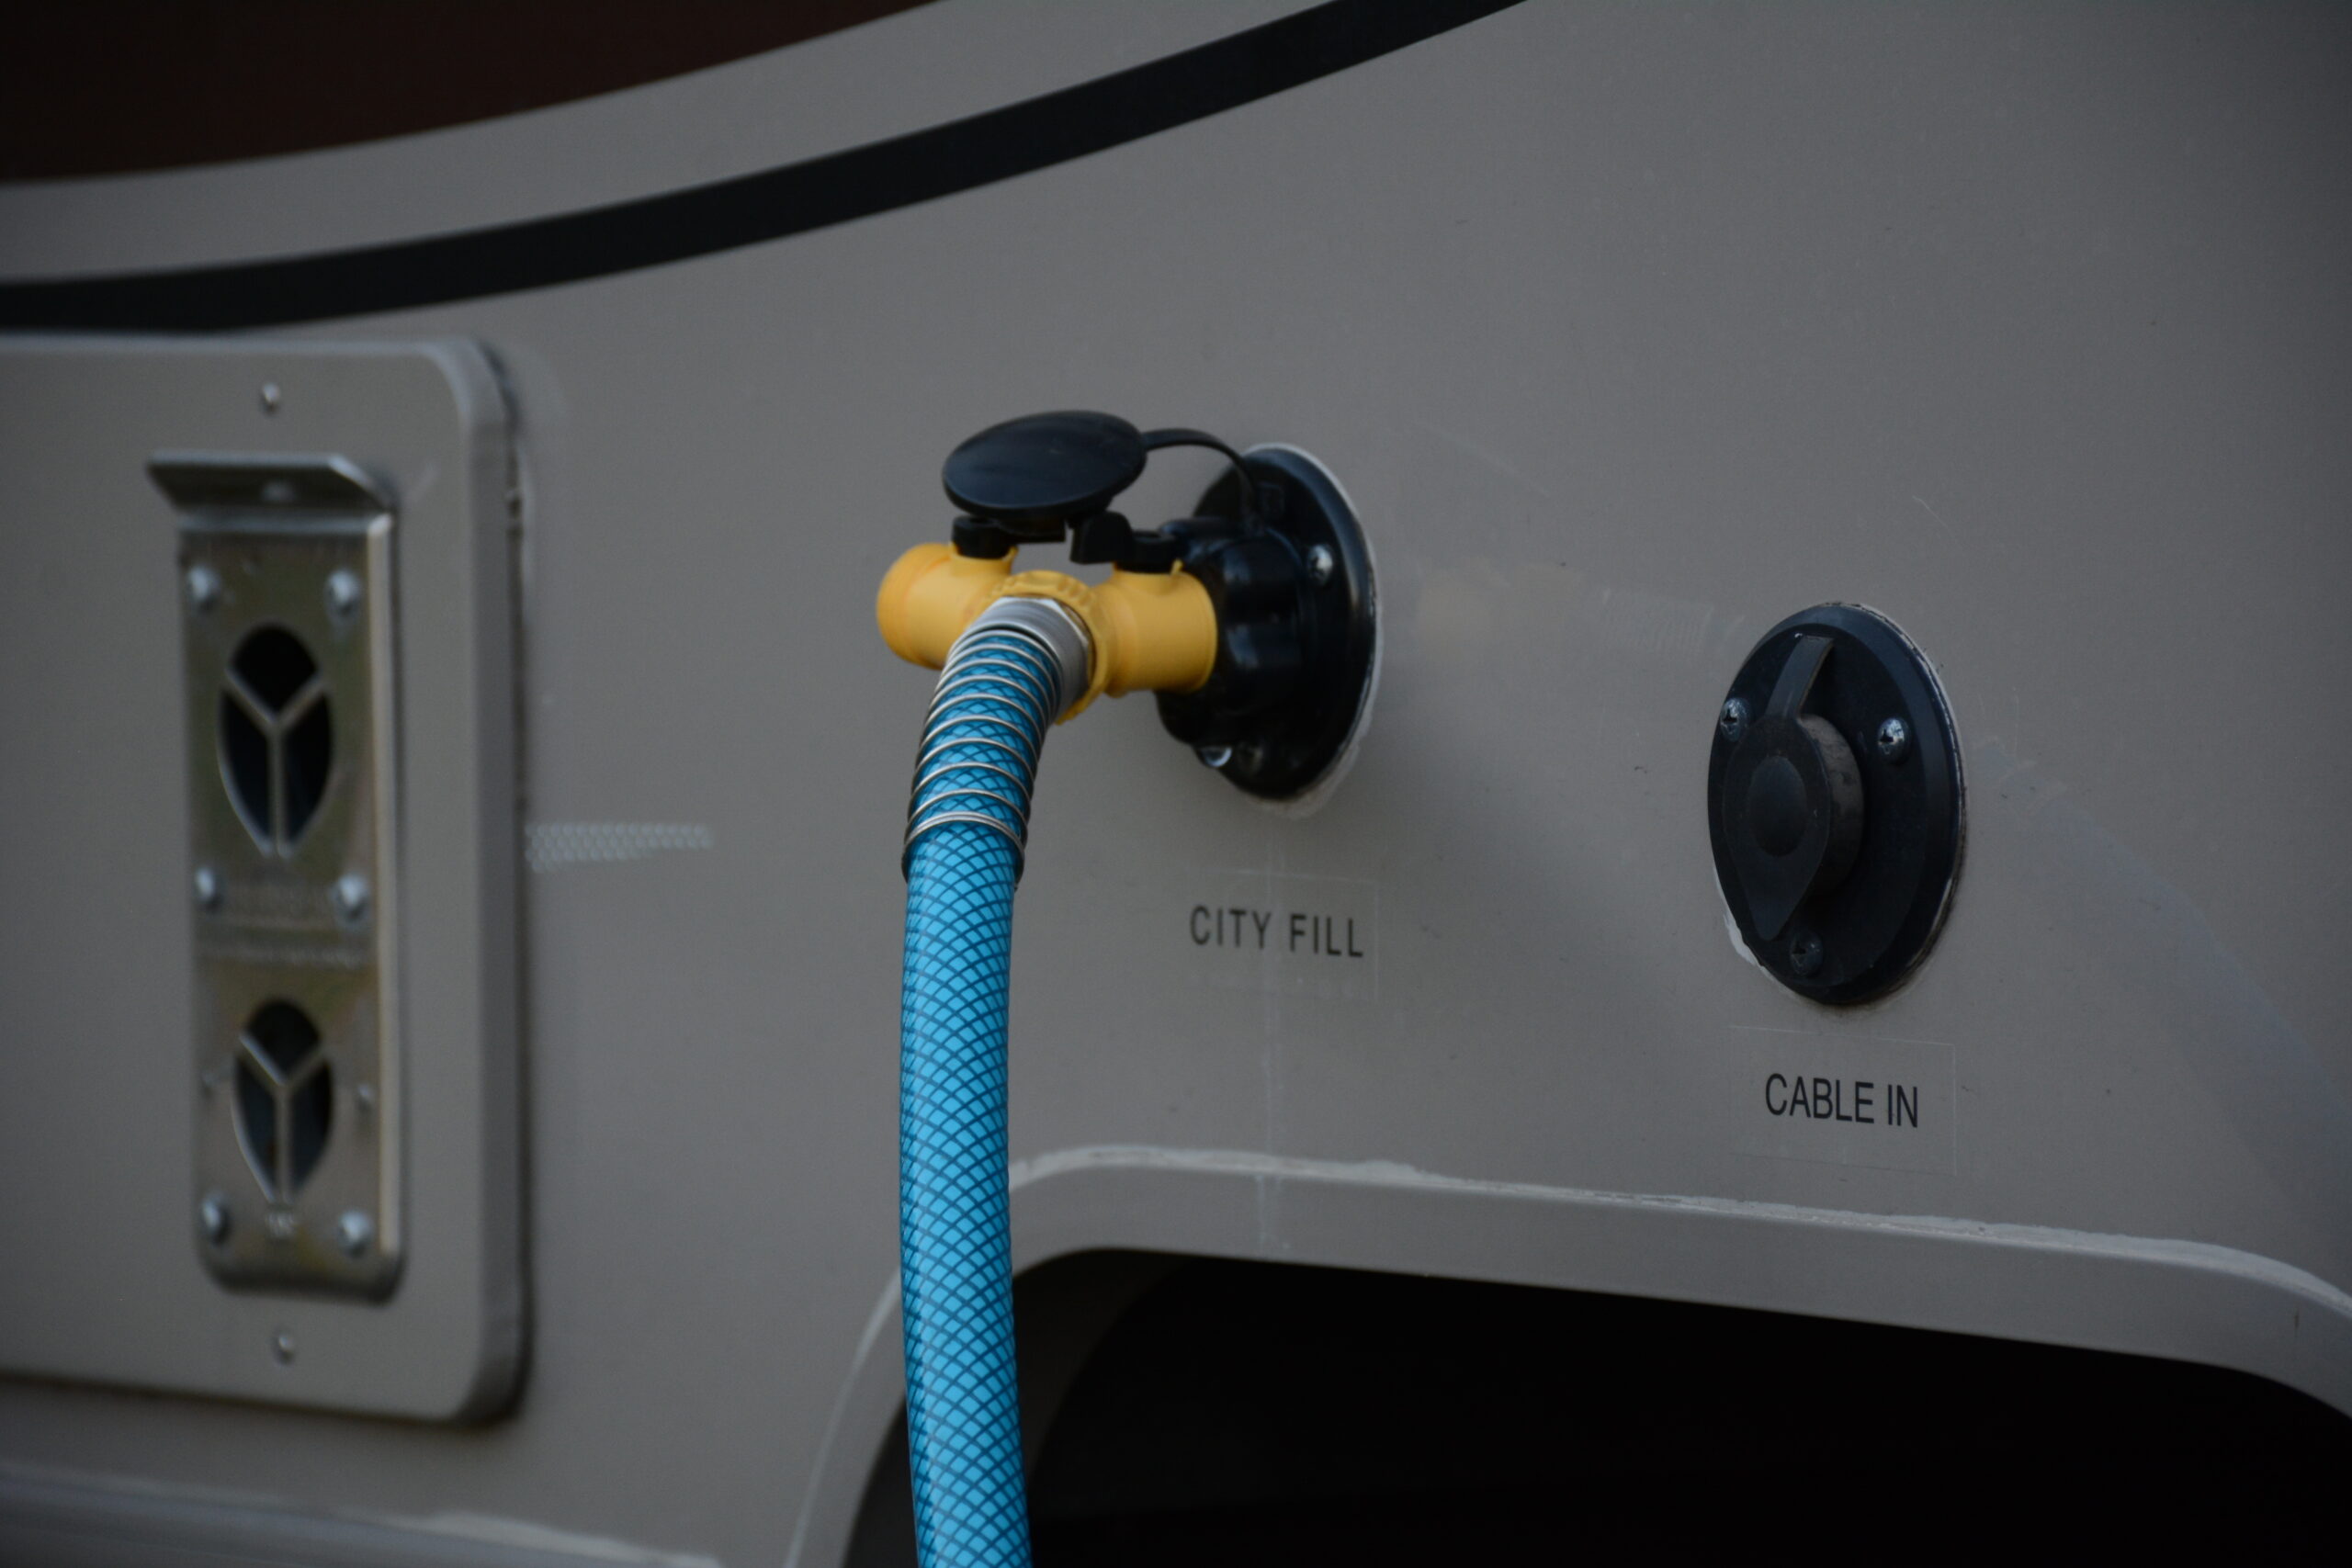
First, turn off the water supply to your RV. This is essential to avoid water flow. Locate the main water valve and turn it off. If you’re connected to a city water supply, disconnect the hose. This stops any water from entering the system.Open All Faucets
Next, open all the faucets in your RV. This includes sinks, showers, and outdoor taps. Opening all faucets allows air to enter the system. It helps in draining out the water more quickly. Don’t forget to flush the toilet to drain its water as well. “`Attach Air Compressor
Attach an air compressor to blow out RV water lines. This prevents pipes from freezing and bursting in winter. Ensure all water is removed for a worry-free trip.
When it comes to winterizing your RV, one crucial step is blowing out the water lines to prevent any damage from freezing temperatures. Attaching an air compressor to your RV’s water system is a key part of this process. This method ensures that all water is expelled, protecting your pipes and fixtures. Let’s walk through how to do this effectively.Find Proper Fitting
First, it’s essential to get the right fitting for your air compressor. Most RVs have a standard water inlet, but the size and type can vary. Check your RV manual to confirm the exact specifications. You can usually find the necessary fittings at a hardware store or an RV supply shop. Make sure the fitting is snug and secure to avoid any air leaks. A loose fitting can make the process less effective and may leave water in the lines. When I first attempted this, I used a generic fitting that didn’t quite fit, and I had to start over after realizing not all the water was expelled.Secure Connection
Once you have the proper fitting, secure the connection between the air compressor and your RV’s water inlet. Use Teflon tape on the threads of the fitting to ensure a tight seal. This will prevent any air from escaping and ensure that all the pressure goes into the water lines. It’s a good idea to double-check the connection before turning on the compressor. A quick tug can confirm everything is set. When I first tried this, I underestimated the importance of a secure connection, and air leaked out, making the process inefficient. By taking these steps, you’re not just winterizing your RV; you’re actively protecting your investment. Have you ever faced issues with freezing pipes in your RV? What methods have worked best for you? Share your experiences in the comments below!Blow Out Water Lines
Blowing out RV water lines is crucial to prevent damage during freezing temperatures. Water left in the lines can freeze, causing cracks and leaks. This process ensures your RV’s plumbing system stays intact. Follow these steps to blow out the water lines effectively.
Set Air Pressure
First, set the air compressor to a safe pressure level. Around 30-50 psi works well for RV water lines. Too much pressure can damage the system. Connect the air compressor to the water lines using an appropriate fitting.
Blow Out Each Line
Next, turn on the air compressor to start blowing out the water. Begin with the faucet farthest from the air source. Open the faucet and let the air push the water out. Close the faucet when only air comes through. Move to the next faucet and repeat the process. Continue until all water lines are clear.

Credit: www.amazon.com
Check For Residual Water
Before you finish blowing out your RV water lines, you need to check for any residual water. This ensures your lines are completely empty. Any leftover water can cause damage during freezing temperatures. Here are steps to ensure all water is removed.
Inspect Faucets
Start by opening all the faucets in your RV. Turn on both hot and cold water. Allow any remaining water to drain out. Check each faucet carefully. Even a small amount of water can freeze and cause problems.
Check All Fixtures
Next, inspect all other water fixtures. This includes the shower, toilet, and any outdoor water connections. Open and close each one. Make sure no water is left inside. Pay special attention to low points where water can collect.
Blowing out your RV water lines properly ensures your RV stays in good shape. Taking the time to check for residual water helps prevent costly repairs. Follow these steps for a worry-free winter season.
Winterize Rv
Winterizing your RV is crucial for protecting it during the cold months. If water stays in the lines, it can freeze and cause damage. Blowing out the RV water lines is an important step in the process. Let’s dive into the steps needed to winterize your RV and keep it safe.
Add Antifreeze
Adding antifreeze is a key step in winterizing your RV. First, purchase RV-specific antifreeze. It is non-toxic and safe for your water lines. Attach a hand pump to the antifreeze container. Connect the other end to the water intake of your RV. Open the faucets one by one. Pump antifreeze through the system. Ensure antifreeze flows out of each faucet. Don’t forget to run it through the shower and toilet. This protects all parts of your water system.
Close All Faucets
After antifreeze runs through the system, close all faucets. This prevents air from getting in and keeps the antifreeze in place. Check every faucet in the RV. Make sure each one is tightly closed. Don’t overlook the outdoor shower if your RV has one. This step is simple but crucial. It ensures your water lines remain safe during winter.
Credit: www.doityourselfrv.com
Final Inspection
Ensure all water is removed from RV lines to prevent freezing. Use an air compressor to blow out remaining water. Verify no water remains in faucets and toilet.
When it comes to winterizing your RV, performing a final inspection of the water lines is crucial. This step ensures that every bit of water has been removed, preventing any damage during the colder months. While it may seem like an extra task, it’s the difference between a smoothly functioning RV and costly repairs. Let’s dive into the final inspection process to ensure your RV’s water lines are in top shape.Review All Lines
Start by reviewing all the water lines in your RV. This includes the main water line, as well as any secondary lines leading to sinks, showers, and toilets. Turn on each faucet and valve one last time to ensure no water remains. A handy tip is to use compressed air to blow out any lingering droplets. It’s a simple yet effective way to guarantee complete dryness. Check for any potential leaks or cracks. Even the smallest fissure can lead to major problems. Make sure to inspect both visible and hidden lines. You might need a flashlight to see under sinks or behind panels.Store Equipment
Once you’ve confirmed that all water lines are clear, it’s time to store your winterizing equipment properly. Drain any hoses and store them in a dry place. Disconnect and safely store your air compressor. You don’t want it exposed to moisture or cold temperatures. Place your antifreeze container in a secure location. Make sure it’s sealed tightly to avoid any spills. Proper storage of your equipment will ensure it’s ready for use next season. It also helps in maintaining the longevity of your tools. Have you ever found yourself in the middle of nowhere with a frozen pipe? That’s why this final step is non-negotiable. By following these practical steps, you’re not just protecting your RV; you’re safeguarding your adventures. So, take a few extra minutes for a thorough final inspection and enjoy a worry-free winter.Frequently Asked Questions
Can You Blow Out Rv Water Lines?
Yes, you can blow out RV water lines. Use an air compressor to remove water before winterizing. This prevents freezing and damage.
How To Blow Water Out Of Camper Water Lines?
To blow water out of camper water lines, use an air compressor. Attach it to the city water inlet, open all faucets, and blow out the lines until only air comes out. Ensure all valves and faucets are open during the process.
How Much Psi Do I Need To Blow Out My Rv Water Lines?
Use 30 to 40 psi to blow out your RV water lines. This pressure ensures thorough cleaning without causing damage.
How To Get Air Out Of Rv Water Line?
Open all faucets. Turn on the water pump. Let water flow until it runs steadily without sputtering. Close faucets.
Conclusion
Blowing out RV water lines is crucial for winter storage. It prevents damage and costly repairs. Follow the steps carefully for best results. Remember to use an air compressor and proper fittings. This ensures all water is removed from the lines.
Regular maintenance keeps your RV in top condition. Always check your RV’s manual for specific instructions. Protect your investment with proper care. Enjoy hassle-free RV adventures year-round. Proper winterization leads to a longer RV lifespan. Happy travels!