To install Bearing Buddies, you need to follow a few straightforward steps. These steps ensure your trailer’s wheel bearings stay well-lubricated and protected from dirt and water.
Installing Bearing Buddies is a simple task that can save you a lot of headaches down the road. If you’re tired of dealing with rusty or damaged wheel bearings, this guide will help. Bearing Buddies are essential for keeping your trailer’s wheel bearings in good condition.
They help maintain proper lubrication and prevent water and dirt from getting inside. This introduction will guide you through the process, making it easy to understand and follow. By the end, you’ll have confidence in installing Bearing Buddies yourself, ensuring a smoother and safer ride for your trailer.
Tools And Materials
Gather a hammer, grease gun, and a set of Bearing Buddies for the installation. Ensure you have marine grease and a clean cloth.
Installing Bearing Buddies can help extend the life of your trailer bearings. To make the process smooth, gather all the necessary tools and materials first. This guide ensures you have everything you need.Required Tools
You’ll need a few basic tools for this task. First, grab a rubber mallet. This helps you tap the Bearing Buddies into place without damaging them. A pair of pliers is also essential. Use them to remove the old dust cap from the hub. A jack and jack stands are crucial for lifting and supporting the trailer. Make sure they are sturdy and reliable. Finally, have a clean cloth or rag ready. You’ll use it to clean the hub before installing the new parts.Necessary Materials
Having the right materials is just as important. Start with the Bearing Buddies themselves. Ensure they are the correct size for your trailer. Grease is another must-have. High-quality marine grease works best. It resists water and keeps the bearings lubricated. You’ll also need a grease gun. This tool helps you apply the grease efficiently. Lastly, keep some extra rags on hand. You will need them to clean up any excess grease. By preparing these tools and materials, you can install Bearing Buddies quickly and easily.
Credit: www.bearingbuddy.com
Preparing The Trailer
Installing Bearing Buddies ensures your trailer wheels remain lubricated and protected. First, remove the old grease cap. Then, tap the Bearing Buddy into place using a rubber mallet.
When it comes to maintaining your trailer, installing Bearing Buddies is crucial for keeping the wheel bearings lubricated and in good condition. Proper preparation can make the installation process smoother and safer. Let’s dive into the first important steps: securing the trailer and removing the wheel.Securing The Trailer
Before you do anything else, you need to ensure that your trailer is securely positioned. Park your trailer on a flat, stable surface. You don’t want it moving while you’re working on it. Use wheel chocks to prevent any accidental movement. Place them in front of and behind the wheels that will remain on the ground. This step is essential for your safety. Also, if your trailer is connected to a vehicle, leave it hitched. This adds an extra layer of stability, making your job much easier and safer.Removing The Wheel
Once your trailer is secure, it’s time to remove the wheel. Start by loosening the lug nuts slightly while the wheel is still on the ground. This makes it easier to remove them once the trailer is lifted. Jack up the trailer using a hydraulic jack or a similar tool. Make sure to place the jack under a solid part of the trailer’s frame. Raise it until the wheel is off the ground. Now, fully remove the lug nuts and take the wheel off. You might need to give it a gentle pull if it’s stuck. Put the wheel aside in a safe spot where it won’t roll away or get damaged. By carefully following these steps, you’ll set yourself up for a smooth installation of Bearing Buddies. Have you ever had an unexpected challenge while preparing your trailer? How did you handle it? Share your thoughts in the comments below.Cleaning The Hub
Cleaning the hub is an essential step when installing Bearing Buddies. A clean hub ensures smooth operation and longevity of the bearings. Let’s dive into the process starting with removing old grease and inspecting for damage.
Removing Old Grease
First, remove the wheel from the hub. This gives you access to the bearings. Use a rag to wipe away as much old grease as possible. You can also use a degreaser for stubborn spots. Ensure the hub is free from all grease and debris.
Inspecting For Damage
After cleaning, inspect the hub for any signs of damage. Look for cracks, rust, or wear. Check the bearings and races for any irregularities. If you find any damage, replace the damaged parts. A clean and undamaged hub is crucial for Bearing Buddies installation.
Installing Bearing Buddies
Installing Bearing Buddies is simple. First, clean the hub and remove any old grease. Then, tap the Bearing Buddies into place using a rubber mallet.
Installing Bearing Buddies is a straightforward process. They help keep water and dirt out of your wheel bearings. This ensures the longevity and smooth operation of your trailer wheels. Follow these simple steps to install Bearing Buddies correctly.Aligning The Bearing Buddy
First, clean the hub area thoroughly. Remove any old grease and debris. Ensure the surface is dry. Take the Bearing Buddy and position it over the hub. Make sure it aligns perfectly with the hub opening. Proper alignment is crucial for a secure fit.Hammering Into Place
Once aligned, use a soft mallet. Gently tap the Bearing Buddy into the hub. Start with light taps to ensure it goes in straight. Increase the force gradually. Do not use excessive force. Check that it sits flush with the hub. Ensure it is secure and does not wobble. Congratulations! You have successfully installed your Bearing Buddies. This simple process helps protect your wheel bearings. It keeps them in top condition for longer. “`Greasing The Bearings
Properly greasing your bearings is crucial for the longevity and performance of your Bearing Buddies. It’s not just a step; it’s a must-do task for every DIY enthusiast. Neglecting this can lead to severe wear and tear, and you don’t want that.
Let’s dive into the essential steps of greasing your bearings. We’ll cover everything from filling with grease to checking for the proper grease levels.
Filling With Grease
Start by gathering your grease gun and the right type of grease. Make sure it’s marine-grade if you’re working with boat trailers. This grease is designed to withstand water and prevent rust.
Attach the grease gun to the Bearing Buddy. Squeeze the trigger gently. Watch as the grease fills the Bearing Buddy. It’s like pumping air into a bicycle tire, but with grease. Stop when you see the piston move outwards.
Checking For Proper Grease Levels
After filling, you need to check the grease level. Look at the piston. It should be slightly extended. This indicates the Bearing Buddy is full.
If the piston is flat, you need more grease. Add it gradually to avoid overfilling. Overfilling can damage the seals and bearings.
Now, give your Bearing Buddy a slight push. If it moves back and forth slightly, you’re good to go. If it feels rigid, you might have added too much grease.
Are you confident in your greasing skills now? Remember, keeping the right grease levels ensures your bearings perform at their best. Share your thoughts or questions in the comments. Happy greasing!

Credit: www.wikihow.life
Reassembling The Wheel
Reassembling the wheel after installing Bearing Buddies is a crucial step. It ensures everything is securely in place and ready for the road. Let’s dive into the details, focusing on reattaching the wheel and tightening the lug nuts.
Reattaching The Wheel
First, line up the wheel with the hub. Make sure the bolt holes align perfectly. This makes it easier to insert the lug nuts.
Next, carefully lift the wheel and slide it onto the hub. You might need to wiggle it slightly to get it in position. Use both hands to keep the wheel steady and balanced.
Once the wheel is in place, hand-tighten the lug nuts. Start with a nut at the top, then move to the one directly opposite. This ensures the wheel is evenly attached. Repeat this process for all lug nuts.
Tightening The Lug Nuts
With the wheel in place and the lug nuts hand-tightened, grab your lug wrench. Begin tightening the nuts in a star pattern. This means tightening one nut, then moving to the nut opposite it, and so on.
Why a star pattern? It ensures the wheel is evenly attached and prevents wobbling. Tightening in a circular pattern can cause the wheel to be misaligned.
Use your body weight to apply firm pressure, ensuring each nut is tight. Don’t overdo it, though. Over-tightening can strip the threads and make future removal difficult.
After tightening all the nuts, give the wheel a slight shake. This checks if everything is secure. If it moves, re-tighten the lug nuts.
Finally, once you lower the vehicle, give the lug nuts one last check. This ensures they’re as tight as possible. Safe and secure wheels mean peace of mind on your drive.
Have you ever reassembled a wheel and found it wobbly? What steps did you take to fix it? Share your experiences in the comments!
Final Checks
The final checks ensure your Bearing Buddies are installed correctly. These steps confirm that everything is secure and functioning as it should. Let’s go through the essential checks to complete your installation.
Testing For Movement
Start by spinning the wheel. It should rotate smoothly without resistance. Listen for any unusual sounds. Grinding or scraping noises indicate a problem.
Next, push and pull the wheel. It should not wobble. If it does, recheck the installation.
Ensuring A Secure Fit
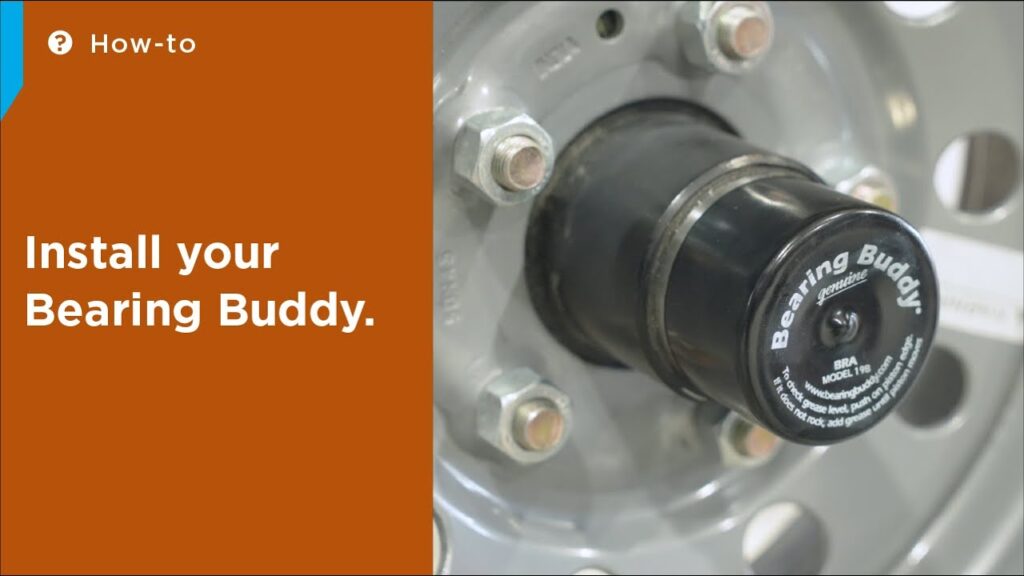
Inspect the Bearing Buddies. They should sit flush against the hub. There should be no gaps.
Press the Bearing Buddy’s spring-loaded piston. It should move slightly under pressure. If it doesn’t, add more grease.
Finally, check for grease leaks. Wipe away any excess grease. Ensure the fitting is tight and secure.

Credit: www.youtube.com
Maintenance Tips
Maintaining Bearing Buddies is essential for their longevity and performance. Regular maintenance ensures your bearings stay in top condition. Follow these tips to keep your Bearing Buddies in good shape.
Regular Inspections
Inspect your Bearing Buddies frequently. Check for any signs of wear or damage. Look for leaks around the seals. If you find any issues, address them immediately. A quick inspection can prevent bigger problems later.
Re-greasing The Bearings
Re-greasing is crucial for maintaining your Bearing Buddies. Add grease until you see the piston move slightly. This indicates the bearing is full. Use a grease gun for this process. Make sure to use the correct type of grease. Check your Bearing Buddies manual for recommendations.
Frequently Asked Questions
Do Bearing Buddies Get Grease To The Back Bearing?
Yes, Bearing Buddies ensure grease reaches the back bearing. They maintain pressure, preventing water and contaminants from entering.
Can You Overfill Bearing Buddies?
Yes, you can overfill bearing buddies. Overfilling can cause grease to push past the seals, leading to damage.
Why Won’t My Bearing Buddy Go In?
Your Bearing Buddy may not fit due to incorrect size, dirt, or damage in the hub. Clean and measure the hub. Ensure you have the correct size.
How Often Should I Repack Trailer Bearings With Bearing Buddies?
Repack trailer bearings with bearing buddies every 12 months or every 12,000 miles. Regular checks ensure safety and longevity.
Conclusion
Installing Bearing Buddies is simple and essential. Follow the steps outlined above. Proper installation ensures a longer life for your trailer bearings. This saves you time and money on repairs. Regular maintenance is crucial for safe and smooth rides. Always check the Bearing Buddies before heading out.
Happy trails!