Our readers keep the lights on and the garage heater humming. As an Amazon Associate, I earn from qualifying purchases.
A car seat is basically a high-friction, high-heat, high-flex “test lab” for leather. You slide in and out, your jeans grind the bolster, sun cooks the surface through the windshield, and the foam underneath constantly bends the material like a paperclip. That’s why a seat can look perfect everywhere… except the one spot you touch every single day.
And here’s the brutal truth: most “quick fixes” fail for one of two reasons. Either the repair doesn’t bond to the seat’s finish (common on coated leather and vinyl), or it’s not flexible enough to survive the bend-and-shear cycle of a seat cushion. If you’ve ever watched a repair look great on day one and then crack, peel, or turn weirdly shiny a week later… you’ve met those two enemies.
This guide is built to eliminate guessing. I’m going to show you how to pick a repair method that matches your damage type and your seat’s material + finish, then I’ll walk you through 12 products that cover the full spectrum—from wide, bolster-saving patch tapes to color-matching compounds and recoloring balms that bring tired interiors back to life.
If you want one article that actually behaves like an expert friend standing next to you with a flashlight, a microfiber towel, and a plan—welcome. By the end, you’ll know exactly which product is the best leather repair kit for car seat problems like yours, and how to apply it so it lasts.
In this article
- How to choose the right repair method for your exact seat damage.
- Quick comparison table of all 12 products.
- In‑depth reviews: what holds up on real car seats (and what doesn’t).
- Finish & durability guide: flex zones, shine, and why repairs fail.
- FAQ: curing time, heated seats, vinyl vs leather, and maintenance.
How to Choose the Best Leather Repair Kit For Car Seat Damage
Forget the marketing labels for a second. A “repair kit” is really just one of four repair strategies: cover, fill, recolor, or restore/maintain. Pick the wrong strategy and you’ll fight your repair forever. Pick the right one and your seat looks—and feels—like it never had a problem.
1. First, identify what your “leather” actually is
Most modern car seats are not raw, absorbent leather. They’re usually coated leather (pigmented and sealed), or synthetic materials like vinyl/PU (“pleather”). That matters because absorbent leather drinks in dyes and balms. Coated leather behaves more like a painted surface—products need to bond to the topcoat, not soak in.
- Coated leather (most common): Smooth, slightly “sealed” feel. Water droplets tend to bead. Repairs need strong surface prep and flexible compounds.
- Vinyl / PU / faux leather: Often peels rather than cracks. Gloss can vary wildly. Repairs must be flexible and compatible with plastic-like surfaces.
- Bonded leather (some furniture, some older vehicles): Can flake/peel with age. Repairs often require a combination of filling + recolor, and good expectations.
2. Match the method to the damage: cover vs fill vs recolor
Here’s the decision framework I use because it mirrors how upholstery pros think.
- Cover (Patch Tape): Best for high-wear bolsters, long tears, and areas where “stop the rip from spreading” matters more than “museum-perfect invisible.” A strong patch is often the most durable seat solution.
- Fill (Liquid Compound / Adhesive Repair Kits): Best for cracks, small tears, punctures, and peeling where you want a blended repair. Done right, this gives the most “factory-like” look.
- Recolor (Balms / Re-dye kits): Best for faded areas, scuffs, steering wheels, and that gray-ish “worn sheen” that makes black seats look tired.
- Restore & Maintain (Cleaner/Conditioner Kits): Not a tear fix—but crucial before and after repairs. Clean surfaces bond better, and conditioned leather flexes instead of cracking.
3. The real “invisible repair” secret is sheen
Color gets all the attention, but sheen is what gives away most DIY repairs. If your seat is satin-matte and your repair dries glossy, it will look like a sticker even if the color is perfect. This is why some kits recommend gentle buffing or layering methods: you’re not just fixing color—you’re matching the finish.
4. Prep is not optional if you want durability
If there is one “expert move” that separates a repair that lasts months from a repair that lasts years, it’s cleaning away the invisible stuff: body oils, silicone dressings, and conditioner residue. That film is a bond-breaker.
- Vacuum seams and cracks so dirt doesn’t get sealed into the repair.
- Clean with a dedicated leather cleaner (or a gentle interior cleaner) to remove grime.
- Final wipe with a small amount of isopropyl alcohol on a microfiber to remove oils and “dressings.”
- Let the surface fully dry. Then repair.
Do that, and you’ll dramatically increase the odds that your best leather repair kit for car seat choice performs like it should—because the surface finally gives it something solid to grab.
Quick Comparison: 12 Car Seat Leather Repair Solutions
This table is organized by real-world usefulness for car seats: first come the durable “bolster savers,” then the most seamless blending kits, then color restoration and maintenance tools.
On smaller screens, swipe or scroll sideways to see the full table.
| Product | Type | Best For | Key Feature | Amazon |
|---|---|---|---|---|
| Besezx Leather Repair Patch Tape Kit (120in x 16in) | Patch Tape | Bolsters & high-wear tears | Extra-wide coverage | Amazon |
| Coconix Leather & Vinyl Repair Kit | Color-Mix Kit | Near-invisible blended repairs | Customizable colors + texture tricks | Amazon |
| Chemical Guys Leather Lovers Kit (5 Items) | Care Kit | Prevention + keeping repairs fresh | Clean + condition + protect | Amazon |
| FORTIVO Leather Recoloring Balm with Mink Oil | Recolor + Condition | Fading, wear haze, scratches | Recolor + finish conditioner | Amazon |
| Doc Bailey’s Re-Dye & Repair-A-Tear Kit (Black) | Re-Dye Kit | Black leather restoration | Urethane dye + grain matching | Amazon |
| FORTIVO Professional Black Leather Repair Kit | Filler Kit | Black vinyl/leather cuts & peeling | Layerable fast-dry gel | Amazon |
| Jughozu 2026 New Leather Repair Kit (Color Match) | All-in-One Kit | Beginner-friendly repairs | Tools + “litchi” filler patches | Amazon |
| ARCSSAI ARCSSAL Leather & Vinyl Repair Kit | Color-Mix Kit | Mix-to-match any color | Fast-dry adhesive compound | Amazon |
| Black Leather Recoloring Balm (drtulz) | Recolor Balm | Quick black refresh on smooth leather | Fast dry, waterproof finish | Amazon |
| Vigorder Brown Leather Repair Kit | Color-Specific Kit | Brown/tan seats | Brown shade guide for blending | Amazon |
| TIANLDD Leather Repair Tape (16in x 160in) | Patch Tape | Large-area wrap repairs | Litchi grain + big roll | Amazon |
| ONine Leather Repair Patch (16in x 90in) | Patch Tape | Wide, multi-purpose patching | Waterproof + cut-to-fit | Amazon |
In‑Depth Reviews: 12 Best Leather Repair Kit For Car Seat Options
Let’s do this the right way: not just “features,” but what each one is actually good at on a car seat, what owners keep praising, and the little application details that determine whether it looks professional—or like a bandage.
1. Besezx Leather Repair Patch Tape Kit (120in x 16in) – The Bolster Saver
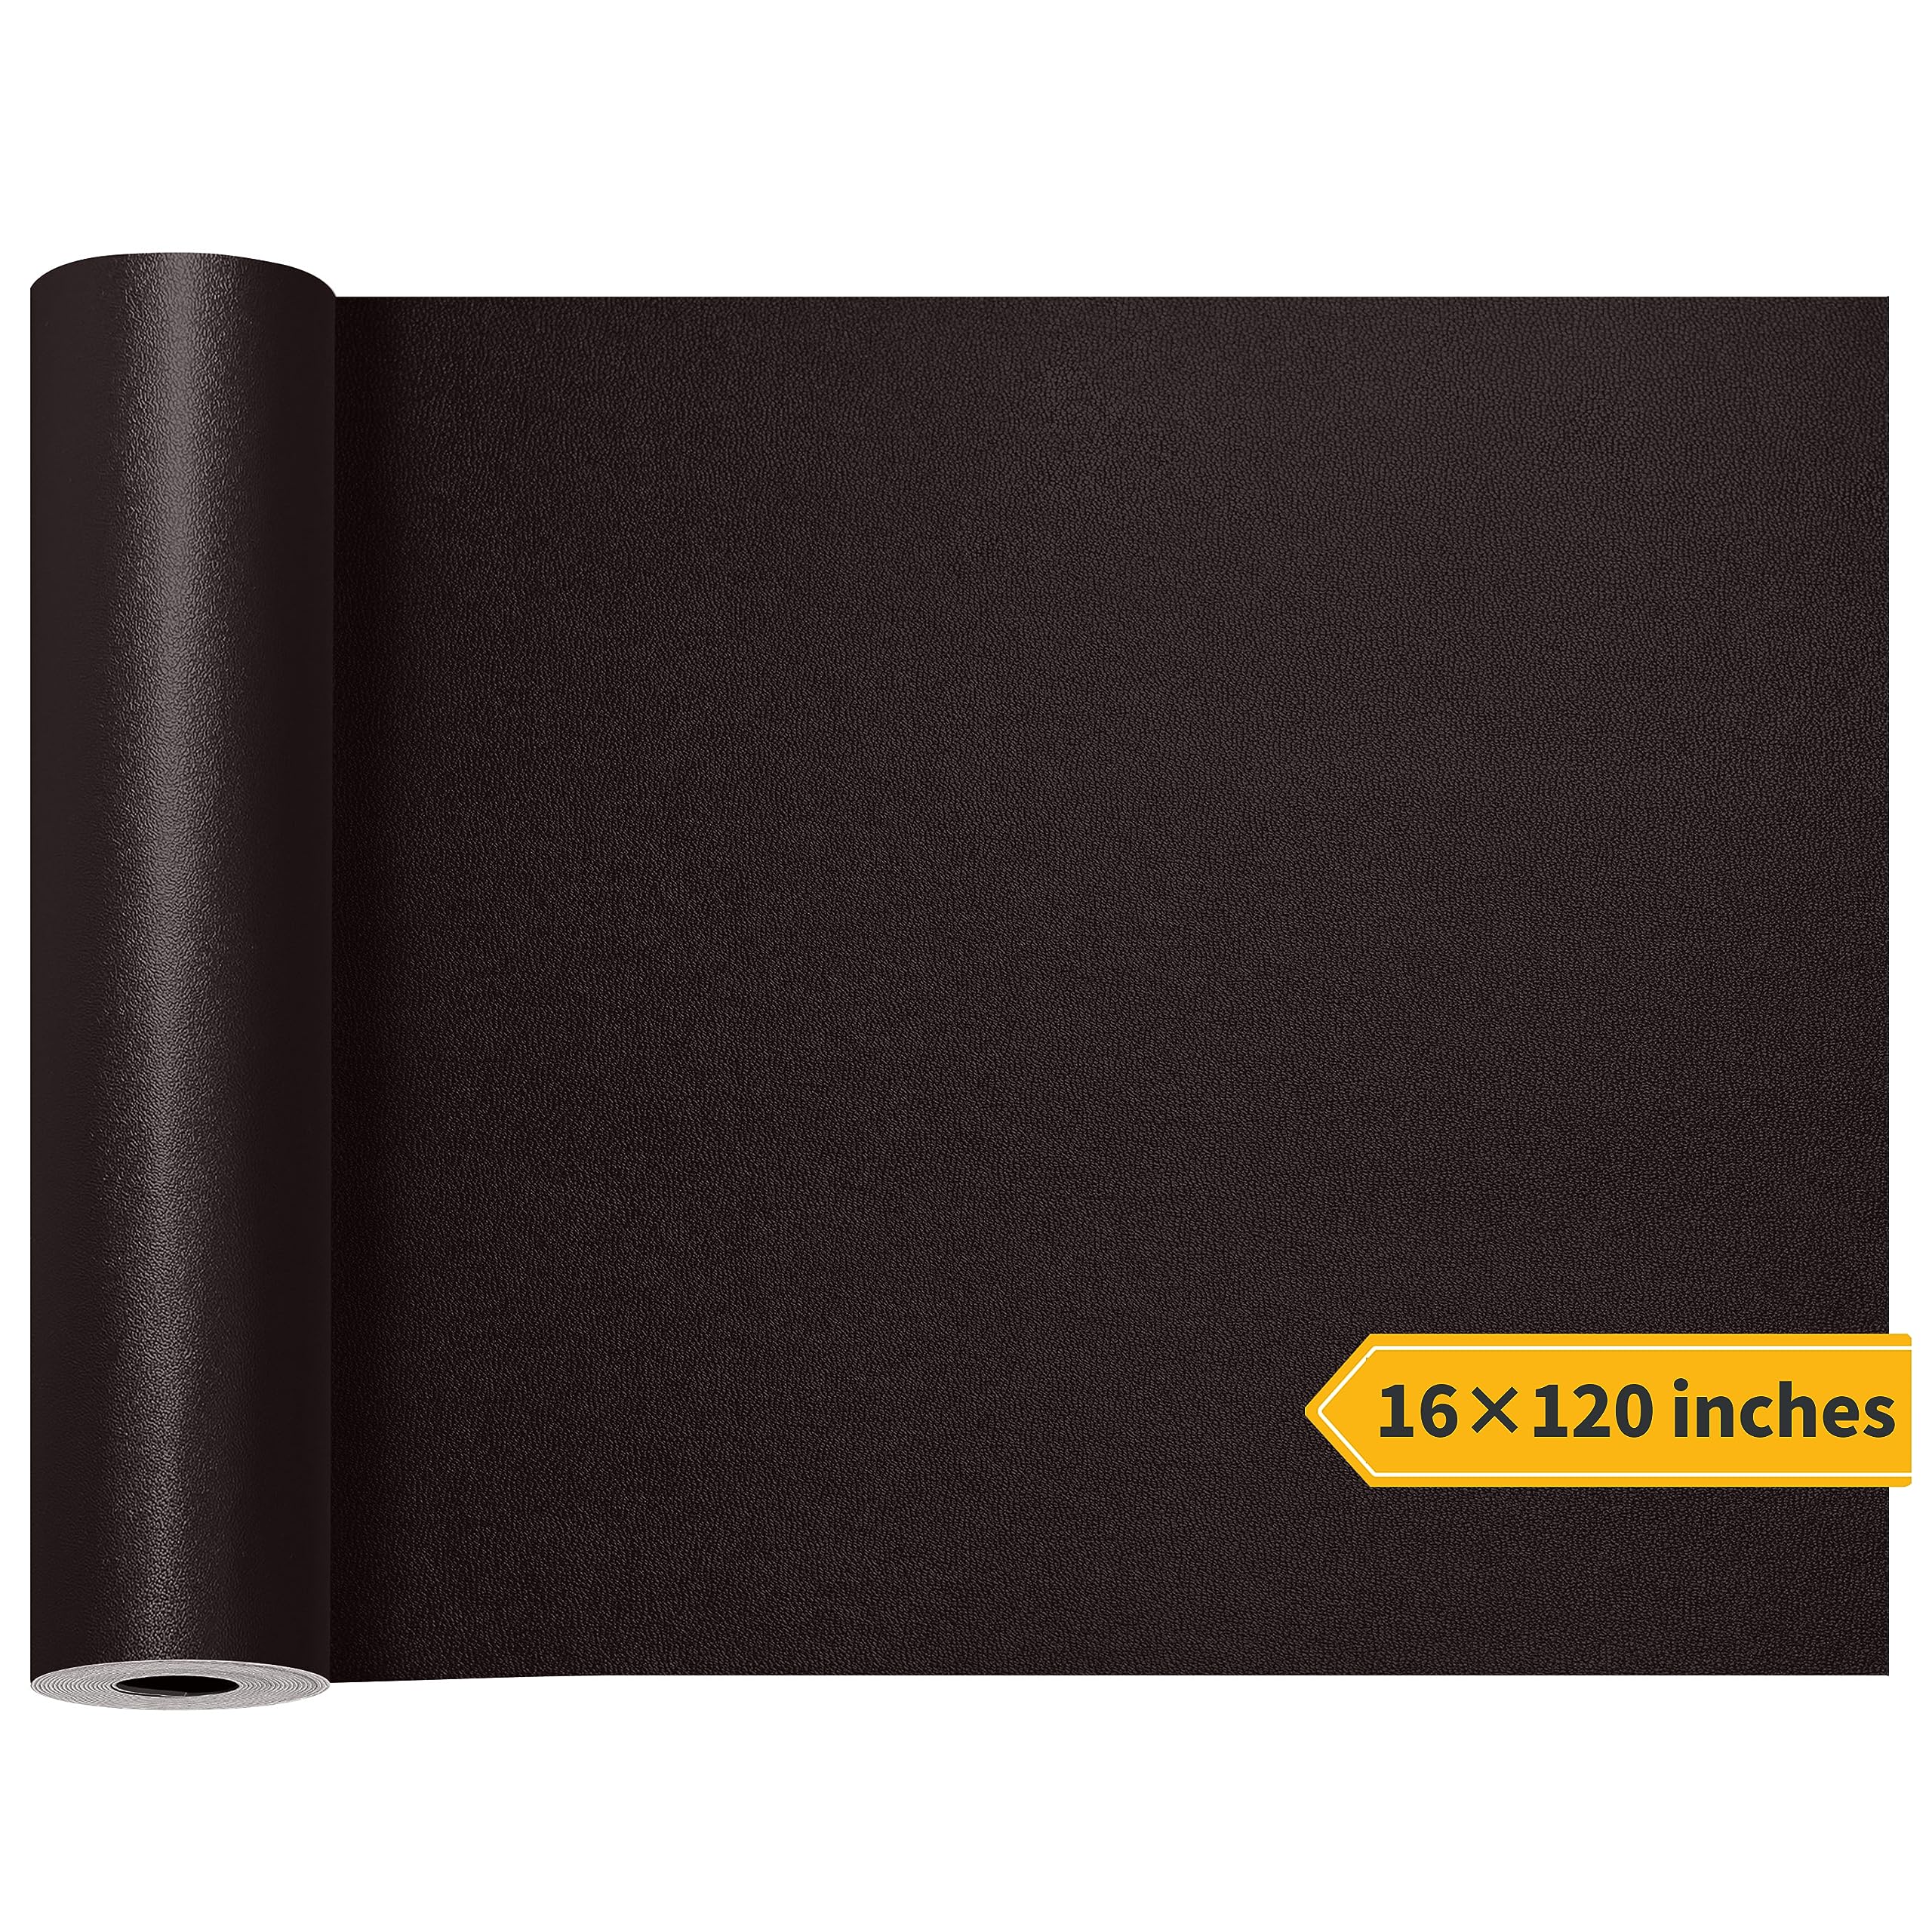
If the tear is on the outer edge of the driver seat—where your body rubs every time you get in—this is the kind of product that wins in real life. The key advantage of the Besezx patch tape is its width: it lets you create a “landing zone” on both sides of a tear so the adhesive isn’t living on a razor-thin margin. That matters because car seats don’t just pull; they shear. A narrow patch can lift from the edge like a sticker. A wide patch behaves more like a new surface.
Owners repeatedly describe the adhesive as very strong when applied to a properly cleaned surface, and the durability praise is what you want to hear for a seat repair: “still holding” stories months later, even on work trucks that see daily abuse. The material thickness also hits a sweet spot—it’s sturdy enough to resist re-tearing, but not so bulky that it looks like armor plating.
Expert tip: don’t cut this patch with sharp corners. Round every corner like a guitar pick. Sharp 90-degree corners are snag magnets—your jeans will find them. Also, align the grain direction with your seat and press it down firmly (a small roller or even a wrapped credit card works) so the adhesive bonds into the tiny texture valleys.
Why it’s the top pick
- Seat-bolster durability: Wide coverage makes edge-lift far less likely.
- Fast “stop the tear” fix: Great when function matters most.
- Comfortable feel: Doesn’t feel like a hard plastic sticker when done right.
- DIY forgiving: Cut large, trim later once placement looks right.
Good to know
- Some patches show a lighter inner edge if you cut too tight—plan your trim and edges carefully.
- Gloss can differ from OEM; choose “function-first” zones if sheen mismatch bothers you.
Ideal for: Driver seat bolsters, long tears, and any repair where durability matters more than “invisible.”
2. Coconix Leather & Vinyl Repair Kit – The “Blend It In” Specialist

When people say “I want it to look factory,” they’re usually describing a blended repair, not a covered one. That’s where Coconix shines. The big idea is simple: you mix a custom shade, apply in thin layers, and use small technique moves to make the repaired zone mimic the surrounding grain and finish.
Real-world users tend to succeed when they treat this like painting: start lighter, darken slowly, and test tiny dots before committing. The most underrated part is texture. If your seat has a pebbled pattern, a perfectly smooth repair will catch light differently and scream “patch.” Coconix repairs look their best when you press a texture cloth (or similar method) lightly to imprint a subtle grain while the compound is still workable. That tiny detail is what separates “good” from “wow.”
Where it can struggle: the highest-wear bolster edge. A perfect-looking filler repair can still get bullied by daily sliding. If your tear is exactly on the “entry/exit line,” consider pairing a blended kit for cosmetics with a patch solution for brute-force durability.
Why it wins for invisibility
- Color control: Mix-to-match beats “one shade fits all.”
- Texture potential: Can mimic pebbled leather when applied with care.
- Flexible repairs: Designed to avoid stiff, flaky patches.
- Big money saver: Especially on steering wheels and small seat tears.
Good to know
- Thin coats matter—thick blobs dry uneven and look obvious.
- On very glossy vinyl, you may need to “dial in” the sheen with technique, not just color.
Ideal for: Cracks, scuffs, punctures, and small tears where you want the repair to blend, not cover.
3. Chemical Guys Leather Lovers Kit – The “Make It Last” Upgrade

This isn’t a “tear filler” kit—so why is it in a car seat repair guide? Because the best repair in the world fails faster on dirty, dry, neglected leather. Chemical Guys’ Leather Lovers approach is about getting the surface properly cleaned, then conditioning it so the material stays supple instead of cracking like dried paint.
Owners consistently describe the feel after conditioning as soft and natural (not slick, not greasy), and that matters more than people think. A slippery, oily conditioner can attract dust and create a “shine patch” effect. A dry-to-the-touch finish keeps the cabin looking OEM while still improving the tactile feel. Another real advantage: if you’re doing any kind of color restoration (balm, dye, serum), having a consistent, properly cleaned base makes color look more even.
If you’re planning a repair, this kit is your “prep and protection” companion: clean before you patch/fill/recolor, then condition afterwards to keep the surrounding leather from aging faster than the repaired spot.
Why it earns a spot
- Better repairs start here: Clean seats bond better and blend better.
- No greasy regret: Users love the non-oily feel after application.
- Great for maintenance: Helps prevent the next crack from showing up.
- Multi-use: Seats, steering wheels, leather goods—one system.
Good to know
- It won’t “fill” holes—pair it with a patch, filler kit, or balm depending on damage.
- If you’ve used heavy silicone dressings in the past, take extra time on cleaning.
Ideal for: Anyone serious about seat longevity—especially before and after repairs.
4. FORTIVO Leather Recoloring Balm with Mink Oil – The “New Seat” Illusion

If your seat isn’t torn but looks “tired”—faded bolsters, dull patches, scratch haze—this is the style of product that can make you do a double-take. The Fortivo recoloring balm behaves like a color-restoring cream: you apply thin coats, build coverage, and then use the conditioning step to bring back a more uniform, healthy finish.
The most important expert insight from real users: absorbency matters. Some leather (especially sealed automotive leather) won’t take color evenly until the surface is properly cleaned and de-glossed. Once the surface is receptive, users report very satisfying results—coverage that sets without transferring onto clothing, and a finish that looks dramatically more even. Many people also love that a little product covers more than expected when you apply it correctly (thin, even coats; more coats only where wear is heaviest).
The “texture trick” with balms is tapping, not wiping. Wiping can create streaks and a smooth-looking patch. Light tapping with an applicator can mimic grain and keep the finish more natural.
Why it’s a standout
- Massive visual improvement: Great for faded, dry-looking seat panels.
- Buildable control: Two thin coats usually beat one heavy coat.
- Comfort factor: Conditioner step helps the seat feel “supple,” not painted.
- Good longevity stories: When prep is right, results stay put.
Good to know
- Not the tool for big holes—use it after structural repair, not instead of one.
- On very slick finishes, prep determines everything.
Ideal for: Faded seats, worn-looking bolsters, scuff zones, and “my interior needs a glow-up” projects.
5. Doc Bailey’s Vinyl & Leather Restoration Re-Dye & Repair‑A‑Tear Kit – Fast, Clean Black Revival
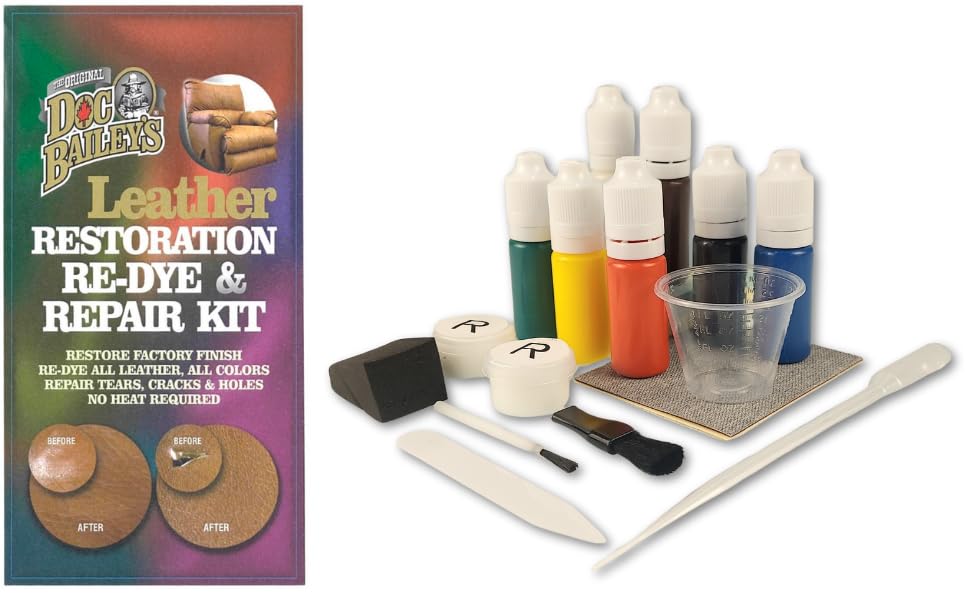
For black leather jackets, bags, and black car interiors, Doc Bailey’s is one of those “why didn’t I do this sooner?” products. Users regularly describe it as easy to apply, fast drying, and surprisingly clean in terms of odor and transfer. That’s exactly what you want for a car interior—nobody wants a chemical smell parked in the cabin.
The finish is where this kit feels smart: it aims for a natural look rather than an overly glossy shoe-polish shine. That semi-matte to soft-satin range matches a lot of automotive black leather better than high-gloss dyes. And if you’re working around scuffs, light scratches, or that gray-ish wear strip on the seat edge, it can dramatically deepen the black in a way that looks intentional.
One practical “expert” note: control the pour. Some users mention it can come out faster than expected, so load a sponge lightly and build gradually. In car-seat terms, you want consistency—especially if you’re blending into an untouched panel. Small, controlled applications beat big wet swipes every time.
Why it’s excellent on black interiors
- Quick visual reset: Great for scuffs, faded zones, and scratch marks.
- Dries without drama: Minimal odor and low transfer reports.
- Natural finish: Less “painted,” more “refreshed.”
- Versatile: Seats, steering wheels, trim, and leather goods.
Good to know
- Black-only solution—amazing if your interior is black, not for tan/gray seats.
- Work in thin layers to avoid a wet-looking patch.
Ideal for: Black leather seats, steering wheels, and any “faded-to-gray” black leather problem.
6. FORTIVO Professional Black Leather Repair Kit – The Layer-and-Blend Workhorse

This kit is a practical reality for a very common situation: black vinyl or faux leather that has peeled, ripped, or cracked. The reason it works better on black than on mixed colors is simple—color matching is the hardest part of leather repair. When the product is already black, you get to focus on the structure and finish.
The strongest “real-life” pattern in feedback is that the best results come from multiple thin layers. Expect to fill, let it set, evaluate, and add another layer rather than trying to “one-and-done” a deep gouge. That approach also helps with texture because you can lightly shape and feather edges between layers.
The big watch-out is sheen: some users note the repair can dry shinier than surrounding vinyl, especially on seats or chair arms. The most reliable trick is gentle buffing with rubbing alcohol after curing—light pressure, short passes. If you scrub hard, you can lift compound. Think “polish,” not “scrape.”
Why it’s great for black seats
- Simple color story: No complex mixing when black matches black.
- Layerable control: You can build depth and shape over time.
- Good for peeling: Helps “re-skin” small damaged spots.
- DIY-friendly tools: Spatula application is forgiving.
Good to know
- Sheen may need adjustment to match OEM (especially on vinyl).
- Plan for cure time—best repairs are patient repairs.
Ideal for: Black faux leather or black vinyl seat damage, and anyone who wants a controlled, layer-based repair.
7. Jughozu 2026 New Leather Repair Kit – Tools, Colors, and “Hole Help”
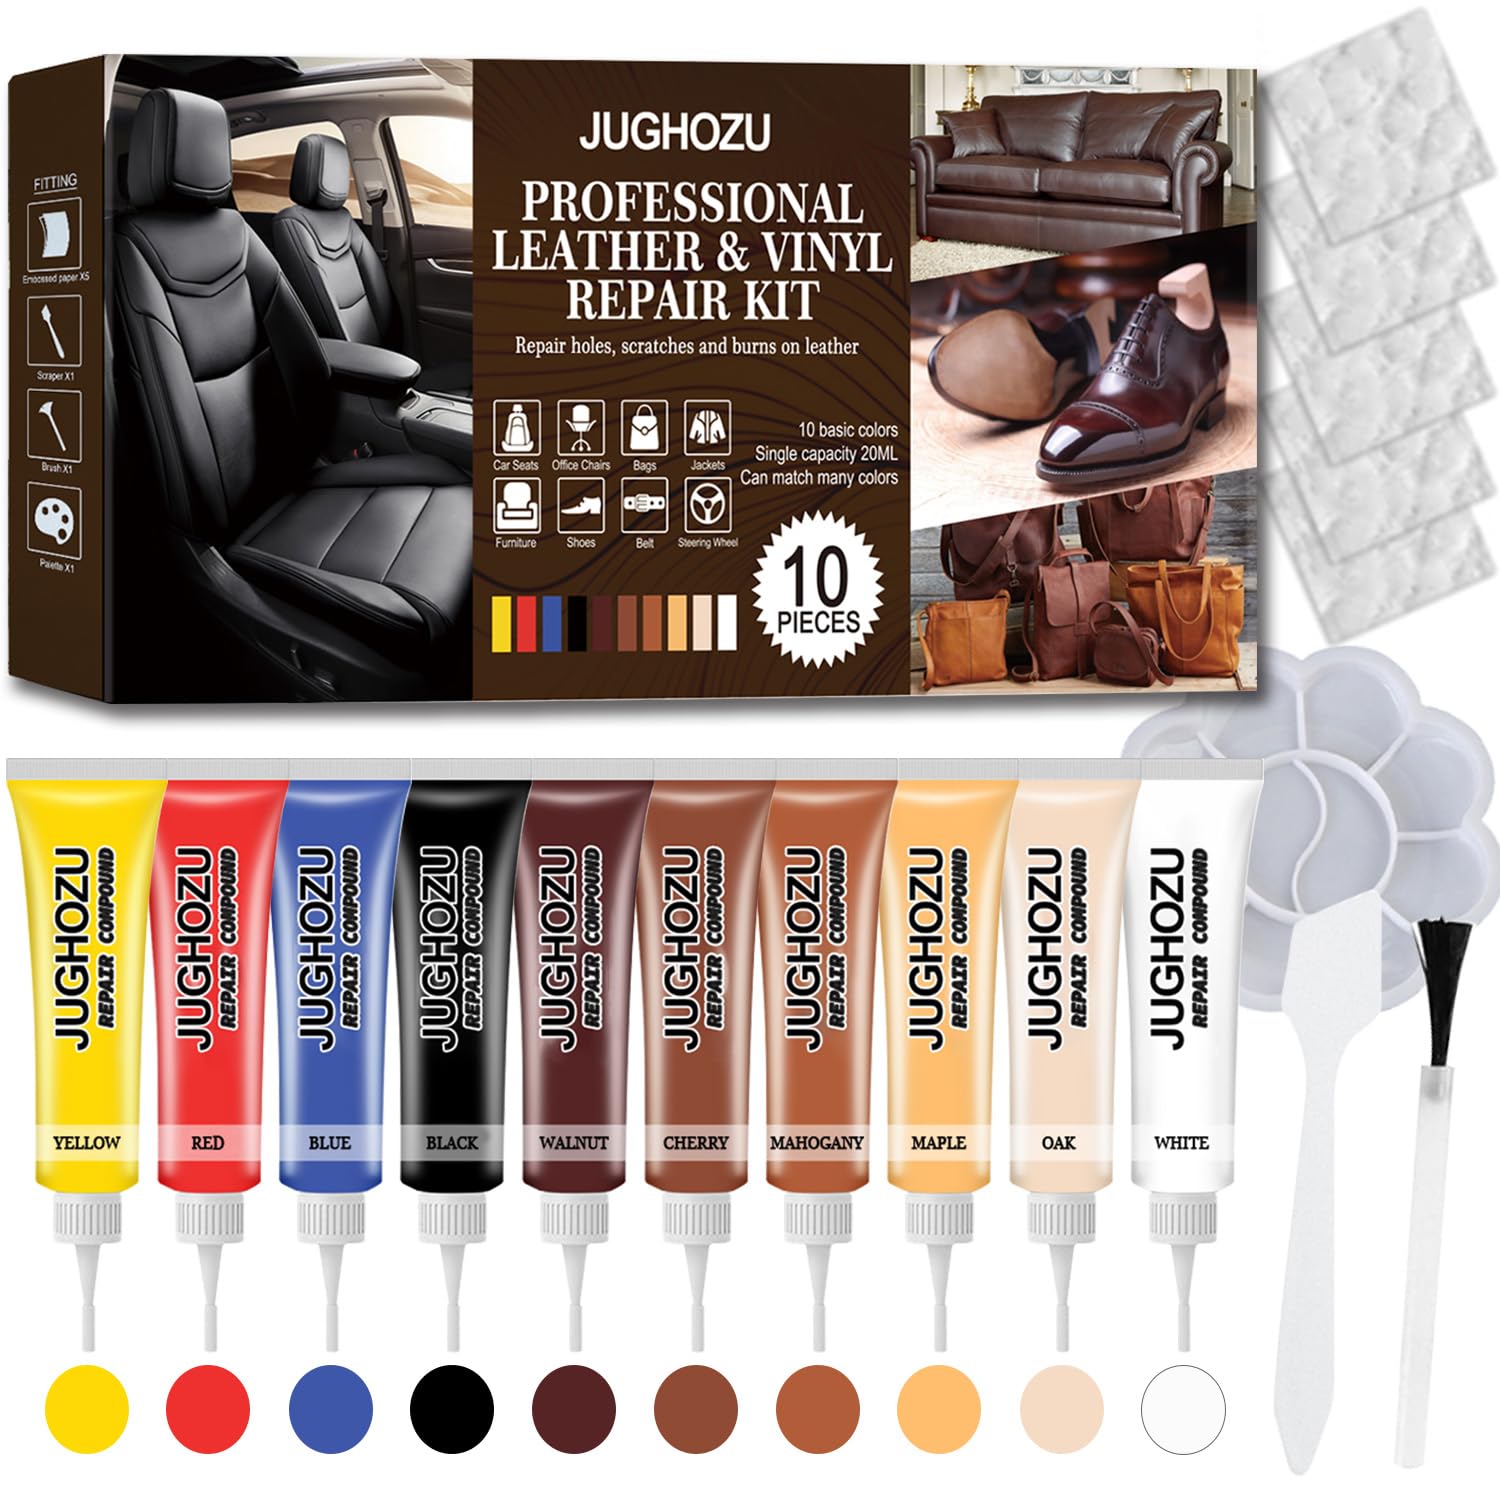
If you’ve never repaired leather or vinyl before, your biggest enemy is uncertainty: “Am I missing a tool? Am I doing the steps in the right order?” Jughozu aims to remove that friction by giving you a complete set—tools for application, a color range for blending, and extra material meant to help when damage is more than a surface scratch.
The standout concept is the included “litchi leather” pieces (used as a filler/patching aid for bigger damage). In car seat terms, this is helpful when you have a small hole or a tear that needs a physical bridge before the surface compound can look smooth. Think of it like rebar in concrete: you’re giving the repair something to hold onto.
One practical note from real buyers: always do a quick “inventory check” when the kit arrives. Like many multi-piece kits, occasional packaging inconsistencies get reported. Catching missing items before you start saves a lot of frustration mid-project.
Why it’s beginner-friendly
- Clear DIY workflow: Designed for people who want step-by-step guidance.
- More than just color: Includes tools and extra material for bigger defects.
- Good for mixed repairs: Scratches + small tears + scuffs in one weekend.
- Fast setting: Helpful when you need results without a long project timeline.
Good to know
- As with any kit, color matching still benefits from patience and test dabs.
- Check contents on arrival so you’re not missing a key applicator mid-repair.
Ideal for: First-timers who want an all-in-one box for scratches, small tears, and “I need everything in one kit.”
8. ARCSSAI ARCSSAL Leather & Vinyl Repair Kit – The Color Lab Approach
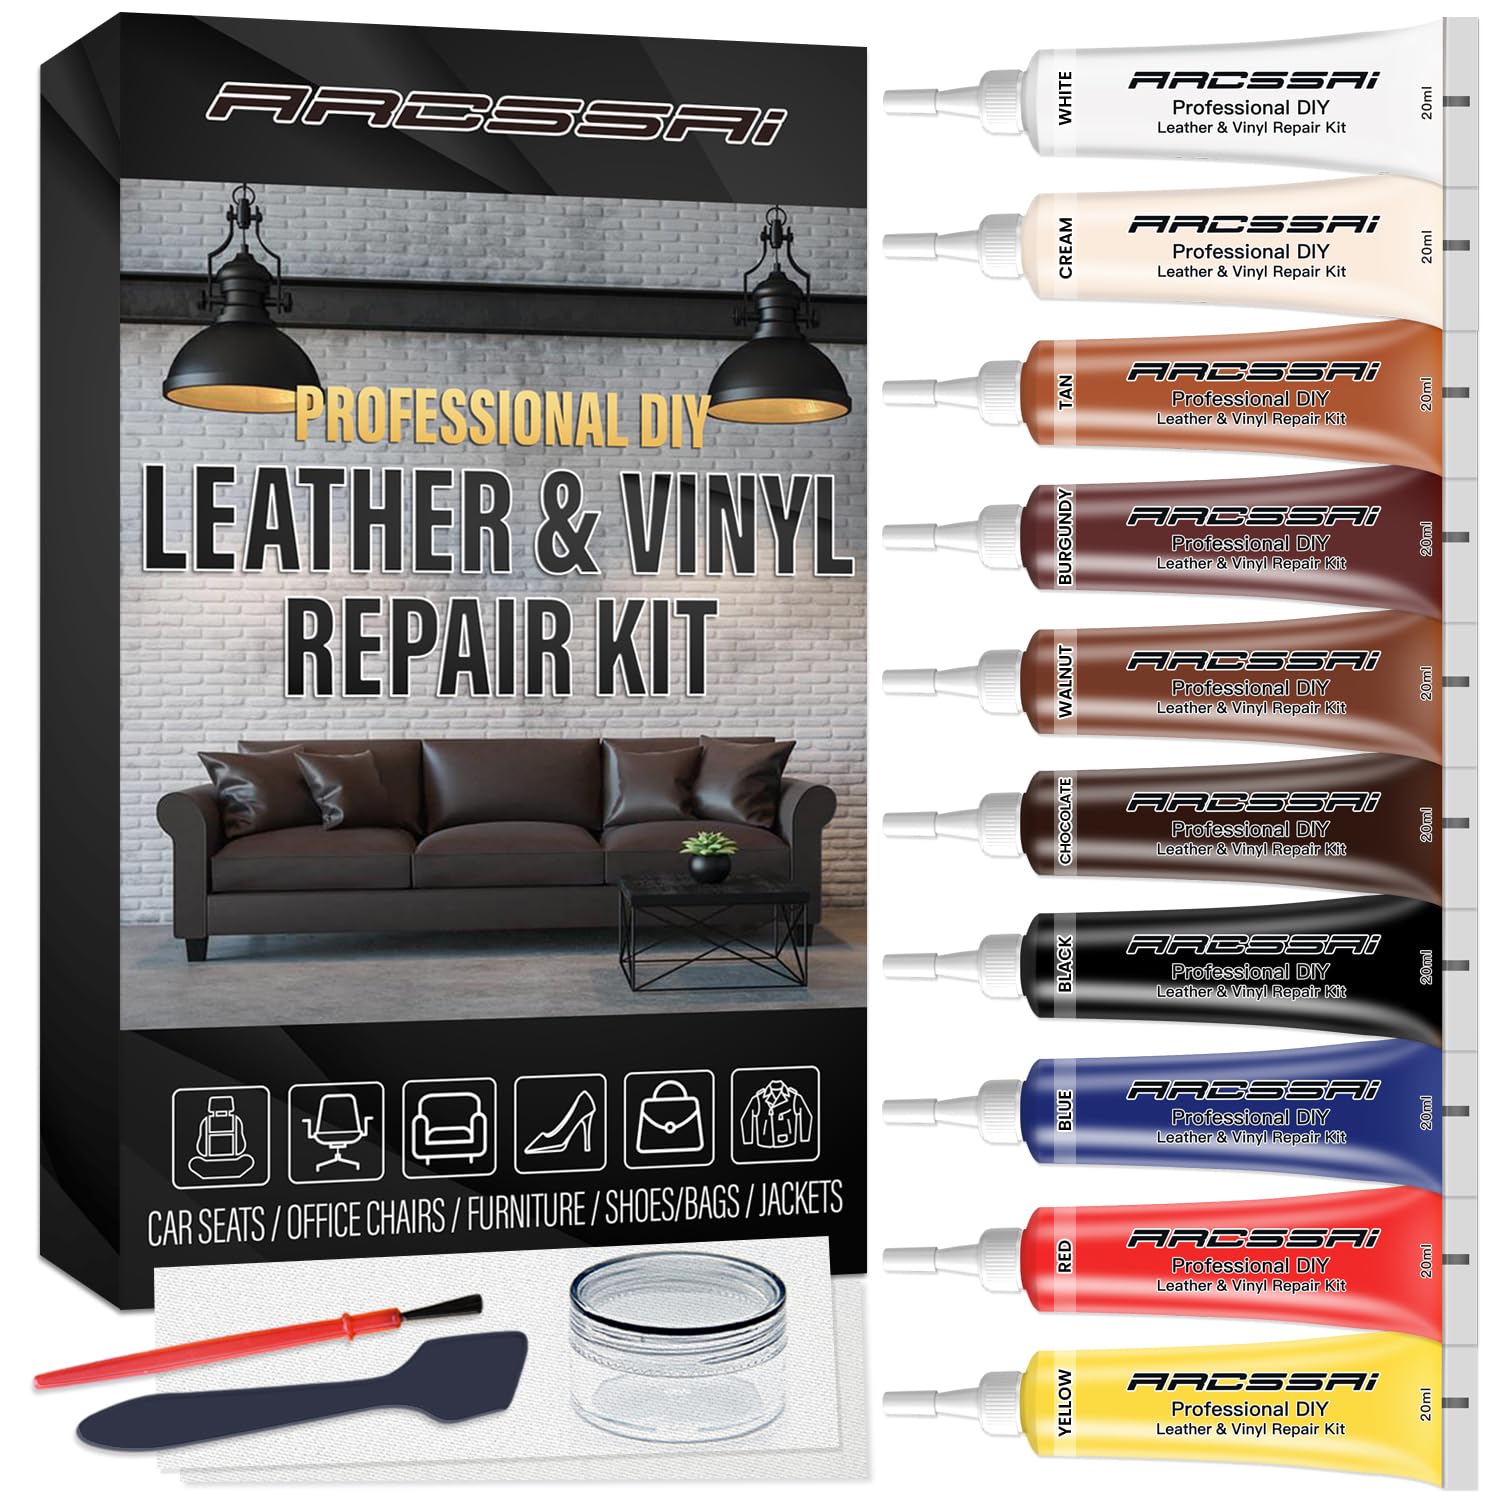
ARCSSAI is the classic “mix any color” repair kit: a palette of base colors, instructions for blending, and a fast-dry repair compound designed to fill and recolor in one workflow. This is the style of kit that can save you when your seats are not plain black—think tan interiors, gray seats, or that tricky “warm beige” that never matches anything off-the-shelf.
What experienced DIYers do with kits like this: they use small brushes for detail areas and keep the included wider applicator for larger seat panels. That matters on car interiors because the repair zones are often narrow and shaped—seat seams, curved bolsters, piping edges—places where a wide paddle can make a mess.
The realistic limitation to know: any color-mix compound can struggle in high-contact areas if the finish isn’t fully cured or if the surface wasn’t properly de-oiled. Some users report rub-off when the repaired zone gets repeated friction. The fix is often procedural: thinner layers, longer curing, and finishing steps that match the surrounding sheen.
Why it’s a strong value pick
- Color freedom: You’re not trapped in “one shade” repairs.
- Good for many materials: Leather, vinyl, pleather, bonded surfaces.
- Great for scuffs + small cracks: Especially on seat side panels.
- Beginner-friendly instructions: Helps people who fear color matching.
Good to know
- High-friction zones require patience: thin layers + full cure.
- For small projects, grab a pack of fine brushes for clean edges.
Ideal for: Non-black interiors where color matching is the whole battle.
9. Black Leather Recoloring Balm (drtulz) – The Fast “Before/After” Jar

This is for the “my black leather looks gray” problem—steering wheels, seat edges, armrests, and those high-touch zones that lose pigment and look older than the rest of the cabin. drtulz is the kind of balm that wins people over because it’s simple: clean, apply, let it dry, and watch the black come back.
The best user outcomes come from treating it like a controlled coating, not a lotion. Use gloves. Apply thin. Let each coat set. And if your seat has two-tone areas, protect the non-black section (masking tape works) so you don’t accidentally “shadow” a lighter panel.
One very real practical tip: open the jar carefully and set up your work area like you’re handling paint. A lot of mess stories happen before the first coat even goes on. Once you’re past that, users love the fast dry time and the low transfer results when applied correctly.
Why it’s a great quick fix
- Instant visual impact: Black looks deeper after just one coat.
- DIY easy: Clean, apply, dry—repeat if needed.
- Good for touch-ups: Perfect for steering wheel wear.
- Low odor focus: Helps keep the cabin pleasant.
Good to know
- Designed for smooth leather; heavy texture matching requires technique.
- Not a structural tear fix—pair with filler or patch for holes.
Ideal for: Black interiors needing fast recolor on smooth leather surfaces.
10. Vigorder Brown Leather Repair Kit – The Brown Interior Shortcut

Brown interiors are gorgeous… and annoyingly hard to match. “Brown” can lean tan, walnut, chocolate, or even slightly olive depending on your trim and sun exposure. Vigorder’s angle is simple and smart: it’s designed around brown tones with a guide that helps you blend into the most common brown families without needing professional color theory.
This kit makes the most sense when your damage is small-to-medium: little holes, scratches, light tears, and worn patches where you want a repair that blends rather than a big cover patch. The reason color-specific kits often work well is focus—rather than giving you every color under the sun, they give you what you actually need to live in the “brown zone.”
A pro-style move for brown interiors: match the aged color, not the “new leather” color. Seats fade. If you match the original factory shade, you can create a perfect repair that looks wrong next to sun-aged panels. Always mix and test in a hidden area first.
Why it’s great for brown cabins
- Brown-first color system: Less guesswork for tan/walnut/chocolate.
- Good for common damage: Scratches, cracks, small tears.
- DIY approachable: Built for first-time users.
- Multi-surface compatible: Works across leather-like materials.
Good to know
- Brown matching still benefits from patience—test dots prevent regrets.
- For large bolster damage, consider combining with a wide patch tape.
Ideal for: Brown/tan car seats where “close enough” color matching is the biggest hurdle.
11. TIANLDD Leather Repair Tape (16in x 160in) – The Reupholster-Style Roll

There are two ways people use patch tape: a small patch over a small defect, or a “strategic re-skin” where you cover an entire worn panel so the repair looks intentional. TIANLDD’s roll size pushes it into that second category. If your seat has a broad worn area—say, a cushion corner that’s thinning or cracking—this kind of roll lets you cover the whole zone cleanly rather than patching a dozen small spots.
Users who love these big-roll tapes typically talk about three things: realistic texture, strong adhesive, and enough thickness to feel durable without turning stiff. The litchi grain look can blend nicely with many pebbled interiors, especially if you align the grain direction and avoid tiny “postage stamp” patches.
Pro tip for car seats: warm the material slightly (room temp is good; gentle hairdryer warmth is better), then press and hold. Adhesives bond best when they’re not cold and rigid. And again—round your corners. If corners lift, it starts a chain reaction where dirt gets under the edge and the patch slowly “walks up.”
Why it’s strong for big areas
- Large coverage: Great for “panel-style” repairs that look deliberate.
- Textured finish: Better blending than flat, sticker-like patches.
- Strong adhesion: Works best on properly cleaned surfaces.
- DIY friendly: Cut big, refine the shape after you like placement.
Good to know
- On tight curves, take your time—big patches need careful smoothing.
- Some people prefer extra flexibility for intricate edges; use smaller sections if needed.
Ideal for: Large worn areas and “cover the whole section” repairs where a small patch would look obvious.
12. ONine Leather Repair Patch (16in x 90in) – The Versatile Cut-to-Fit Fix
ONine is for the practical person who wants one roll that can handle multiple repairs: a car seat scuff today, a chair arm tomorrow, a bag corner next month. The core strengths people mention are straightforward: it adheres well to clean surfaces, the texture can match surprisingly well when you align it correctly, and it’s easy to cut and apply without tools or waiting.
Where patch tape lives or dies is placement intelligence. If you slap a patch in the middle of a seat panel with no alignment and sharp edges, you’ll notice it forever. If you place it along a natural seam line, align the grain direction, and cut a shape that looks like it belongs (rounded corners, clean symmetry), it can look “reasonably nice” while doing the real job: stopping further ripping.
A helpful mindset shift: patch tapes are often best when used like a trim piece rather than a bandage. If you’re covering a long worn strip on the seat edge, consider making it a clean, continuous shape that looks intentional—even if a close inspection reveals the seam.
Why it’s a great utility pick
- Quick application: Clean, cut, peel, stick—done.
- Versatile uses: Cars, furniture, bags, and more.
- Good adhesion reports: Especially on properly cleaned leather/vinyl.
- Large roll freedom: You can design the patch shape for your specific damage.
Good to know
- Color matching is everything—compare texture and shade carefully before committing.
- Joined pieces can show a seam line; plan your patch layout around natural seat seams.
Ideal for: Multi-use DIYers who want a cut-to-fit patch solution for a variety of leather/vinyl fixes.
Finish & Durability Guide: Why Seat Repairs Peel, Crack, or Turn Shiny
Car seats are harder than couches. Not emotionally (well… sometimes), but mechanically. If you want repairs that hold, you need to understand the forces and finishes you’re working against.
Flex Zones vs. Flat Zones
A seat bolster is a flex zone: it bends and twists every time you enter/exit. Flat seat panels are calmer. Patch tapes often win on bolsters because they “cover and move” as one surface, while fillers can crack if applied too thick or cured too fast.
Rule of thumb: the more the seat bends, the more you should prioritize flexibility and edge security over “perfect invisibility.”
Surface Chemistry: Oils, Dressings, and Bond Failure
Most repair complaints that sound like “it didn’t stick” are really surface contamination. Body oils, silicone dressings, and even old conditioner can create a slippery barrier. That’s why the final wipe-down (after cleaning) is so powerful: it removes the invisible film that makes adhesives and compounds lift.
If you’ve used shiny interior “protectants” in the past, spend extra time on prep. Repairs bond to what’s on the surface—make sure that surface is actually your seat, not a residue layer.
Sheen Matching: The Hidden “Tell”
If your repair looks too glossy, it will be visible even if color is perfect. If it looks too matte, it can look chalky. The best approach is controlled layering and gentle finishing: thin coats for compounds, tapping for balms, and cautious buffing techniques when recommended.
Temperature Cycles: Sunlight is a Stress Test
A repair that looks great in a cool garage can behave differently after a week of hot sun and cold nights. Give repairs time to set, and avoid heavy friction immediately after application. Heat also softens adhesives (helpful during install), but it can punish weak edge work over time.
FAQ: Leather & Vinyl Car Seat Repairs
How long should I wait before sitting on a repaired seat?
Can I use these on heated or perforated seats?
My “leather” is peeling. Is that leather or vinyl?
What’s the #1 mistake that makes repairs look obvious?
Final Thoughts: Best Leather Repair Kit For Car Seat Picks
If your priority is a tough, high-wear repair—especially on a driver-seat bolster—the smartest “real life” choice is the wide patch approach of the Besezx Leather Repair Patch Tape Kit. If your goal is a cleaner, more blended repair that can look close to factory when you take your time, the Coconix Leather & Vinyl Repair Kit is the move.
And if you want your interior to age slower (and your repairs to stay looking good), pair your fix with real maintenance: the Chemical Guys Leather Lovers Kit is the “clean and protect” backbone that keeps seats from drying out and cracking again.