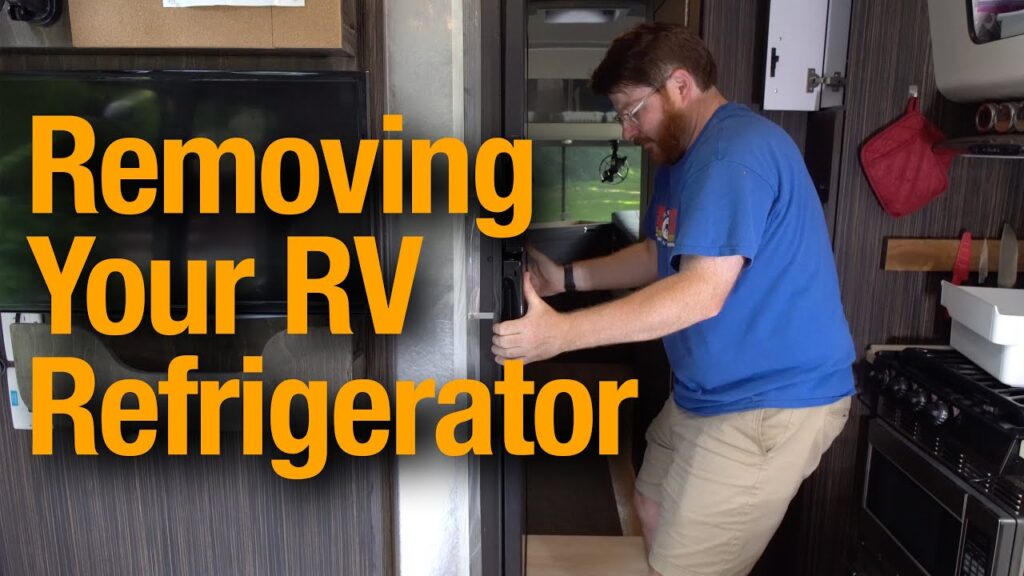
Removing an RV refrigerator can seem daunting at first. But with the right guidance, it becomes manageable.
RV refrigerators are essential for your travel comfort. However, they may need replacement or repair. Understanding the removal process is crucial. This guide offers clear, step-by-step instructions. Whether you are a novice or have some experience, you will find the information you need here.
By the end, you’ll feel confident in tackling this task. Let’s get started on safely removing your RV refrigerator.
Preparation
Preparing to remove an RV refrigerator requires careful planning. Begin with gathering all necessary tools and ensuring safety measures are in place. This process helps to avoid any mishaps and makes the task smoother.
Gather Tools
First, gather all the tools you will need. You will need a screwdriver, a wrench, and a pair of gloves. Have a flashlight handy to see in dark areas. Keep a small container for screws and bolts. This ensures you do not lose any parts.
Ensure Safety
Next, ensure safety measures are in place. Turn off the RV’s power supply. Unplug the refrigerator from any electrical outlets. Disconnect any gas lines connected to the fridge. Wear gloves to protect your hands. Keep a fire extinguisher nearby, just in case. Check for any sharp edges before you start. Safety first, always.
Credit: www.outdoorbits.com
Empty The Refrigerator
Before removing your RV refrigerator, you must empty it. This step ensures that you don’t face spills or messes. It also lightens the appliance, making it easier to handle.
Remove Food Items
Start by taking out all food items. Use a cooler to keep perishable goods safe. Check for any expired or spoiled food and dispose of it.
Defrost The Unit
Next, defrost the unit. Turn off the refrigerator and unplug it. Leave the doors open to let the ice melt. Place towels or a container to catch the water. This step prevents water damage and makes the unit lighter.
Disconnect Power
Removing an RV refrigerator requires several steps. One crucial step is disconnecting the power. This ensures safety and prevents electrical accidents. Follow these simple instructions to disconnect power properly.
Turn Off Electricity
First, turn off the electricity. Locate the RV’s main power switch. This is usually near the electrical panel. Flip the switch to the “Off” position. This cuts off power to the entire RV.
Make sure the RV is not connected to external power sources. Check the generator or shore power connection. Unplug any cords connected to the RV. This ensures that no electricity flows to the refrigerator.
Unplug Refrigerator
Next, unplug the refrigerator. Find the refrigerator’s power cord. It is usually at the back of the unit. Gently pull the plug from the socket. This disconnects the refrigerator from the RV’s power supply.
Verify that the refrigerator is completely off. Check the control panel inside the fridge. Ensure no lights or sounds indicate it is still powered. Now, you can safely proceed to the next steps of removal.
Disconnect Propane
Disconnecting the propane supply is a crucial step in removing your RV refrigerator. This process ensures safety and prevents any accidental leaks. Follow these steps to carefully disconnect the propane and proceed with the removal.
Turn Off Propane Supply
First, locate the main propane valve on your RV. This valve is usually near the propane tank. Turn the valve clockwise to shut off the propane supply. Ensure it is fully closed to prevent any gas from escaping.
Detach Propane Line
Next, find the propane line connected to your refrigerator. Use a wrench to loosen the fitting. Carefully disconnect the line from the refrigerator. Be cautious of any residual gas that may escape. Store the detached line safely away from any ignition sources.
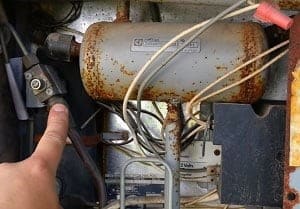
Disconnect Water Lines
Disconnecting the water lines of your RV refrigerator can seem daunting, but it’s a crucial step to ensure a smooth removal process. This task requires careful handling to prevent any leaks or damage. Let’s break it down into manageable steps.
Turn Off Water Supply
First things first, you need to turn off the water supply. Locate the main water valve in your RV. It’s usually found near the kitchen or bathroom area. Turn the valve to the off position to stop the flow of water. This is essential to prevent water from spilling everywhere when you disconnect the lines.
Double-check that the water is indeed turned off. Try turning on a faucet. If no water comes out, you’ve successfully shut off the supply. This simple step can save you from potential water damage and a big cleanup job.
Drain Remaining Water
Even after turning off the water supply, there will be some water left in the lines. You need to drain this out. Place a bucket under the water lines connected to your refrigerator. Carefully disconnect the lines one at a time.
Allow the remaining water to drain into the bucket. You might get a small splash, so keep some towels handy. This step ensures that no water is left that could cause mold or damage later on.
Removing an RV refrigerator isn’t just about unplugging it. Each step requires attention to detail to avoid mishaps. Have you ever found yourself in a situation where a small oversight led to a big mess? Disconnecting the water lines properly will save you from those headaches.
Credit: mountainmodernlife.com
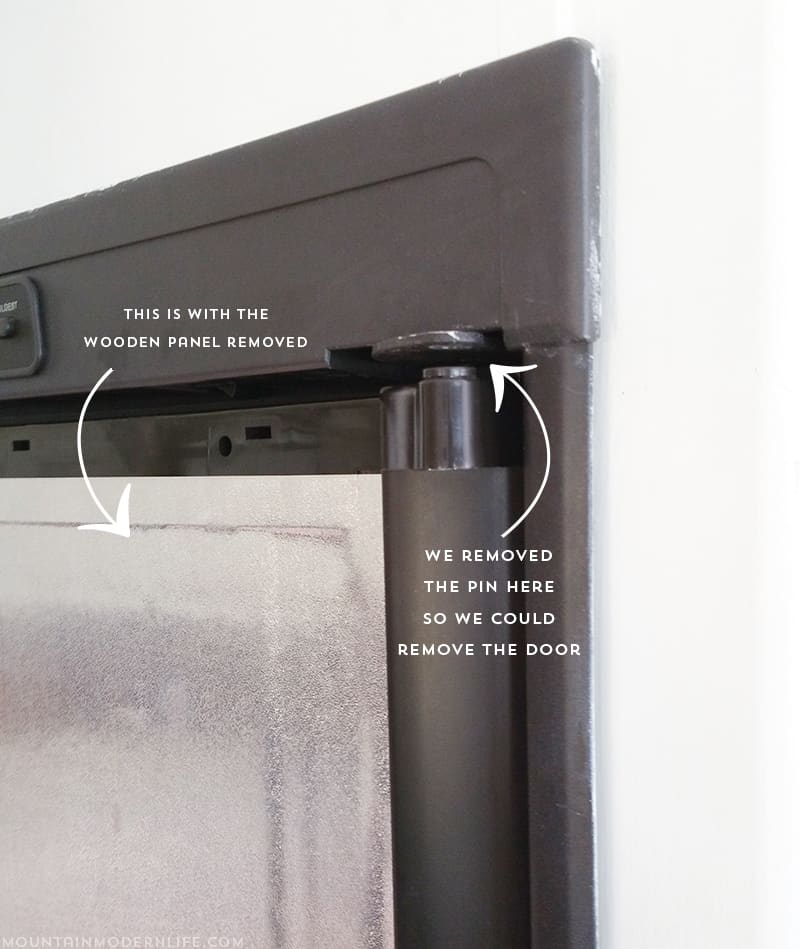
Remove Mounting Screws
Removing an RV refrigerator can seem daunting. One of the critical steps involves removing the mounting screws. These screws hold the refrigerator in place, ensuring it remains stable during travel. To safely and efficiently remove these screws, follow the steps below.
Locate Screws
First, find all the mounting screws. Typically, these screws are located around the perimeter of the refrigerator. Check both the top and bottom edges. You might also find screws at the sides, securing the fridge to the cabinetry.
Inspect the refrigerator carefully. Look behind any removable panels or covers. These screws may be hidden from plain view. Use a flashlight if necessary to spot any hard-to-see screws.
Use Appropriate Tools
Using the right tools is essential. Most RV refrigerators are secured with Phillips head screws. A Phillips screwdriver or a drill with a Phillips bit will work best. Ensure the tool fits the screw head properly to avoid stripping.
Once you have the right tool, begin removing the screws. Turn them counterclockwise. Be careful not to apply too much force. Keep a container handy to store the screws safely. This prevents losing any small parts.
After removing all the screws, check if the refrigerator is free. Sometimes, additional brackets or clips might hold the unit. Remove these if necessary. Your RV refrigerator should now be ready for the next step.
Slide Out Refrigerator
Removing an RV refrigerator involves several steps. First, disconnect power and propane lines. Next, carefully slide out the unit and detach any securing brackets.
Removing an RV refrigerator can seem like a daunting task, but it’s manageable with the right steps. One of the most critical parts of this process is the slide-out refrigerator. Ensuring you handle this step correctly will make the overall removal smoother and less stressful. ###Prepare Pathway
Before you begin sliding out the refrigerator, you need to prepare the pathway. Clear any obstacles that may be in the way. This includes removing cabinet doors, securing loose items, and making sure the path is wide enough for the refrigerator to pass through. Also, lay down protective covers to prevent scratches on the floor. Use furniture sliders to ease the movement. This preparation will save you from potential damage and hassle. ###Carefully Slide Out Unit
Once the pathway is clear, start sliding out the refrigerator. Use gentle but firm pressure. It’s best to have a helper for this step to ensure balance and control. Ensure to unplug the refrigerator and disconnect any gas lines if applicable. Pay attention to any wiring and connectors that might still be attached. This careful attention to detail prevents accidents and makes the reinstallation process easier. What did you find most surprising about removing your RV refrigerator? Maybe the ease of sliding it out? Share your thoughts in the comments!
Credit: www.youtube.com
Clean And Inspect
First, clean the refrigerator thoroughly. Next, inspect the unit for any signs of damage or wear. This ensures a smooth removal process.
Removing an RV refrigerator can be a daunting task, but breaking it down into manageable steps can make it easier. One crucial step is to clean and inspect the area. This ensures that your new refrigerator will fit perfectly and operate efficiently. Plus, it gives you a chance to catch any hidden issues early.Clean Area
Before installing a new refrigerator, thoroughly clean the area where the old one was. Dust and debris can accumulate over time, causing potential issues. Use a vacuum and a damp cloth to remove all dirt. Pay special attention to corners and hard-to-reach places. If there’s any mold or mildew, use a mixture of water and vinegar to clean it. This ensures a fresh start for your new appliance.Inspect For Damages
Look closely for any damages that might have occurred over time. Check the walls, floor, and surrounding areas for any signs of wear and tear. Small cracks or water damage can lead to bigger problems if not addressed. Are there any loose wires or disconnected parts? Make sure everything is in good condition. If you find any issues, now is the perfect time to fix them. Taking these steps not only prepares the area for your new refrigerator but also extends the life of your RV. Have you ever found unexpected damages during a home project? It’s always better to find and fix them early.Frequently Asked Questions
How Do You Pull Out A Built-in Refrigerator?
First, unplug the refrigerator. Remove any trim or screws holding it in place. Gently pull it out, using a dolly if needed.
How Much Does It Cost To Replace An Rv Refrigerator?
Replacing an RV refrigerator typically costs between $1,200 and $3,000. Prices vary based on brand, size, and features.
What Is The Most Common Problem With Rv Refrigerators?
The most common problem with RV refrigerators is improper cooling. This often results from poor ventilation or low voltage.
How Do I Uninstall A Refrigerator?
To uninstall a refrigerator, unplug it and remove all contents. Disconnect the water line if present. Slide the fridge out, then unscrew any brackets. Carefully move it out of the space.
Conclusion
Removing an RV refrigerator can seem daunting, but it’s manageable. Follow the steps carefully. Ensure you have all necessary tools. Disconnect power and gas lines safely. Remember to protect the RV interior. Seek help if needed. Take your time to avoid mistakes.
Enjoy the satisfaction of a job well done. Happy traveling!