Lighting an RV oven can seem tricky at first. It’s essential for your cooking needs while on the road.
Knowing how to light your RV oven is crucial for preparing meals during your travels. Without it, you might miss out on home-cooked dishes and rely on less satisfying alternatives. This task can feel daunting, especially if you’re new to RV life.
But don’t worry, it’s simpler than it appears. With a few easy steps, you can quickly get your oven working. In this guide, we’ll walk you through the process. You’ll gain the confidence to light your RV oven safely and efficiently. Let’s make cooking on the road a breeze!
Gathering Necessary Tools
Lighting your RV oven can seem daunting if you’ve never done it before. But with the right tools and a bit of preparation, you’ll have it up and running in no time. Let’s dive into the necessary tools you’ll need and how to prepare your workspace.
Tools Required
Before you start, gather all the tools you’ll need. This will make the process smoother and quicker.
- Long lighter or matches: You’ll need these to light the pilot light safely.
- Flashlight: It helps you see inside the oven, especially if it’s dimly lit.
- Screwdriver: Some oven models have a cover over the pilot light that needs unscrewing.
- Gloves: Protect your hands from any heat or sharp edges.
Preparing Your Workspace
Now that you have your tools, let’s prepare your workspace. This is an essential step to ensure safety and efficiency.
Clear the area: Remove any items around your oven. This prevents accidents and provides you with easy access.
Ensure proper ventilation: Open windows or vents to allow fresh air to circulate. This is crucial when working with gas appliances.
Keep a fire extinguisher nearby: Safety first! Always have a fire extinguisher within reach just in case.
By gathering the right tools and preparing your workspace, you’re setting yourself up for a smooth process. What other tools do you think might be useful when lighting an RV oven?
Credit: www.etrailer.com
Checking The Propane Supply
Before lighting your RV oven, check the propane supply. This ensures smooth operation and safety. Two crucial steps are locating the propane tank and ensuring an adequate supply.
Locating The Propane Tank
First, find the propane tank. It’s usually outside, near the RV’s rear. Look for a metal cylinder with hoses attached. The tank is often secured with straps or brackets.
Some RVs have a compartment for the propane tank. Open the compartment door to access the tank. Ensure the area around the tank is clear and free of debris.
Ensuring Adequate Supply
Next, ensure there’s enough propane. Check the gauge on the tank. A full tank usually reads between 80% and 100%. If the gauge is lower, consider refilling the tank.
Inspect the hoses for leaks or damage. Listen for hissing sounds and smell for gas odors. If you detect any issues, replace the hoses before proceeding.
Finally, open the valve on the tank. Turn it counterclockwise to release the propane. Ensure the valve is fully open for optimal flow.
Setting The Oven Controls
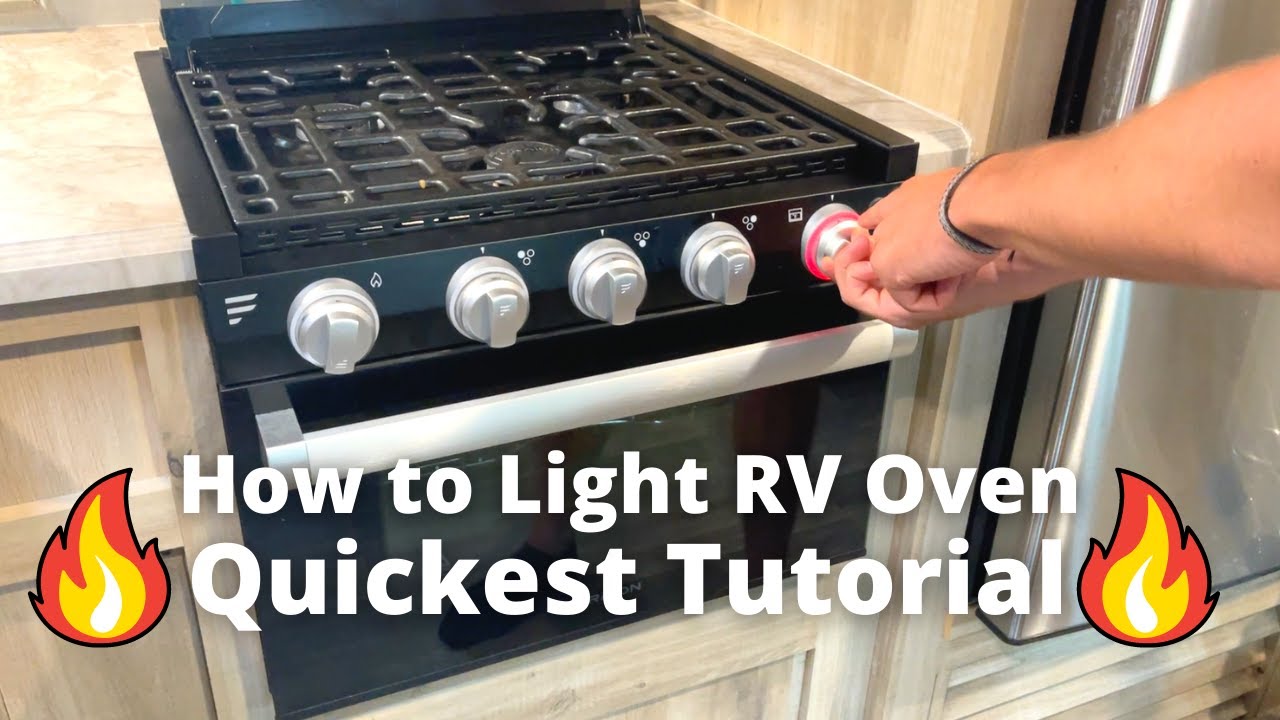
Set the oven controls by turning the knob to “Pilot. ” Press and hold the knob while igniting the pilot light.
Setting the oven controls on your RV might seem daunting at first, especially if you’re used to a conventional oven. However, once you get familiar with your RV oven’s control panel and temperature settings, you’ll be cooking up delicious meals in no time. Let’s break it down into simple steps so you can confidently set the oven controls and get cooking.Understanding The Control Panel
Before you start, take a moment to familiarize yourself with the control panel. This is the heart of your RV oven. You’ll typically see knobs or buttons that control the oven’s functions. Look for labels or icons that indicate different settings. These might include bake, broil, or even a timer. Understanding these controls will make your cooking experience much smoother. Have you ever been confused by a button or knob? Take the time now to read your RV oven’s manual. It will give you a clear idea of what each control does.Setting The Temperature
Setting the right temperature is crucial for cooking success. Most RV ovens have a temperature control knob or digital display. Turn the knob or set the display to your desired temperature. If you’re baking a cake, you might set it to 350°F. Always preheat your oven. This ensures it reaches the right temperature before you start cooking. It usually takes about 10-15 minutes to preheat. Have you ever wondered if the temperature is accurate? Use an oven thermometer to check. This small tool can prevent undercooked or burnt food. In my first RV trip, I remember setting the temperature without preheating. My cookies turned out half-baked! Don’t make the same mistake. By understanding the control panel and setting the temperature correctly, you’ll master your RV oven in no time. What will you cook first?
Credit: www.youtube.com
Lighting The Pilot Light
To light an RV oven, locate the pilot light and turn the knob to “pilot. ” Use a match or lighter to ignite it. Ensure the flame stays lit and adjust the oven temperature as needed.
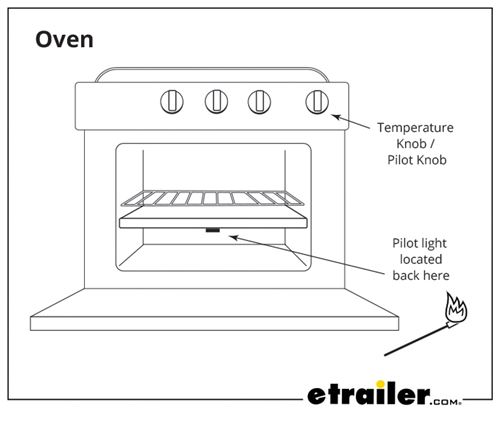
Lighting the Pilot Light in your RV oven can seem like a daunting task, but with the right guidance, it’s quite straightforward. Whether you’re a seasoned RV traveler or a newbie, knowing how to safely light your oven’s pilot light is essential. Not only does it ensure your meals are cooked perfectly, but it also guarantees your safety on the road.Finding The Pilot Light
First, you need to locate the pilot light in your RV oven. Open the oven door and look towards the back. You should see a small metal tube or opening. This is where the pilot light is situated. Sometimes it helps to use a flashlight to get a clearer view.Steps To Light The Pilot
Now that you have found the pilot light, let’s get it lit. 1. Turn Off the Oven: Ensure that all oven knobs are in the ‘off’ position. Safety first! 2. Open the Oven Door: This helps to ventilate any gas that may have built up. 3. Set to Pilot: Turn the oven control knob to the ‘pilot’ setting. Some RV ovens have a separate button for this. 4. Press and Hold: Press and hold the control knob to start the flow of gas to the pilot light. 5. Ignite the Pilot: Using a long match or lighter, carefully bring the flame to the pilot light opening. You should see the pilot light ignite. 6. Hold for a Moment: Keep holding the control knob for about 30 seconds to ensure the pilot light stays lit. 7. Release and Check: Slowly release the knob and check to see if the pilot light remains lit. If it goes out, repeat the process. Always ensure your RV is well-ventilated during this process. Safety should be your top priority. If the pilot light doesn’t stay lit after several attempts, there might be an issue with the thermocouple or another component. In such cases, it’s best to consult a professional. Lighting your RV oven’s pilot light doesn’t have to be a hassle. Have you ever had an experience where the pilot light just wouldn’t stay lit? Share your stories and tips below!Preheating The Oven
Preheating your RV oven is a crucial step in cooking. It ensures that your food cooks evenly and thoroughly. This step can make a big difference in the quality of your meals. So, understanding how to preheat your oven properly is essential.
Optimal Preheat Time
Most RV ovens need about 10-15 minutes to preheat. This time allows the oven to reach the desired cooking temperature. Use an oven thermometer to check the temperature. This tool helps you know when the oven is ready.
Ensuring Even Heat Distribution
Even heat distribution is key for cooking your food properly. Place a baking stone or unglazed tile on the oven rack. This helps distribute the heat evenly. It also prevents hot spots.
Rotate your baking tray halfway through the cooking process. This simple step ensures that all sides of your food cook evenly. Always keep an eye on your food to prevent overcooking.
Troubleshooting Common Issues
Lighting an RV oven can be tricky. Ensure the gas valve is open, then hold a lit match near the pilot light opening. Turn the oven knob to “Pilot” and press it in until the flame lights.
Lighting your RV oven can sometimes be a tricky task. There are common issues that might crop up and hinder the process. Understanding these issues can save you a lot of frustration and get you back to cooking your favorite meals.Pilot Light Won’t Stay Lit
A pilot light that won’t stay lit can be a real headache. Often, this is due to a thermocouple issue. The thermocouple is a safety device that shuts off gas flow if the pilot light goes out. If the thermocouple is dirty or misaligned, it won’t sense the heat correctly. Clean it gently with fine sandpaper and ensure it’s properly positioned. If cleaning doesn’t help, the thermocouple might need replacing. Another common issue is a gas flow problem. Ensure your propane tank has enough gas and that the valve is fully open. Also, check for any kinks in the gas line that might be restricting flow.Oven Not Heating Properly
An oven that doesn’t heat properly can ruin your cooking plans. This could be due to a blocked burner. Check if the burner holes are clogged and clean them with a pin or needle. Sometimes, the thermostat might be faulty. If your oven consistently fails to reach the set temperature, the thermostat might need calibration or replacement. It’s worth having a professional look at it to ensure accuracy. You might also want to check the door seal. A damaged seal can let heat escape, making your oven work harder to maintain the right temperature. Replacing the seal can make a huge difference. Have you faced any of these issues while lighting your RV oven? What solutions worked for you? Share your experiences and tips, and let’s help each other enjoy hassle-free cooking on the road!Maintenance Tips
Maintaining your RV oven is key to its longevity. Proper care ensures safe and efficient operation. Here are some essential maintenance tips.
Regular Cleaning
Keep the oven clean to prevent fire hazards. Wipe spills immediately. Use mild soap and water to clean the interior. Avoid harsh chemicals. Check for food buildup in hard-to-reach areas. This can affect performance.
Inspecting For Leaks
Inspect your oven for gas leaks regularly. A simple soapy water solution can help. Apply it to connections and watch for bubbles. Bubbles indicate a leak. If you find a leak, turn off the gas supply. Contact a professional for repairs. Never ignore a gas leak. Safety first!
Credit: www.youtube.com
Frequently Asked Questions
How To Ignite An Rv Stove?
Turn on the gas supply. Push and turn the stove knob to the “ignite” position. Press the ignition button. Adjust the flame.
How Do I Light The Pilot Light On My Oven?
To light the pilot light, turn the oven knob to “Pilot. ” Hold a lit match near the pilot opening. Keep holding the knob for a few seconds after lighting. Release and check if the pilot stays lit.
Can You Leave The Pilot Light On In An Rv Oven?
Yes, you can leave the pilot light on in an RV oven. It is safe and helps maintain temperature.
How To Ignite A Propane Oven?
To ignite a propane oven, turn the knob to “Pilot” and hold a lit match near the pilot light. Once lit, turn the knob to the desired temperature.
Conclusion
Lighting an RV oven can seem tricky at first. But, with practice, it gets easier. Remember the steps discussed. Always ensure safety first. Double-check gas connections and avoid distractions. Practice makes perfect. Soon, lighting your RV oven will be second nature.
Happy cooking and enjoy your adventures!