
Adjusting a slide out on a camper can seem daunting. But it’s easier than you think.
A slide out can enhance your camper’s space and comfort. Proper adjustment ensures smooth operation and prevents damage. Whether you’re a new camper owner or a seasoned traveler, knowing how to adjust the slide out is essential. This skill can save you time and money on repairs.
In this guide, we’ll walk you through simple steps to adjust your camper’s slide out. You’ll gain confidence in handling this task. Plus, we’ll share tips to keep your slide out in top condition. Ready to learn? Let’s dive in and make your camping experience even better!

Credit: www.youtube.com
Tools Needed
Basic tools like a wrench, level, and tape measure are essential to adjust the slide-out on your camper. Ensure you have these on hand for a smooth process.
Adjusting the slide-out on your camper can seem like a daunting task, but with the right tools, it becomes a manageable and even satisfying DIY project. Whether you are a seasoned camper or a weekend warrior, having the right tools on hand is crucial for a smooth and efficient adjustment. Let’s delve into the tools you will need to get the job done right.Essential Equipment
To start, you must gather the essential tools. These are non-negotiable items that you need to ensure the adjustment is done correctly and safely: – Socket Set: A variety of socket sizes are crucial. You’ll likely need both metric and standard sockets to fit different bolts. – Screwdrivers: Both Phillips and flathead screwdrivers are necessary for removing any panels or covers. – Wrenches: Adjustable wrenches can handle bolts of various sizes. – Tape Measure: Accuracy is key, so a good tape measure helps ensure everything is aligned. – Level: This is essential to ensure the slide-out is even and functions smoothly. – Lubricant: Use a silicone-based lubricant to keep the slide mechanisms running smoothly. Imagine you’re out on a trip, and your slide-out starts sticking. Having these tools on hand can save your vacation from turning into a frustrating experience.Optional Tools
While the essential tools are necessary, there are a few optional tools that can make the job easier and more efficient: – Cordless Drill: Speeds up the process of removing and securing bolts and screws. – Rubber Mallet: Sometimes a gentle tap is needed to adjust parts without causing damage. – Flashlight or Headlamp: Provides better visibility in tight or dark spaces. – Work Gloves: Protects your hands from sharp edges and rough surfaces. – Digital Angle Finder: Ensures precise measurements for perfect alignment. Having these optional tools can turn a good job into a great one. They can save you time and reduce frustration, making the process smoother. Before you start, think about the tools you have. Are you missing any of the essentials or optional tools? Preparing in advance can make all the difference. What other tools have you found useful in your DIY projects? Remember, the right tools not only make the job easier but also safer. So, gather your toolkit and get ready to tackle that slide-out adjustment with confidence!
Credit: www.amazon.com
Safety Precautions
Adjusting the slide-out on your camper involves careful attention to safety. Ensuring safety while performing this task prevents accidents and damage. Below are essential safety precautions to follow when adjusting your camper’s slide-out.
Check Surroundings
Before starting, check surroundings for obstacles. Ensure no objects block the slide-out path. Look for any hazards like branches or debris. Clear these obstacles to prevent damage.
Wear Protective Gear
Wear protective gear to safeguard yourself. Use gloves to protect your hands. Safety goggles shield your eyes from debris. Proper footwear prevents slips and falls.
Preparing The Camper
Preparing your camper for a trip involves several steps. One of the crucial steps is adjusting the slide out. This ensures you have extra space and comfort. Before adjusting, you must prepare the camper properly.
Leveling The Camper
First, make sure the camper is on a flat surface. Use leveling blocks under the tires to achieve this. A level camper is essential for the slide out to function correctly. Check the level using a bubble level tool. Place the tool inside the camper on a flat surface. Adjust until the bubble is centered.
Disconnecting Power
Next, disconnect the power supply to the camper. This includes unplugging from any external power source. Also, turn off the battery disconnect switch if available. This step prevents any electrical issues during adjustment. Safety first.
Inspecting The Slide Out
Inspecting the slide out on your camper is a crucial step to ensure your next adventure goes off without a hitch. Proper inspection can prevent unexpected issues and costly repairs down the road. It’s all about paying attention to the small details and staying proactive. Let’s dive into the key steps of a thorough inspection, starting with a visual examination and checking the mechanisms.
Visual Inspection
Begin your inspection with a careful visual examination. Walk around the camper and look at the slide out from all angles. Are there any obvious signs of damage like cracks, rust, or misalignment? These could be early indicators of bigger problems.
Don’t forget to check the seals around the slide out. Seals that are cracked or peeling can let water in, leading to significant damage over time. If you notice any wear and tear, consider replacing the seals before your next trip.
One time, I noticed a small tear in the seal of my camper’s slide out. I ignored it, thinking it was minor, but after a rainy weekend, the interior showed water damage. A small fix beforehand could have saved me a lot of hassle and money.
Checking Mechanisms
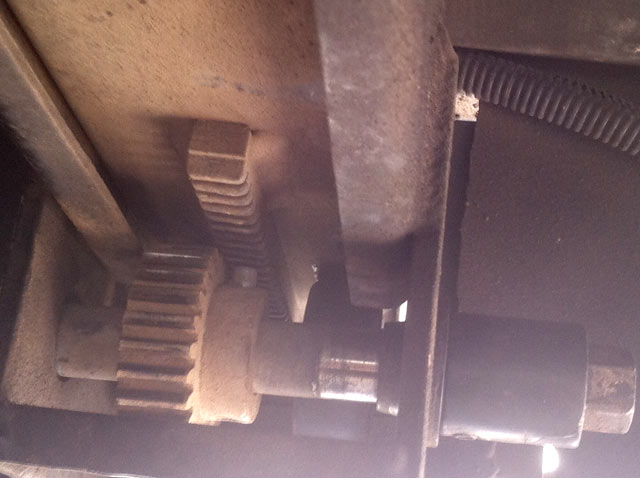
Next, move on to the mechanisms that operate the slide out. These include the motors, gears, and rails. Start by extending and retracting the slide out a few times. Listen for any unusual noises like grinding or squeaking. These sounds can indicate that parts need lubrication or adjustment.
Pay close attention to the alignment of the slide out as it moves. It should slide smoothly and evenly without wobbling. Misalignment can cause strain on the mechanisms and lead to failure. If you notice any issues, it might be time to consult a professional.
Check the wiring and connections to the slide out motor. Loose or corroded connections can lead to electrical failures. Ensure everything is secure and clean, and if you spot any corrosion, clean it off and apply a protective coating.
Have you ever experienced a slide out that wouldn’t retract at the end of a trip? It can be stressful, especially when you’re ready to hit the road. Regularly checking these mechanisms can save you from such last-minute headaches.
Remember, a thorough inspection not only keeps your camper in top shape but also ensures your safety and peace of mind. So, next time you prepare for a trip, take a few extra minutes to inspect your slide out. Your future self will thank you.
Adjusting Alignment
Aligning your camper’s slide out is crucial for smooth operation. If your slide out isn’t aligned properly, it can cause damage. The following guide will help you understand how to adjust the alignment. This will ensure your camper remains in good shape.
Manual Adjustments
First, check your camper’s manual for specific instructions. Most manuals provide detailed steps. Use a level to check the alignment of the slide out. Place the level on the slide out floor. If the bubble isn’t centered, adjustments are needed. Carefully push the slide out in or out. This may require some force. Recheck with the level. Repeat until the bubble centers.
Using Adjustment Tools
Some campers come with adjustment tools. These tools make the job easier. Find the adjustment screws on your slide out. They are usually located on the sides. Use a wrench or screwdriver to turn the screws. Turn slowly to avoid damage. Check the alignment after each turn. Use the level to ensure accuracy. Adjust both sides evenly. This prevents uneven wear.
Credit: liveworkdream.com
Lubrication Tips
Maintaining your camper’s slide-out is crucial for smooth operation. Lubrication is essential to keep the slide-out moving effortlessly. Proper lubrication prevents wear and tear, and prolongs the life of your camper’s slide-out mechanism.
Choosing Lubricants
Select the right lubricant for your camper’s slide-out. Silicone spray is a popular choice. It reduces friction without attracting dirt. Lithium grease is another option. It offers long-lasting lubrication and protection against rust.
Avoid using WD-40. It is not a lubricant, but a cleaner. It can dry out the moving parts and cause damage. Always read the product label. Ensure it is suitable for slide-out mechanisms.
Applying Lubricants
Start by cleaning the slide-out mechanism. Remove any dirt or debris. This ensures the lubricant can work effectively.
Apply the lubricant to the moving parts. Focus on the gears, tracks, and rollers. Use a small amount to avoid buildup. Move the slide-out in and out. This helps distribute the lubricant evenly.
Regular lubrication ensures your slide-out operates smoothly. Schedule this maintenance task every few months. Keep your camper in top shape for your next adventure.
Testing The Slide Out
Testing the slide out on your camper is a crucial step to ensure everything is working smoothly before you hit the road. This part of the process will help you identify any potential issues early, saving you from headaches during your trip. Here’s a detailed guide on how to properly test the slide out, focusing on two key aspects: Extending and Retracting and Checking Smoothness.
Extending And Retracting
Begin by fully extending the slide out. Use the control panel inside your camper to activate the slide out mechanism. Pay close attention to the sounds and movements. Is everything running smoothly, or do you hear any unusual noises like grinding or clicking? These can indicate potential problems.
Once the slide out is fully extended, inspect the seals and edges to ensure they are properly aligned and there are no visible gaps. Misaligned seals can lead to water leaks and drafts, which can be troublesome during bad weather.
Next, retract the slide out completely. This is just as important as extending it. Watch for any hitches or jerky movements. If the slide out struggles to retract, it might need lubrication or adjustment.
During one of my camping trips, I noticed a slight delay while retracting the slide out. It turned out to be a minor obstruction that was easily fixed. Such small checks can prevent bigger issues down the road.
Checking Smoothness
After extending and retracting, focus on the smoothness of the slide out operation. Does it move effortlessly, or does it seem to struggle? A smooth movement indicates that the mechanism is in good condition.
Feel the surfaces and joints of the slide out. Are they clean and free of debris? Dirt and grime can hinder the smooth operation of the slide out. Regular cleaning and maintenance can go a long way in ensuring everything runs seamlessly.
Consider this: What if a lack of smoothness indicates a deeper mechanical issue? Addressing this early can save you time and money. For instance, if you feel resistance, it might be due to misaligned tracks or worn-out gears. These are issues that a professional can easily fix before they escalate.
Test the slide out in various conditions, like on a slight incline or when the camper is fully loaded. These scenarios can reveal hidden issues that might not be apparent in ideal conditions.
By paying attention to these details, you ensure that your camper’s slide out functions perfectly, providing you with a comfortable and hassle-free camping experience. Remember, a smooth-running slide out is not just about convenience; it’s about the safety and longevity of your camper.
So, are you ready to test your camper’s slide out with confidence? By following these steps, you’ll be well-prepared for your next adventure.
Troubleshooting Issues
Adjusting the slide out on your camper can sometimes lead to issues. Troubleshooting these problems is crucial for a smooth camping experience. This section will help you identify common problems and provide simple solutions to fix them.
Common Problems
Slide outs often face alignment issues. This may cause them to jam or move unevenly. Motor malfunctions can also occur. The slide out might not extend or retract fully. Wiring problems are another common issue. Faulty connections can disrupt the power supply.
Solutions And Fixes
To fix alignment issues, check the rails and gears. Clean and lubricate them regularly. For motor malfunctions, inspect the motor and its connections. Replace the motor if it is faulty. If you face wiring problems, examine the wiring for any damage. Repair or replace damaged wires to restore power.
Maintenance Advice
Adjusting the slide-out on a camper involves checking the alignment and tightening bolts. Regular maintenance ensures smooth operation. Lubricate moving parts to prevent wear and tear.
Maintaining your camper’s slide-out system is crucial for ensuring a smooth and enjoyable travel experience. Neglecting this essential component can lead to costly repairs, frustrating trips, and even safety hazards. This section provides practical maintenance advice to keep your camper’s slide-out in top condition. ###Regular Checks
Regular inspections are the cornerstone of effective maintenance. Make it a habit to check the slide-out mechanism before and after every trip. Look for any signs of wear, rust, or damage on the gears and tracks. Pay special attention to the seals. These are critical for preventing water leaks and drafts. Ensure they are not cracked or worn out. If you notice any issues, address them immediately to avoid bigger problems down the road. ###Preventive Measures
Preventive measures can save you time and money. Lubricate the moving parts of the slide-out system at least twice a year. Use a lubricant specifically designed for RVs to avoid any damage. Keep the slide-out clean. Dirt and debris can accumulate in the tracks, causing the mechanism to jam. A simple sweep or vacuum can make a big difference. Consider investing in slide-out stabilizers. These tools provide extra support, reducing the strain on the mechanical parts. They are especially useful if you frequently use your camper in uneven terrains. ###Personal Experience
During one of my trips, I neglected to check the slide-out seals. Halfway through the journey, I encountered heavy rain, and water started seeping into the camper. It was a nightmare trying to keep everything dry. That experience taught me the importance of regular checks and preventive maintenance. Have you ever faced a similar issue? What steps did you take to resolve it? Sharing your experiences can help others avoid the same pitfalls. By following these maintenance tips, you can ensure your camper’s slide-out system remains reliable and functional. This will not only enhance your travel experience but also extend the life of your camper. So, take a few minutes before each trip to perform these checks. Your future self will thank you.Frequently Asked Questions
Can Rv Slideouts Be Adjusted?
Yes, RV slideouts can be adjusted. Regular maintenance and proper alignment ensure smooth operation. Consult your RV manual or a professional for guidance.
Why Is My Camper Slide Not Going Out Evenly?
Your camper slide might not be going out evenly due to low battery power, mechanical issues, or debris obstructing the mechanism. Regular maintenance helps prevent these problems.
How Do I Adjust The Cables On My Rv Slide Out?
To adjust RV slide-out cables, locate the adjustment nuts. Turn them clockwise to tighten or counterclockwise to loosen. Check alignment.
Are Rv Slides Supposed To Be Level?
Yes, RV slides should be level to ensure proper operation and prevent damage. Leveling improves stability and comfort inside the RV.
Conclusion
Adjusting your camper slide out is crucial for a smooth trip. Follow the steps carefully. Regular maintenance ensures its longevity. Check for obstructions before extending or retracting. Lubricate the slide mechanism often. Tighten any loose bolts. Use a level to ensure stability.
A well-adjusted slide out enhances your camping experience. Happy camping!