Painting fiberglass is one of those jobs that looks simple until it isn’t. The surface feels smooth, “clean,” and ready… and then the new coating starts to fisheye, peel, stay tacky, or chip the first time it gets real use. That failure is almost never because you “picked a bad brand.” It’s usually because fiberglass isn’t one surface—it’s a stack: gelcoat with wax residue, oxidation, old polish, invisible oils, and sometimes an older coating with unknown chemistry.
So if you’re here looking for the best paint for fiberglass, I’m going to give you something more valuable than a shopping list: a decision system that explains why certain paints succeed on fiberglass and why others fail—even when the product has great reviews. When you understand the failure points, you don’t just buy a can. You buy a finish that actually survives sun, water, scrubbing, trailer bunks, bathroom humidity, pool chemistry, and the occasional “oops” bump.
This guide is built around real-life friction: the paint that levels beautifully until your garage gets humid, the bottom paint that works in cool water but gets challenged in hot, nutrient-rich marinas, the spray kit that looks perfect for a week and then lifts because the surface wasn’t deglossed enough. We’ll talk about those “after three months” realities—the stuff you only learn after you’ve done a job twice.
Below you’ll find 14 picks that cover the biggest fiberglass scenarios: boat hulls (topside and below the waterline), outdrives and underwater metals, RV roofs, fiberglass tubs and showers, fiberglass pool steps, and small repairs. Every pick includes the truth that matters: what it’s great at, what people complain about, and how to apply it so it behaves like it’s supposed to.
How to Choose the Right Best Paint for Fiberglass (Without Peeling Later)
Here’s the first truth: “fiberglass paint” isn’t a category. Fiberglass is the substrate. The correct paint is determined by what the surface will experience after you apply it: sunlight, abrasion, constant immersion, pool chemicals, saltwater growth, or high humidity and cleaning products. Choose by exposure first, then choose by application method second, and only then worry about brand.
1. Identify your fiberglass “exposure zone” (this is everything)
Most wrong purchases happen because someone buys a marine paint for a bathtub, or a topside gloss for a boat bottom, or a roof coating for a surface that gets scrubbed. Use this quick zone map:
- Zone A — Above the waterline (boats / RV trim / fiberglass panels): You need UV stability, gloss retention, chip resistance, and a paint that levels well on gelcoat. One-part polyurethane topside paints dominate here.
- Zone B — Splash and spray (swim platforms, dinghies, transoms, waterline scuffs): Similar to Zone A, but prioritize abrasion resistance and easy touch-ups.
- Zone C — Below the waterline (boat bottoms): You’re not “painting,” you’re building a controlled-release anti-growth system. Ablative, hard, hybrid, copper-free, multi-season—all of that matters more than shine.
- Zone D — Constant immersion but not marine fouling (pools, fountains, fiberglass steps): Two-part epoxies are common here because they cure hard and resist water exposure and cleaning.
- Zone E — Flexible outdoor membrane (fiberglass RV roofs): You want a flexible coating designed to expand and contract, reflect heat, and tolerate weathering.
- Zone F — High humidity + cleaners (fiberglass tubs, showers, tile surrounds): The finish must handle scrubbing, soap film, and moisture. Prep and cure time become just as important as the paint.
2. Know what fiberglass “prep” actually means (not just sanding)
Fiberglass failures usually show up as: fisheyes, orange peel that won’t level, soft paint, or peeling sheets. The hidden causes are almost always contamination and gloss. Gelcoat often holds wax, polish, sunscreen oils, fuel residue, or boat soap film. That stuff blocks adhesion.
A professional-grade prep sequence looks like this:
- Degrease first: wipe with a proper surface prep solvent or dewaxer. (If you sand first, you can grind contamination into the pores.)
- Sand to remove gloss: you’re not trying to remove gelcoat; you’re trying to dull it uniformly so the paint can grab.
- Vacuum + wipe again: fiberglass dust is clingy. If you leave it, it becomes a weak layer between substrate and paint.
- Prime when the system expects it: primer isn’t “extra.” It’s the bond bridge that prevents chipping and uneven absorption.
3. Understand paint chemistry in plain language
Here’s the cheat sheet you can use without needing a chemistry degree:
- One-part polyurethane (topside): Great gloss and leveling, easier DIY application, strong UV resistance when formulated for marine use. Not for constant immersion.
- Marine primers (topside primers): High solids to fill tiny texture, improve bonding, and give a uniform base that makes your topcoat look “expensive.”
- Ablative bottom paint: Wears away gradually, constantly exposing fresh biocide. Reduces paint buildup over seasons. Often best for boats that move regularly.
- Hybrid / dual-resin bottom paint: Mixes durability of hard paint with controlled polishing to avoid heavy buildup.
- Copper-free antifouling: Uses alternative biocides; avoids galvanic corrosion concerns on aluminum/outdrives and can keep colors brighter.
- Two-part epoxy pool coatings: Hard, chemical-resistant finish for constant immersion environments like pools and water features.
- Acrylic roof coatings: Flexible, reflective “skin” designed for weather exposure and roof movement.
- Spray refinishing coatings (tub/tile): Convenience-first approach that depends heavily on prep and curing discipline.
4. Pick your “application personality” before you pick the can
Some paints are forgiving. Some are high-performance but demand patience. Decide which version of you is doing this project:
- The “I want it to look pro” painter: You’ll do roll-and-tip, you’ll sand between coats, and you’ll let it cure properly. You’ll love premium topside paint + the right primer.
- The “I want it done in a weekend” painter: Choose coatings that dry fast and don’t demand perfect weather. Avoid systems with tight pot life unless you’re confident.
- The “my boat lives in the water” owner: Bottom paint selection is about your water temperature, fouling pressure, and how often you move the boat.
- The “I’m fixing a problem area” DIYer: Small volume options and easy touch-ups matter more than multi-coat perfection.
5. What real user reviews reveal (the stuff listings don’t say)
Across real-world feedback, the same themes show up again and again—no matter the brand:
- Shipping dents: Heavy cans often arrive banged up. The product may still be fine, but plan to inspect lids and seals immediately.
- “The paint was too thin” complaints: Many marine coatings are designed to be applied in thin coats. Thick coats can sag, trap solvent, and stay soft.
- “It didn’t last” complaints: Often linked to missed prep, wrong paint for the zone, or harsh conditions (hot water + heavy growth).
- “It looks amazing” praise: Almost always paired with “I prepped forever” and “I used multiple thin coats.” That’s not coincidence.
Now let’s make this easy: the next section gives you a quick table, then we’ll go deep on each product with the reality-based guidance that turns “good paint” into a finish you actually keep.
Quick Comparison: 14 Best Paint for Fiberglass Picks (By Real Use Case)
Use this table to shortlist your best matches fast. Then jump to the full reviews for the “real life” details—like which paints level beautifully with a foam roller, which bottom paints handle haul-and-relaunch, and which kits demand strict curing discipline to avoid peeling.
On smaller screens, swipe or scroll sideways to see the full table.
| Model | Paint category | Where it belongs | Signature strength | Amazon |
|---|---|---|---|---|
| TotalBoat Wet Edge Topside (White, Gallon) | Topside polyurethane | Above the waterline (boats, RV trim, fiberglass panels) | Levels like a champ with roll-and-tip for “spray-like” gloss | Amazon |
| TotalBoat Marine Topside Primer (White, Gallon) | Marine primer | Above the waterline (under topside paint) | High-solids “one-coat” undercoat that sands smooth fast | Amazon |
| Interlux Fiberglass Bottomkote NT (Blue, Gallon) | Hybrid antifouling | Boat bottoms (underwater fiberglass) | Hard durability + slow polishing to reduce heavy buildup | Amazon |
| TotalBoat Krypton Copper-Free (Black, Quart) | Copper-free antifouling | Below waterline + underwater metals/outdrives | Bright colors + copper-free formula that plays nicer with aluminum | Amazon |
| TotalBoat Spartan (Blue, Gallon) | Multi-season antifouling | Boat bottoms in higher fouling waters | Smooth, abrasion-resistant finish that can be burnished for performance | Amazon |
| TotalBoat JD Select (Blue, Gallon) | Water-based ablative | Boat bottoms (fresh/salt), marina-friendly setups | Low-odor, soap-and-water cleanup, no “launch window” stress | Amazon |
| TotalBoat Underdog (Black, Gallon) | Value bottom paint | Boat bottoms (especially frequent-use boats) | Durable single-season protection designed for real wear | Amazon |
| Olympic Zeron Pool Paint (Black, 2-Part Epoxy) | 2-part epoxy | Pools, fiberglass steps, constant immersion surfaces | Thick, one-coat epoxy system built for durable water exposure | Amazon |
| Dicor RP-FRC-1 Fiberglass RV Roof Coating (White, Gallon) | Acrylic roof coating | Fiberglass RV roofs and roof maintenance | Flexible, reflective coating designed for roof movement and sun | Amazon |
| BEKOMN Tub & Tile Spray Paint (White, 2 Pack) | Refinishing spray | Fiberglass tubs, sinks, tile walls, bathroom fixtures | Fast spray application with a hard, glossy look—if you respect cure time | Amazon |
| Rust-Oleum Marine Wood & Fiberglass Primer (White, Quart) | Budget primer | Above-waterline fiberglass and wood (under topcoats) | Fast-drying, sands easily, improves adhesion and uniform gloss | Amazon |
| TotalBoat Wet Edge Topside (Flag Blue, Gallon) | Topside polyurethane | Above the waterline (color restoration / hull refresh) | Same self-leveling magic—chosen for classic deep marine color | Amazon |
| TotalBoat Wet Edge Topside (White, Quart) | Topside quart | Small fiberglass jobs and touch-ups above the waterline | High-gloss marine finish in a size that makes sense for repairs | Amazon |
| SENVEN Marine Boat Paint (35 oz, Gloss) | All-in-one enamel | Small boats, dinghies, minor fiberglass repairs | Quick-drying gloss for patch jobs when you need a hard film fast | Amazon |
In‑Depth Reviews: 14 Best Paint for Fiberglass Options (What Actually Matters)
This is where we go beyond “it’s glossy” and “it covers well.” I’ll break down what each product is actually designed to do, the common failure modes people run into, and the exact behaviors that show up on real projects—boats, RVs, pools, and bathrooms. Think of these reviews as a shortcut to the experience you’d normally only gain after a few expensive do-overs.
1. TotalBoat Wet Edge Topside (White, Gallon) – The “Looks Sprayed” Finish Without a Spray Booth

Wet Edge wins “best overall” because it solves the problem most fiberglass owners actually have: you don’t just want coverage—you want a finish that makes the boat (or fiberglass panel) look renewed, not “painted.” This is a one-part polyurethane topside paint engineered to level and flow out, which is exactly what creates that near-spray look when you do a clean roll-and-tip routine.
The reason it feels like magic isn’t luck. The formula is designed to self-level, so brush marks relax instead of freezing. That matters on fiberglass because the substrate is unforgiving: gelcoat shows every ripple, every lap mark, every rushed section. In user feedback, the same story repeats: first-time painters are skeptical… then they watch the surface smooth out as it flashes off. That’s a rare “DIY confidence” moment in marine finishing.
The pro move with Wet Edge is to stop thinking in thick coats. Thick coats trap solvent and invite sagging, softness, and extended cure time. Thin coats build depth and hardness, and they sand cleanly between coats. The other pro move: treat the primer as your texture manager. If your fiberglass has small pinholes, old oxidation scars, or sanding scratches, you don’t want to “hide” those with topcoat. You want to fill and fair with primer, sand smooth, then topcoat. That’s how the final gloss looks premium instead of lumpy.
Where Wet Edge shines most is on “high visibility fiberglass”: hull sides, decks above waterline, consoles, lockers, hatches, and RV exterior trim where you want a bright, clean look. The White gallon is a popular workhorse choice because it matches a ton of fiberglass applications and makes aging gelcoat look young again.
Why you’ll like it
- Levels beautifully – The finish relaxes as it dries, reducing roller texture and brush marks.
- High-gloss payoff – When applied thin and evenly, it looks closer to sprayed paint than most one-part products.
- DIY-friendly system – Roll-and-tip is achievable with basic tools if you control dust and work in sections.
- Strong durability story – Owners consistently praise gloss retention and resilience when prep is done right.
- Versatile on fiberglass – Great for boats, RV exteriors, and fiberglass parts that live in the sun.
Good to know
- If you apply it too thick, you can create orange peel or slow curing—thin coats are the secret.
- Weather matters: humidity and dust can ruin the “spray-like” look, so control your environment if you can.
- It’s not for continuous submersion—boat bottoms need true antifouling or immersion-rated epoxy systems.
Ideal for: anyone painting fiberglass above the waterline who wants a professional-looking finish without specialty spray gear.
2. TotalBoat Marine Topside Primer (White, Gallon) – The Undercoat That Makes Your Topcoat Look Expensive

Most fiberglass paint jobs that “look amateur” don’t look that way because the topcoat is bad. They look that way because the surface underneath was never made uniform. Fiberglass is full of tiny valleys—micro scratches, pinholes, old oxidation texture—and topside paint will magnify that texture the moment light hits it. That’s what makes a quality primer so valuable: it doesn’t just help adhesion, it helps appearance.
TotalBoat’s Topside Primer is designed as a high-solids undercoat for topside paints. The high-solids part matters because it fills better than thin primers, and it sands into a smooth, consistent base that makes your finish coat flow and level more predictably. This is why people who pair primer + Wet Edge often say “it came out way better than expected”—the primer quietly did the hardest part: surface uniformity.
Here’s the expert trick: don’t chase full hide with primer. Primer isn’t paint. One thin, consistent coat can be enough to seal and give tooth. If your surface is rough, you can do a second coat, but the goal is still thin consistency. Thick primer can get gummy when sanding, and that’s usually a sign of over-application or insufficient cure. The right process is: thin, even coat → let it dry → sand lightly to knock down texture → wipe clean → topcoat.
This primer also helps you avoid the “spotty gloss” issue. When you topcoat directly over unevenly sanded gelcoat, some areas absorb or grab differently than others. You end up with dull patches and glossy patches. A uniform primer coat acts like a neutral canvas—one of the simplest ways to get a finish that looks intentional.
Why it’s a game-changer
- High-solids filling – Smooths minor texture so your topcoat doesn’t telegraph scratches.
- Sands cleanly – When applied thin, it powders nicely and makes leveling easy.
- Fast workflow – Great for weekend projects where you want steady progress between coats.
- Improves adhesion – Helps topside paint bite into fiberglass and older coatings.
- Pairs perfectly with Wet Edge – Designed for one- and two-part topside systems above the waterline.
Good to know
- Stir thoroughly—high-solids primers settle hard and need real mixing power.
- Apply thin: thick films can sand gummy and slow down your schedule.
- Dust control matters—primer sanding dust is fine and can contaminate your topcoat if not cleaned well.
Ideal for: anyone painting fiberglass topsides who wants fewer imperfections, better gloss uniformity, and a finish that holds up to real use.
3. Interlux Fiberglass Bottomkote NT (Blue, Gallon) – Hard-Paint Durability with Ablative-Like Smarts

Bottom paint is not “paint,” it’s an antifouling system. And the biggest misunderstanding people have is thinking that more coats or a thicker film automatically means more protection. In reality, different antifouling technologies behave differently. Hard paints can build up and turn into a sanding nightmare. Ablatives can wear away unevenly if the boat sits still for long periods or gets scrubbed aggressively. Hybrid systems exist because boat life is messy—and Interlux Bottomkote NT is a classic hybrid.
Bottomkote NT uses a dual-resin approach: it’s durable like a hard paint, but it has a slow polishing mechanism that helps renew the surface and reduce heavy paint buildup over time. That matters if you’ve ever inherited a boat with layers of old bottom paint. You can feel those ridges with your hand. They create drag, they flake, and they make the next job harder. A paint that resists “layer cake” buildup is a sanity saver.
Real-world feedback often describes it as easy to apply and good coverage, but also notes something that’s true of many biocide paints: it has a strong smell and it’s not something you want in your lungs. Use proper ventilation and a cartridge respirator. Another consistent theme: mixing. Bottom paint pigments and biocides settle, and a casual stir isn’t enough. The owners who get great results tend to mix with a drill-mounted mixer and scrape the bottom of the can until it’s uniform.
The practical advantage for DIYers is speed. Fast-dry bottom paint can compress your haul-out schedule and reduce the chance your “one coat day” becomes a three-day weather gamble. But speed doesn’t replace prep. The best Bottomkote jobs come from: thorough scuff sanding, clean surfaces, correct primer/barrier coat when needed, and careful coat thickness in wear areas (leading edges, keel, bow, waterline).
Why it works for many boats
- Hybrid behavior – Durability with a polishing mechanism that helps avoid heavy buildup.
- Fast dry workflow – Helps you paint and keep your schedule tight during haul-out.
- Season-long protection – Designed for consistent antifouling across water types.
- Good coverage – Owners often note you can get solid coverage without excessive paint consumption.
- Stable color – Clean, stable color is useful for seeing wear patterns over time.
Good to know
- Not recommended for aluminum hulls without the correct system—confirm compatibility before use.
- Strong odor and biocide content means you must take ventilation seriously.
- Like most bottom paints, mixing quality directly affects performance—stir like you mean it.
Ideal for: fiberglass boat owners who want a durable underwater coating with reduced “paint layer buildup” pain over multiple seasons.
4. TotalBoat Krypton Copper-Free (Black, Quart) – Bright Color + Strong Growth Control Without Copper

Krypton exists for a very specific problem: you want serious antifouling performance, but you also care about copper-related issues—especially when you’re painting underwater metals like trim tabs and outdrives, or dealing with aluminum where galvanic corrosion concerns are real. Krypton is copper-free, and that changes both behavior and aesthetics: colors can stay brighter because you’re not mixing pigment into a copper-heavy base.
Where Krypton really shines in real-world use is on “awkward underwater parts”: outdrives, props (where appropriate), trim tabs, and other below-waterline metals where people want an antifouling coat without inviting corrosion worries. Reviewers often mention strong adhesion when paired with the right primer and praise how clean the finish looks—an eggshell sheen that hides minor imperfections rather than spotlighting them. That matters because underwater surfaces are rarely showroom perfect after sanding.
Another practical advantage for DIY scheduling: there’s no maximum dry time before launch. That means you can paint well ahead of the season, haul and relaunch without the panic of “did I miss the window?” That’s huge if your boatyard schedule is unpredictable or you’re painting in stages. For travelers who trailer or haul mid-season, this flexibility can feel like a superpower.
What’s the “real” Krypton tactic? Don’t skimp on stirring and don’t underestimate how much surface prep affects copper-free performance. Copper-free paints rely on the biocide package and the paint film wearing/renewing properly. If you apply it over chalky, oxidized, poorly cleaned surfaces, you can create weak spots where fouling starts. If you prep properly, Krypton can be remarkably clean-looking after long exposure—exactly why it’s earned attention in comparative discussions.
Why it stands out
- Copper-free formula – Great option when you’re concerned about copper on underwater metals or aluminum setups.
- Bright, stable color – Cleaner pigment appearance than many traditional copper-heavy antifoulings.
- Flexible launch timing – No maximum dry-time-to-launch pressure helps real-world scheduling.
- Looks good while working – Eggshell finish hides minor prep scars better than high gloss.
- Quart size makes sense – Perfect for outdrives, trim tabs, and targeted antifouling projects.
Good to know
- Like all antifouling paints, performance depends heavily on prep and correct film thickness.
- Shipping dents happen often with heavy cans—inspect the seal and lid immediately on arrival.
- If your waters have extreme fouling pressure, you may still need periodic checks and cleaning.
Ideal for: copper-averse boaters, outdrive owners, and anyone who wants antifouling protection on fiberglass and underwater metals with flexible launch timing.
5. TotalBoat Spartan (Blue, Gallon) – Multi-Season Muscle for Harder Waters
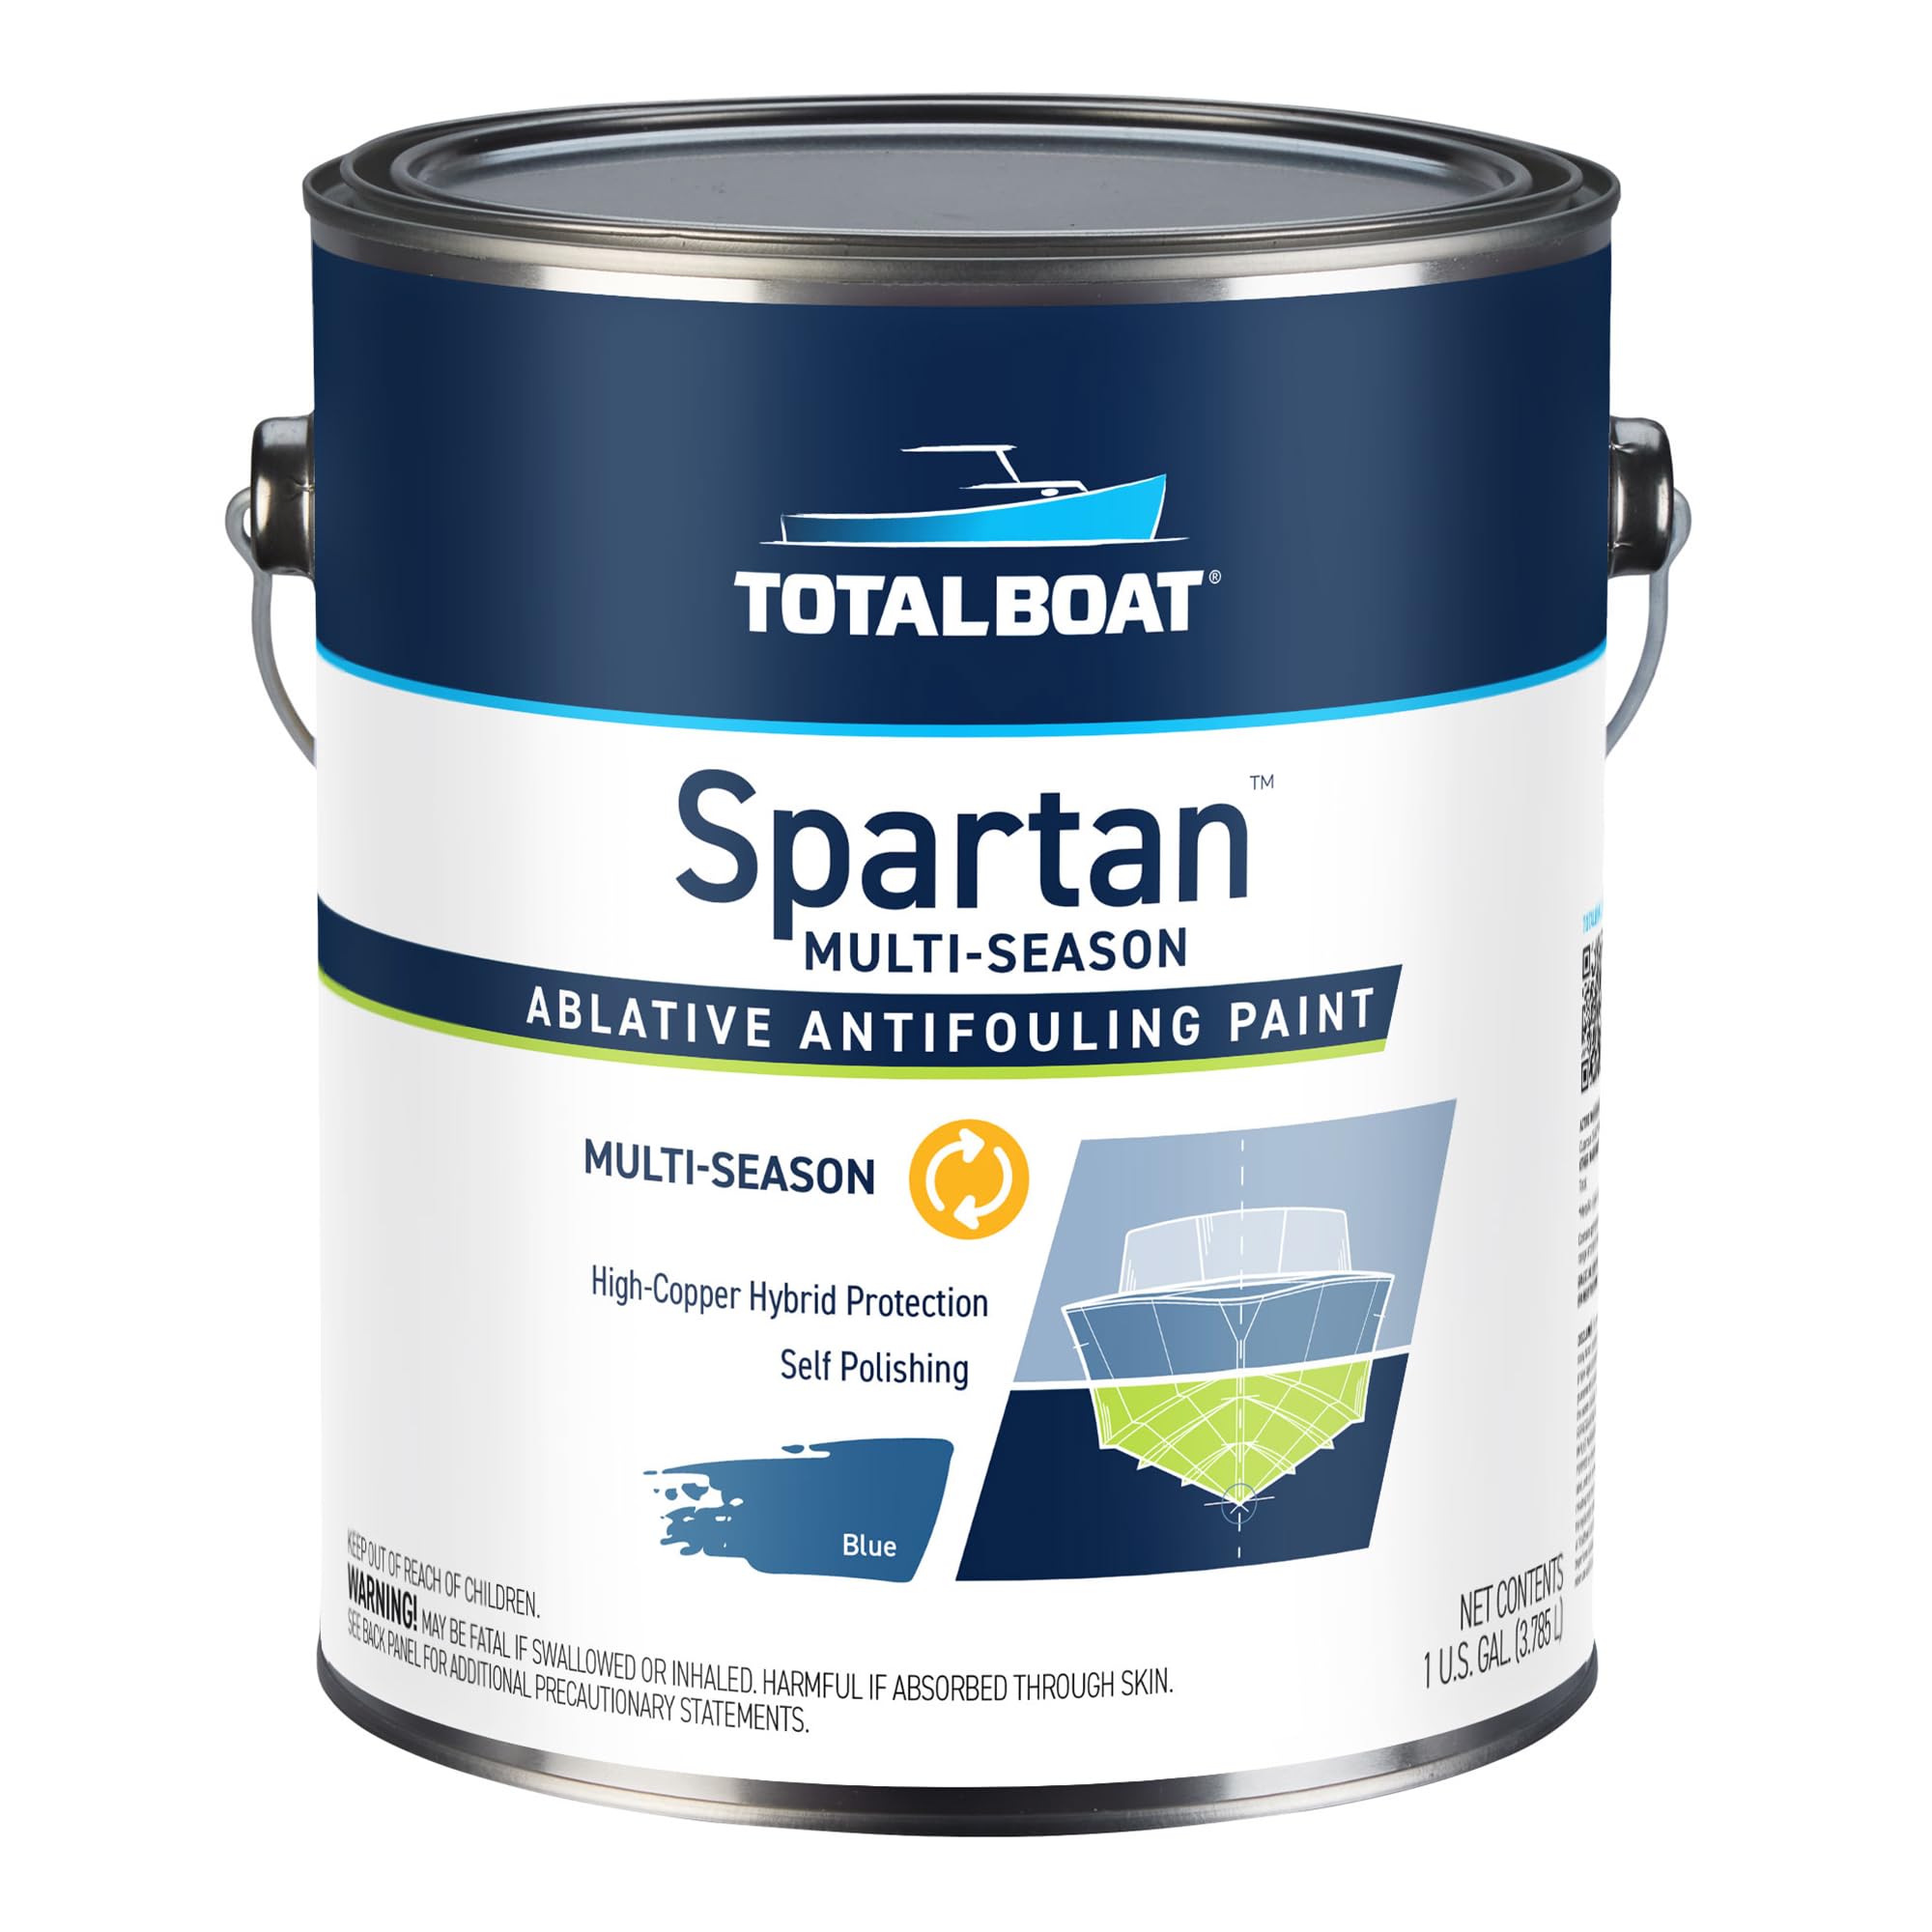
Spartan is for boat owners who don’t want to gamble with growth. In warm, nutrient-rich, high-fouling environments, the difference between “good bottom paint” and “great bottom paint” is whether you’re scrubbing constantly or actually enjoying the boat. Spartan is built around multi-season protection and a controlled-release, self-polishing ablative approach—meaning it’s designed to renew the active surface as the boat moves through the water.
The performance-side benefit is twofold. First, a smooth, abrasion-resistant finish helps efficiency. Second, the film can be burnished for a racing-style finish, which is not just about speed—it’s also about keeping the surface less hospitable to growth. Smooth surfaces don’t magically stop fouling, but they do make it harder for organisms to anchor and easier for the paint to shed growth under movement.
Real-life feedback on Spartan tends to split into two groups:
- Group 1 (“It was great”): Usually boats that are used regularly—movement helps ablatives perform as intended.
- Group 2 (“I still got growth”): Often boats sitting in very hot water, heavy current, or high growth zones where even strong paints may need periodic cleaning. Some owners also discover that growth can appear first where film thickness is thin or prep was rushed.
The expert move is to treat Spartan like a system, not a single coat. Apply extra coats in high-wear areas (leading edges, waterline, keel) and make sure your barrier coat and primer situation is correct. Also: mix thoroughly. High-biocide paints settle. If you don’t power-mix and scrape the bottom of the can, you can literally paint a lower-biocide layer onto your hull and then wonder why one section grows faster than another.
If you’re a trailer boater, Spartan can also behave differently than softer ablatives: it’s designed to be abrasion resistant and handle real-world handling. Many owners like that it doesn’t instantly rub off on bunks and rollers when applied correctly and allowed to cure.
Why Spartan earns its reputation
- Built for tougher fouling – Multi-season intent makes it a strong candidate in challenging waters.
- Self-polishing behavior – Designed to renew the active surface instead of building thick layers.
- Can be burnished – Smoother finish can improve efficiency and reduce “draggy” buildup.
- Haul-and-relaunch friendly – Designed for real boating schedules where haul-outs happen.
- Durable film – Better suited than many soft ablatives for boats that see trailering or beaching.
Good to know
- In extremely warm, high-growth zones, you may still need periodic wipe-downs—no paint is magic.
- Performance varies with boat usage; boats that sit still can see more growth than boats that move regularly.
- Apply and mix carefully—uneven film thickness often predicts uneven growth patterns.
Ideal for: fiberglass boat owners in higher-fouling waters who want a more serious, multi-season antifouling approach and a smoother performance-minded finish.
6. TotalBoat JD Select (Blue, Gallon) – Water-Based Ablative That’s Easier to Live With

JD Select is the kind of product you appreciate when you’ve painted bottom paint in a real marina environment. Traditional solvent-based antifouling can be intense: fumes, cleanup hassle, and the general “my clothes will never recover” vibe. JD Select is water-based, low VOC, and cleans up with soap and water, which makes the whole project feel more manageable—especially for DIYers doing the job at home or in facilities with stricter environmental rules.
Performance-wise, JD Select is a single-season ablative. That means the film gradually wears away as the boat moves through the water, exposing fresh biocide. When that mechanism works as intended, the hull stays cleaner with less heavy paint buildup year-over-year. It also means you often have less sanding pain next season because you’re not stacking hard layers on top of hard layers.
Here’s the real-world nuance: water-based bottom paints can behave differently during application. Some users report that it “dries too fast” while rolling, especially in warm or breezy conditions. That’s not a defect—it’s the nature of water-based films. The fix is technique: work in smaller sections, maintain a wet edge, and consider lightly thinning within recommended limits when conditions demand it. Another pro trick: keep your roller appropriately loaded so you’re laying down an even film, not dry-rolling texture into the paint.
JD Select is also loved for scheduling flexibility. Like some other TotalBoat bottom paints, there’s no maximum dry time before launch, so you don’t have the stress of “painted too early.” That matters when weather turns, haul-out dates slip, or you prefer to paint before winter storage so spring launch is effortless.
If you want a bottom paint that feels less harsh during application but still behaves like a real antifouling system, JD Select is one of the most livable picks. Just treat it like a coating system: proper prep, correct film thickness, and extra attention on high-wear zones.
Why people choose it
- Low odor + low VOC – Makes the project less brutal and more feasible in tight spaces.
- Easy cleanup – Soap and water cleanup is a huge quality-of-life upgrade.
- No maximum launch time – Flexible scheduling for fall painting or unpredictable boatyard timelines.
- Less paint buildup – Ablative behavior can reduce future sanding headaches.
- Good DIY accessibility – Brush/roll/spray options give you flexibility.
Good to know
- Can feel “fast drying” during rolling in warm conditions; work in sections and keep a wet edge.
- Single-season protection means you should plan your maintenance cycle realistically.
- Like all bottom paints, prep quality and mixing quality make or break results.
Ideal for: boat owners who want a more breathable, user-friendly bottom paint experience and appreciate flexible launch timing without harsh solvent cleanup.
7. TotalBoat Underdog (Black, Gallon) – The Durable Single-Season Workhorse

Underdog is built for a very common reality: you want reliable bottom protection for a season, you want it to be durable enough to handle real wear, and you don’t want a product that feels precious or complicated. It’s an economical antifouling option designed to keep slime, algae, grasses, and common fouling growth at bay with a film that can tolerate trailering and normal scrapes better than some softer ablatives.
In owner reviews, two themes show up consistently. First: “It goes on fantastic.” People often praise how it brushes and rolls, how it dries flat without ugly roller marks, and how it covers older colors well. Second: shipping and packaging. Heavy paint cans often arrive dented, and some users have had shipping damage frustrations. That’s not unique to this paint—it’s a logistics reality for hazmat coatings—but it’s worth knowing so you inspect immediately and avoid last-minute surprises.
Performance feedback is often realistic and honest: people commonly get a full season, sometimes longer in fresh water or moderate conditions. That’s exactly what single-season paints are designed for. The win is predictability. When you know you’re going to haul annually, a paint that behaves consistently, doesn’t build up excessively, and doesn’t require exotic application steps is a good partner.
The expert application move for Underdog is mixing and film control. Many bottom paints settle; Underdog is no exception. Power-mix and scrape the can. Then apply one or two coats depending on your wear expectations, adding extra on leading edges and wear areas. If you’re coating over older paint, do a compatibility scuff and spot test first—especially if the existing paint type is unknown.
Underdog is not trying to be a luxury multi-season racing finish. It’s trying to be the paint you can confidently apply, launch, and not think about constantly. For a lot of boat owners, that’s the best “value” feature of all.
Why it’s a smart pick
- Durable for real use – Better suited than many soft ablatives for trailering and normal wear.
- Easy application feel – Owners often praise brush/roller behavior and coverage.
- Predictable seasonal protection – Great for annual haul-out routines.
- Less buildup over time – Ablative behavior can reduce year-to-year sanding misery.
- Good “first bottom paint” option – Forgiving choice if you’re learning the process.
Good to know
- Shipping dents are common with heavy paint cans; inspect seals immediately.
- Single-season protection means you should plan recoat intervals around your water conditions.
- Like all antifouling paints, it performs best when the boat is used regularly (movement helps).
Ideal for: boaters who want dependable single-season antifouling protection with a durable film and a straightforward DIY application experience.
8. Olympic Zeron Pool Paint (Black, 2-Part Epoxy) – The Hard-Curing “One-Coat” Pool System

If your fiberglass project is a pool, a set of fiberglass steps, a coping section, or a water feature surface that stays immersed, you are in a totally different world than marine topside paint. Pool environments are about constant water exposure, cleaning, and chemistry. This is where two-part epoxies like Zeron have a long history: they cure hard, form a dense film, and can deliver a tile-like look when applied correctly.
Zeron is known as a high-solids, thick epoxy system marketed as a one-coat coating (though real-world pros often do spot builds or second coats where needed). The kit includes a base and catalyst that must be mixed thoroughly and used within the workable time window—this is the big “epoxy reality” difference from one-part paints. With epoxies, you don’t paint at your pace. You paint at the chemical reaction’s pace. Reviewers regularly mention that it applies beautifully when mixed correctly, but can start to thicken/harden if you mix too much at once or work in very warm conditions.
Here’s what expert users do:
- Mix in smaller batches instead of committing the whole kit at once—especially in warm weather.
- Stage your work area so you’re not walking around looking for tools while the pot life ticks away.
- Prep is non-negotiable because epoxy will lock in anything left behind—chalk, oils, loose material, old failing coatings.
Zeron also has a “feel” difference. It’s thicker than household paint, so it tends not to drip as easily, and it can cover well in a steady coat. But it’s still a coating system: surface profile, temperature, humidity, and cure schedule determine whether you get a hard, durable finish or a surface that marks easily. Some long-term users report excellent service life with periodic touch-ups, which is exactly how many pool pros treat epoxy coatings—maintenance cycles, not forever coatings.
If you want an immersion-ready finish on fiberglass, Zeron is the specialized tool for the job. Just don’t treat it like a casual repaint. Treat it like a controlled application process, and it rewards you with a hard, glossy surface that can dramatically refresh old fiberglass pool components.
Why it’s the right tool
- Epoxy hardness – Designed for constant immersion environments like pools and steps.
- Thick, high-solids feel – Covers well and creates a substantial film.
- Glossy “tile-like” look – Aesthetic upgrade when applied evenly on a well-prepped surface.
- Pro-style system – Built for serious pool restoration work, not just cosmetic touch-ups.
- Great for problem areas – Useful for fiberglass steps and coping where discoloration is common.
Good to know
- Pot life is real—mixing too much at once can turn the job into a race against hardening.
- Warm temperatures can shorten workable time; plan your schedule and batch size accordingly.
- Surface prep and cure discipline determine results; epoxy is unforgiving of shortcuts.
Ideal for: fiberglass pools, steps, and constant-immersion surfaces where a hard-curing epoxy system is the correct chemistry choice.
9. Dicor RP-FRC-1 Fiberglass RV Roof Coating (White, Gallon) – Flexible, Reflective Roof Refresh

An RV roof is fiberglass, yes—but it behaves more like a moving membrane than a rigid hull side. The roof expands, contracts, flexes slightly, and lives under relentless sun exposure. That’s why roof coatings are their own category. Dicor’s Fiberglass RV Roof Coating is built around a flexible acrylic resin approach, designed to refresh the appearance and protect the roof while tolerating that movement.
Owners often describe the immediate payoff as twofold: the roof looks cleaner and brighter, and the surface can feel cooler under sun due to reflectivity. In real-world use, that can translate into less heat load inside the RV, especially in bright summer conditions. The “white roof looks new again” factor also matters for resale and simple pride—RV roofs get stained, oxidized, and streaky over time, and a fresh coat can reset that visual age.
Where roof coatings succeed or fail is almost always preparation and application thickness. Roof coatings are not like topside hull paint. They’re designed to form a flexible layer, and that means you need uniform coverage without overworking it. Users who report streaking or runoff often applied in conditions where the coating didn’t set fast enough, or applied too heavy in a way that invited sagging. The practical fix is boring but effective: apply in the recommended conditions, keep coats even, and respect dry times.
Another real-world concern is shipping and packaging. Heavy coatings can arrive with lid issues, and RV owners who paint on a tight schedule get understandably frustrated by spills. The solution is simple: plan delivery to a day you’re home, inspect immediately, and store upright and sealed before the job.
If your fiberglass project is an RV roof, don’t use boat topside paint. Use a roof-specific coating that is designed to stay flexible and reflective. Dicor is a targeted solution built for that exact problem.
Why RV owners like it
- Flexible acrylic system – Designed to expand/contract with roof movement.
- Bright white refresh – Restores a clean look and improves reflectivity.
- Weather-focused protection – Built for sun, rain, and outdoor roof exposure.
- Maintenance mindset – Great for extending roof life when paired with proper cleaning/prep.
- DIY-friendly application – More approachable than many specialty roof systems.
Good to know
- Can run if applied too heavy or in poor drying conditions; thin, even coats win.
- Prep matters: roof coatings need clean, properly prepped surfaces to bond well.
- Packaging issues happen; inspect lids and store upright before application day.
Ideal for: fiberglass RV roof owners who want a roof-specific coating that refreshes appearance and provides a flexible, reflective protective layer.
10. BEKOMN Tub & Tile Spray Paint (White, 2 Pack) – Fast Resurfacing, But Only If You Respect the Cure

Fiberglass tubs and shower surrounds are a special kind of challenge because the failure mode is brutal: peeling sheets where water sits, worn patches where feet and scrub brushes hit, and “looks great for a week” jobs that break your heart. Spray refinishing products exist because people want a bathroom refresh without full replacement. BEKOMN’s kit is designed for porcelain, ceramic, and fiberglass surfaces like tubs, sinks, tile walls, and countertops—with a cured film that aims to feel hard and glossy.
The key word here is cured. Owners who get excellent results usually follow a very strict discipline:
- They prep aggressively (cleaning, degloss sanding, removing soap scum and silicone residue).
- They apply multiple thin coats, not “let’s cover it in one go” coats.
- They avoid water contact during the full cure window, even if it looks dry on day one.
The reviews reflect that reality. Many people love the immediate transformation—bright, even, “looks new” results. But the negative experiences usually track the same pattern: peeling after curing, or soft spots where water exposure or cleaning happened too early. This isn’t about being “fussy.” It’s about chemistry. Coatings can feel dry to the touch long before they reach full hardness and chemical resistance.
Another real-world note: odor. Refinishing aerosols often have a strong smell. Plan for ventilation: open windows, run fans, and use a proper respirator. That’s not optional in a small bathroom—both for comfort and for application quality (better airflow helps solvent flash and cure behavior).
Here’s the expert way to think about BEKOMN: it’s a convenience tool that works when you treat it like a system. If you’re willing to do prep like a pro and cure like a patient person, it can be a big visual upgrade on fiberglass bathroom surfaces. If you want to spray and use the tub immediately, you’re rolling the dice.
Why it can be a big win
- Fast visual transformation – Makes aged fiberglass look dramatically cleaner and newer.
- Spray convenience – Useful for curves, corners, and surfaces where rolling is awkward.
- Hard-film goal – Designed to cure into a tougher surface than basic spray paint.
- Works across common fixtures – Tubs, tile walls, sinks, counters, and more.
- DIY approachable – Clear process: prep, thin coats, cure discipline.
Good to know
- Cure discipline is everything—rushing water exposure is a common reason for peeling.
- Odor can be strong; ventilation and a proper respirator make the job far more manageable.
- Thin coats matter; heavy coats can trap solvent and reduce adhesion.
Ideal for: fiberglass bathroom refinishing projects where you can commit to serious prep and a true cure window before exposing the surface to water and cleaners.
11. Rust-Oleum Marine Wood & Fiberglass Primer (White, Quart) – Simple Adhesion Insurance Above the Waterline

If you’re painting fiberglass above the waterline and you want a straightforward primer that improves adhesion and helps your topcoat look uniform, Rust-Oleum’s Marine Wood & Fiberglass Primer is a classic option. It’s meant as a base coat for better adhesion and longer-lasting finishes on wood and fiberglass—specifically above the waterline. Think: small boats, fiberglass repairs, interior lockers, utility areas, and projects where you want a reliable base without overcomplicating the system.
User feedback on primers tends to be blunt and useful. People often mention that the toughest part is sanding—because that’s where you win the final look. When they sand thoroughly and apply primer and topcoat with patience, they get results that feel like a total transformation. When they rush, they usually get texture issues. One common practical note with this primer category: it can settle thickly. If you open the can and see sludge, that’s normal for high-solid primers. The fix is elbow grease—or better, a drill mixer. Mix until the consistency is uniform.
This primer also sands easily, which is a big deal for fiberglass. Fiberglass wants to show every sanding scratch, and a primer that sands predictably helps you refine the surface. When you sand primer, you’re not trying to remove it—you’re leveling peaks and creating a surface that lets the topcoat level smoothly. That’s how you avoid the “looks okay from far away” finish and get something you’re proud of up close.
Where Rust-Oleum’s primer is especially helpful is on older, repaired, or imperfect surfaces. Primer acts as a stabilizer for slight differences in texture and absorption. It also helps prevent topcoat from “sinking in” unevenly on repairs, which can show up as patchy gloss.
If your project is a high-visibility hull side and you want the maximum pro look, you may prefer a primer matched to your topside system (like TotalBoat’s undercoat). But if you want a clean, dependable primer approach that gets the job done for many above-waterline fiberglass jobs, this one is an easy, proven tool.
Why it’s useful
- Improves adhesion – Helps topcoats bond better to fiberglass and older coatings.
- Sands easily – Makes surface leveling more predictable for smoother finishes.
- Fast drying – Keeps DIY projects moving without long waiting periods.
- Good for imperfect surfaces – Helps unify repairs and older fiberglass textures.
- Simple system – Straightforward primer step for better topcoat performance.
Good to know
- Not intended for below-waterline use; keep it above the waterline in marine applications.
- Can settle heavily; thorough mixing is essential for consistency and performance.
- Your sanding quality still determines the final look—primer supports prep, it doesn’t replace it.
Ideal for: above-waterline fiberglass projects where you want a straightforward primer step to improve adhesion and create a smoother base for topcoat.
12. TotalBoat Wet Edge Topside (Flag Blue, Gallon) – Same Pro-Leveling Behavior, Iconic Deep Color
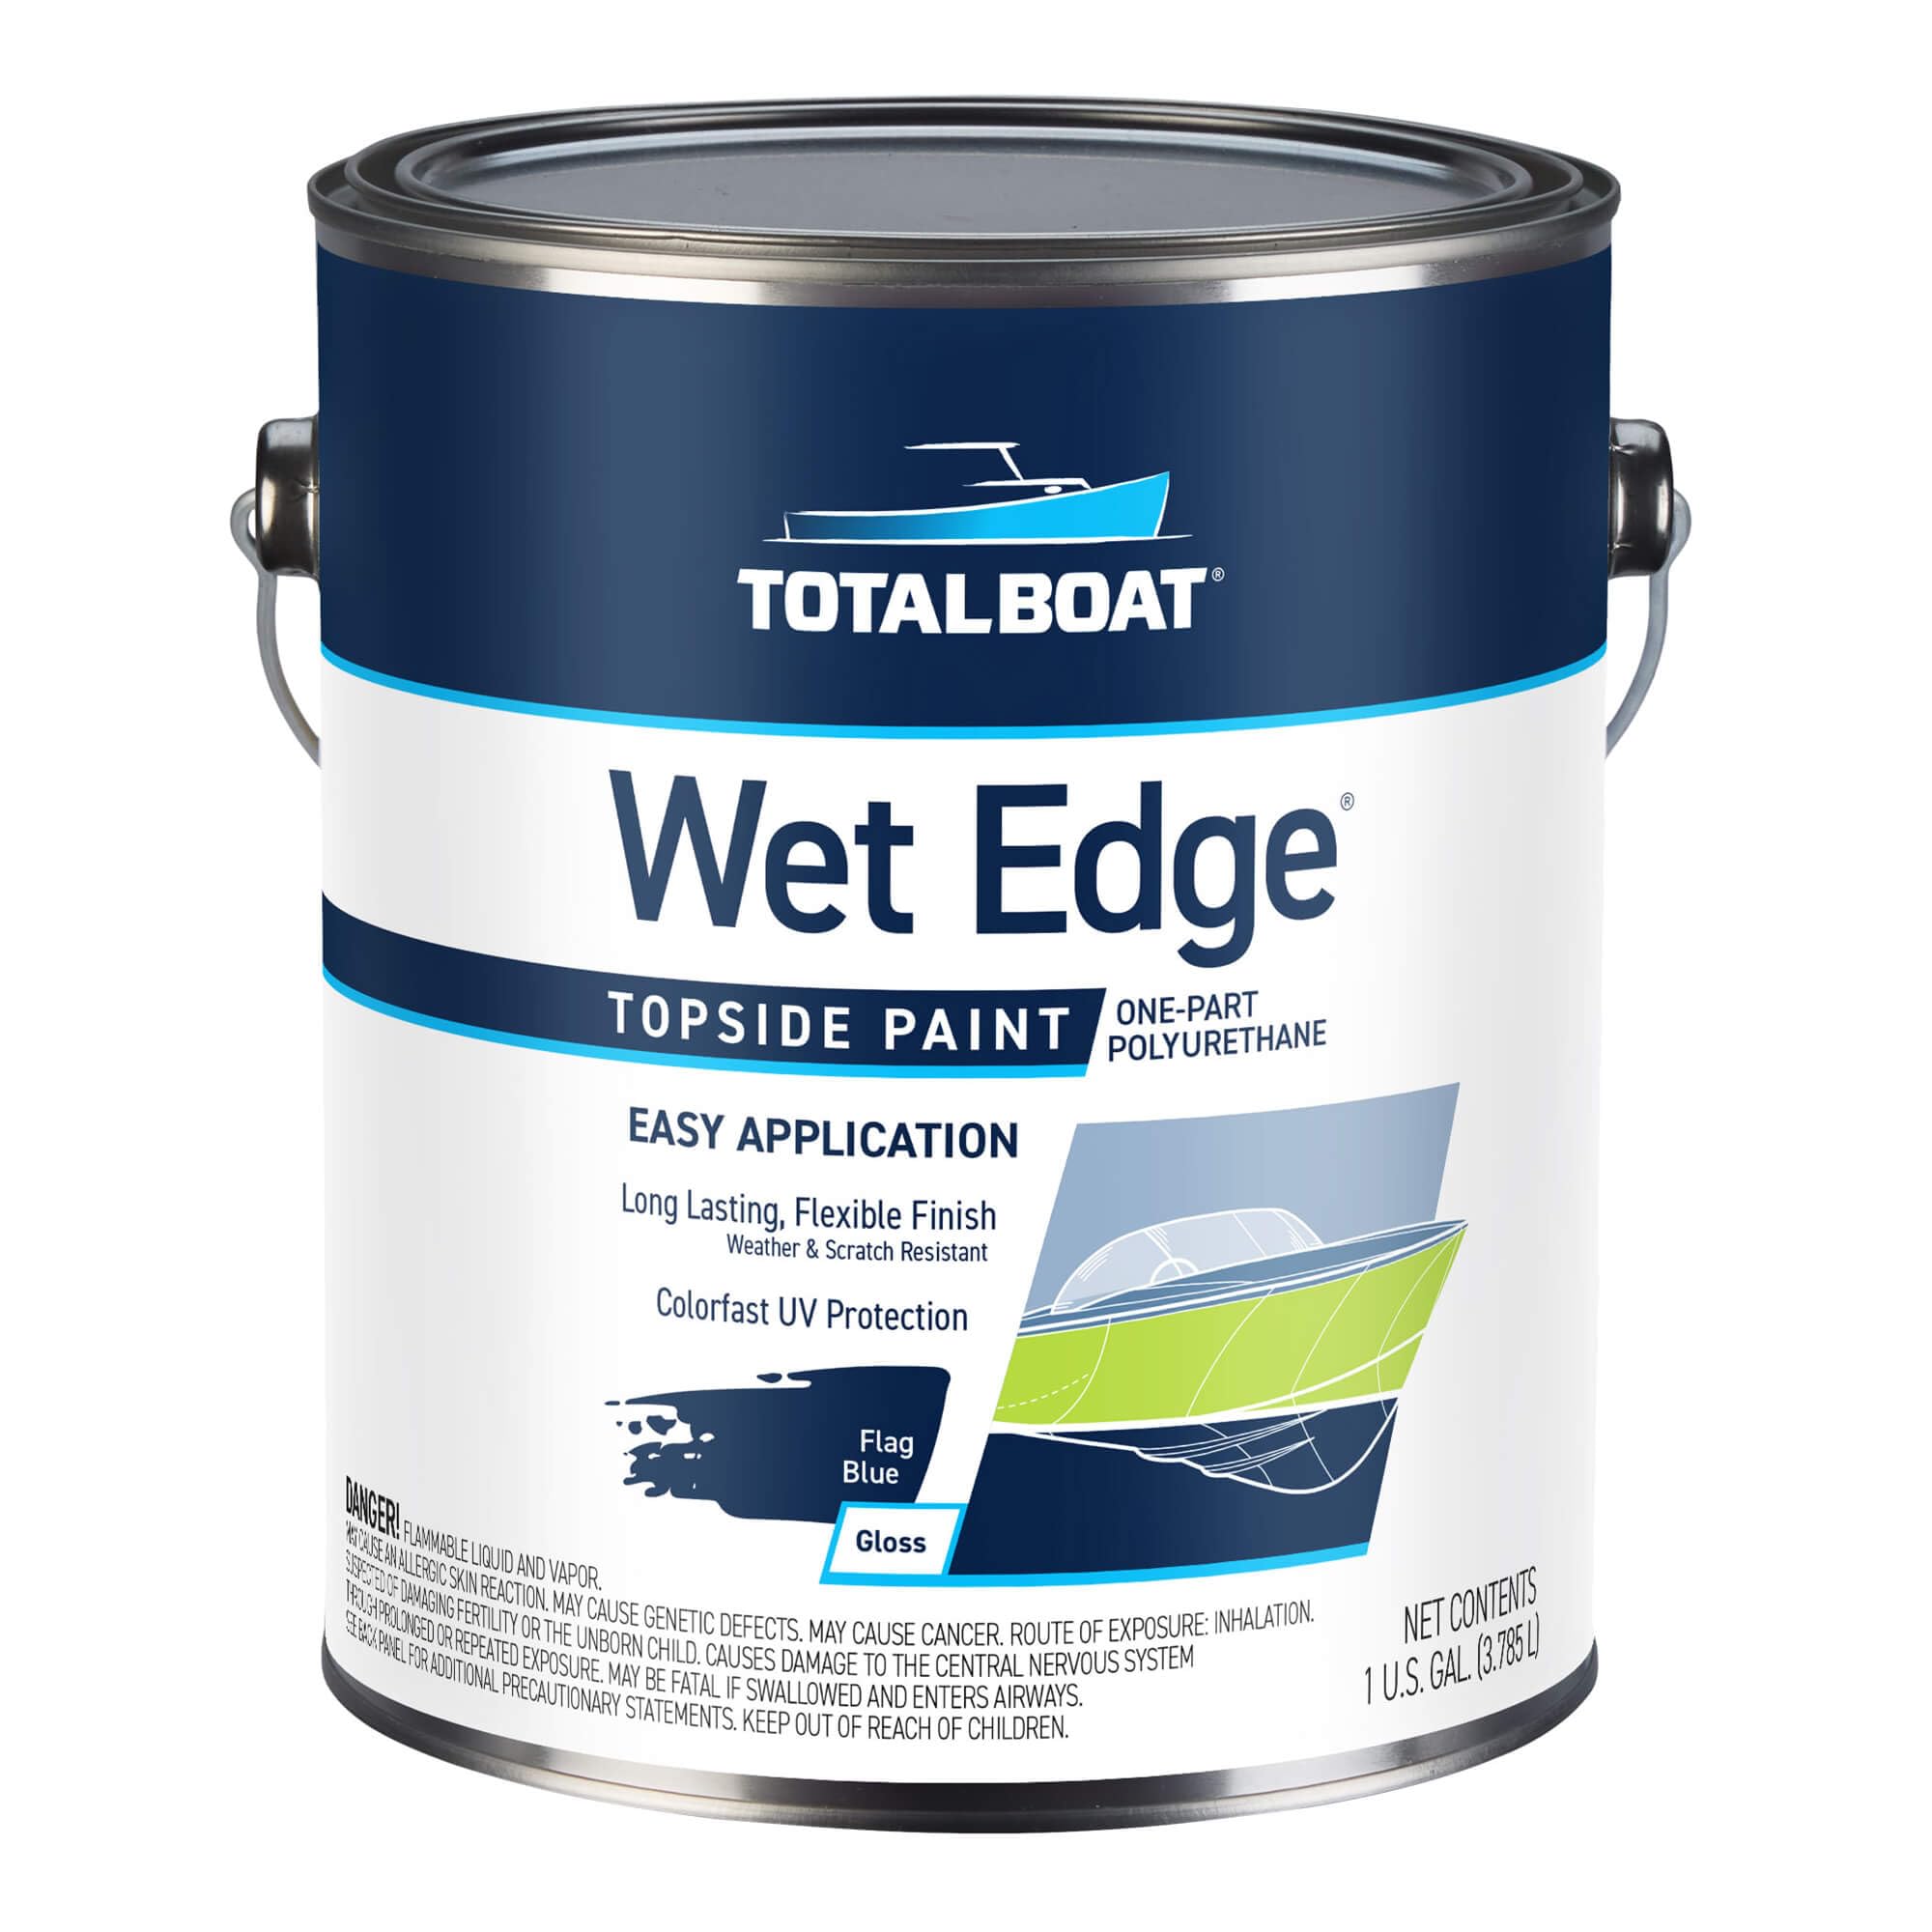
We already covered why Wet Edge is a top-tier topside system. This Flag Blue gallon listing deserves its own spot because color choice is not cosmetic on fiberglass—it’s a strategy. Darker, richer hull colors will highlight surface fairness. That sounds scary, but it’s actually a gift: it forces you to prep correctly and rewards you with a finish that looks like a full restoration, not a cover-up.
Flag Blue is one of those “classic boat colors” that instantly makes a fiberglass hull look more intentional and premium—when the surface is properly faired and primed. That’s why people who roll-and-tip this color often mention how shockingly good it looks for a DIY job. The paint’s leveling behavior plus a deep color gives you that “wet” look that feels like a professional job.
Here’s the expert warning: deep colors are brutally honest. If you have waves, pinholes, or sanding scratches, you will see them under oblique light. That’s not a Wet Edge problem. That’s what dark glossy colors do. The fix is process:
- Fair first – fill dings and gouges; don’t try to hide them with paint.
- Prime and sand – use primer as a leveling tool, not just an adhesion tool.
- Control your coats – thin, even coats reduce texture and increase depth.
Flag Blue is also a great choice for restoration projects because it hides some “age stains” better than bright white does. White highlights every small discoloration and oxidation mark. Deep marine colors can make old fiberglass look uniform again—especially if you’re repainting an older hull that has uneven gelcoat tone.
If you want the Wet Edge look but you’re craving a more dramatic before/after transformation than white offers, Flag Blue is a high-impact option. Just be ready to earn it with prep—and you’ll love the result.
Why this color choice matters
- Iconic deep finish – High visual payoff for hull sides and classic fiberglass restorations.
- Same leveling behavior – The Wet Edge “flow out” advantage still applies here.
- Looks premium when prepped – Dark gloss + smooth substrate = pro appearance.
- Great restoration impact – Often produces the most dramatic before/after results.
- Strong durability with correct system – Excellent as part of a proper primer + topcoat process.
Good to know
- Dark gloss shows surface flaws; primer sanding and fairing become non-negotiable.
- Dust control matters more on dark colors; tiny nibs are more visible.
- Like all topside paints, not intended for constant immersion; keep it above the waterline.
Ideal for: fiberglass boat owners doing a visible hull refresh who want a classic deep color with high gloss and near-spray appearance potential.
13. TotalBoat Wet Edge Topside (White, Quart) – The Smart Size for Repairs and Small Fiberglass Projects

Not every fiberglass project needs a gallon. Sometimes you’re dealing with a hatch cover, a console panel, a repaired corner, a swim platform touch-up, or a small boat that needs a cosmetic refresh without turning into a full refit. That’s where the Wet Edge quart is quietly brilliant: you get the same leveling, gloss, and durability story, but in a size that actually matches “real life repairs.”
The biggest mistake people make on small fiberglass jobs is under-prepping because the job feels small. A small job still fails the same way a big job fails: contamination, gloss, and impatience. The quart size is great because it lowers the psychological cost of doing it right. You’re more likely to do:
- proper dewax/cleaning
- a full degloss sand
- a careful wipe-down and dust control
- two thin coats instead of one thick coat
Another advantage: touch-up blending. When you have a quart on hand, you can revisit high-wear areas and maintain your finish instead of letting chips accumulate until a full repaint becomes necessary. That “maintenance paint” mindset is how many experienced boat owners keep fiberglass looking good year after year without the big overhaul.
In terms of application, everything from the gallon still applies: foam rollers for smoother laydown, quality brushes for tipping, and thin coats for better leveling. If you’re doing a small job indoors, the quart also makes it easier to manage fumes and workflow. You can pour small amounts, keep your can sealed, and reduce solvent exposure while you work.
If you’re buying Wet Edge for the first time and you’re unsure how it behaves in your environment, the quart can also be a smart “test run.” Do a hatch or a locker, learn your technique, then decide if you want a gallon for the full hull or deck.
Why it’s practical
- Perfect size for repairs – Great for consoles, hatches, small boats, and touch-ups.
- Same leveling and gloss – You’re not “downgrading,” you’re just buying the right quantity.
- Encourages maintenance – Lets you keep a finish fresh instead of waiting for a full repaint crisis.
- Great for learning technique – Easier entry point into roll-and-tip without committing to a full gallon.
- Less waste – More likely to finish the can before it ages in storage.
Good to know
- Still requires proper prep; small jobs fail just as dramatically if contaminated.
- Gloss highlights texture; primer and sanding still matter for a “pro” result.
- Not designed for constant immersion; keep it for above-waterline use.
Ideal for: fiberglass touch-ups, small repaint projects, and anyone who wants Wet Edge performance in a quantity that matches real-world maintenance.
14. SENVEN Marine Boat Paint (35 oz, Gloss) – Quick-Drying Patch Paint for Small Fiberglass Needs
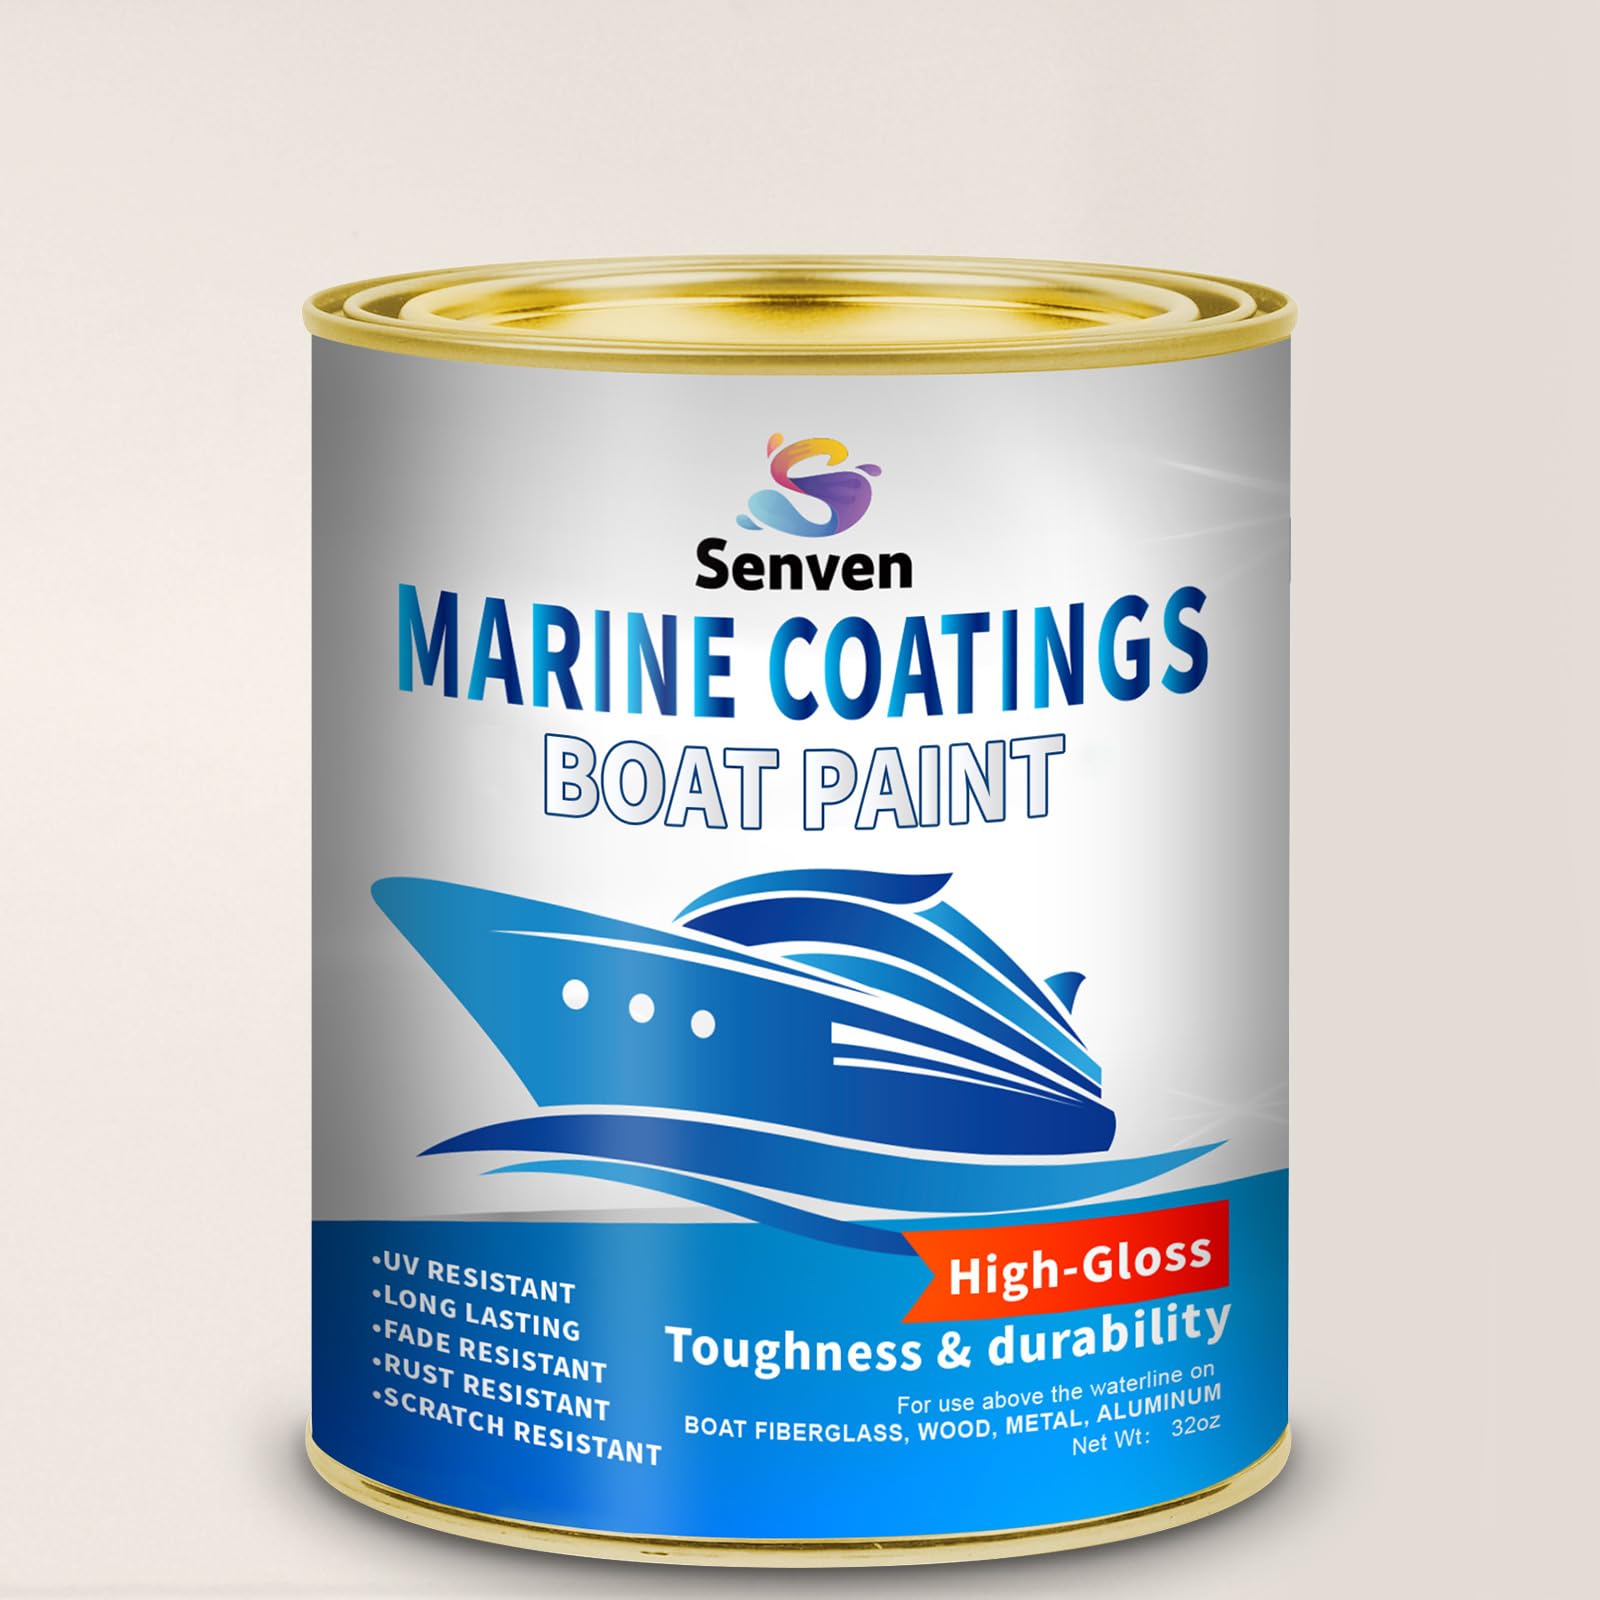
SENVEN’s 35 oz gloss marine paint sits in a different lane than the premium marine systems above. It’s positioned as an all-in-one enamel-style coating for boats and marine equipment, intended for fiberglass, wood, and metals. This kind of product is most useful when your project is small and practical: covering scratches, sealing exposed fiberglass after a repair, refreshing a dinghy, repainting a fiberglass slide or accessory, or touching up a bottom edge that takes occasional abrasion.
The most telling real-world feedback tends to be: it dries quickly and forms a hard coating. That makes sense for quick repairs—especially when you want to get the item back into service without a multi-day schedule. Some owners report good durability over a season for small repairs, which is exactly how a lot of people use enamel-style marine paints: spot fixes and convenience jobs, not full hull perfection.
There are also consistent “practical warnings” in reviews: packaging issues (missing paint, dented cans, leakage) and application quirks (spraying overspray that dries and strings). Those are not reasons to avoid it, but they do tell you how to use it best:
- Inspect the can immediately and document issues if something arrives damaged.
- For brushing, maintain a wet edge and don’t overwork it—enamels can tack up and then drag.
- For spraying, set up overspray control, keep your distance consistent, and avoid spraying in windy conditions.
This is also where expectations matter. If you want the “spray booth” look on a yacht topside, use a topside system like Wet Edge plus primer. If you want a hard, glossy protective coat for a utilitarian fiberglass surface, SENVEN can be a practical option—especially for smaller jobs where convenience matters.
Finally, a key fiberglass truth: small repairs often fail because edges aren’t feathered. Whatever paint you choose, sand the repair edges so the coating transitions smoothly. Hard edges are where chips start. Feathering is where longevity starts.
Why it’s useful
- Quick-drying feel – Helpful for small repairs and time-sensitive projects.
- Hard, glossy film – Good for sealing exposed fiberglass and covering scratches.
- Multi-surface flexibility – Can be used on fiberglass, wood, and many metal items.
- Convenient size – Appropriate for spot repairs without buying large volumes.
- Practical DIY use – Works well when expectations match the job: patches and refreshes.
Good to know
- Packaging quality can vary; inspect on arrival so you’re not surprised on project day.
- Spray application can be tricky without proper setup; brushing often gives more control for small jobs.
- Not a substitute for true antifouling on boat bottoms that live in the water full-time.
Ideal for: small fiberglass repairs and practical marine touch-ups where quick cure and a hard film matter more than boutique finish perfection.
Why Fiberglass Paint Fails (and the Fixes That Actually Work)
Most coating failures on fiberglass come from one of four root causes: contamination, gloss (no mechanical tooth), incompatible chemistry, or trapped solvent from thick coats. If you fix those four, you can make almost any quality product behave better. Here’s how to diagnose and prevent the common failures before they happen.
The prep moves that change everything
- Dewax before sanding – Wax and polish residues cause fisheyes and adhesion loss. Wipe first, then sand.
- Sand to “uniform dull” – You’re not removing fiberglass; you’re removing shine. Shine = no grip.
- Vacuum like you mean it – Fiberglass dust becomes a weak layer if you just “wipe it around.”
- Use primer as a leveling tool – Primer fills micro texture; topcoat creates appearance. Don’t reverse those roles.
- Thin coats, not thick coats – Thick coats trap solvent and stay soft. Thin coats cure harder and level better.
- Respect cure time – “Dry to touch” is not “ready for full use,” especially in bathrooms and immersion environments.
- Mix coatings thoroughly – Bottom paints and primers settle; power-mixing prevents weak patches.
The failure patterns (and what they usually mean)
- Fisheyes: contamination (wax/oil/silicone). Fix: dewax/solvent wipe, then sand, then wipe again.
- Peeling sheets: wrong paint for the zone or inadequate deglossing. Fix: correct system + stronger mechanical profile.
- Soft or tacky paint: too thick, wrong temperature/humidity, or recoat timing issues. Fix: thin coats + correct conditions + patience.
- Orange peel texture: thick application, cheap rollers, or paint drying too fast. Fix: better tools + thinner coats + maintain wet edge.
- Uneven gloss: substrate inconsistency or uneven sanding. Fix: primer base + uniform sanding + clean wipe-down.
- Bottom growth despite antifouling: extreme fouling pressure, thin film areas, poor mixing, or boat sitting still. Fix: coat strategy + correct paint type + usage-aware maintenance.
When you treat fiberglass finishing like a system—prep, primer, coat thickness, cure timing—the project stops being a gamble. That’s the difference between “painted fiberglass” and “restored fiberglass.”
FAQ: Painting Fiberglass Without the Guesswork
Do I need primer when painting fiberglass?
Can I use topside boat paint on a fiberglass tub or shower?
What grit should I sand fiberglass to before painting?
Can I paint the bottom of my fiberglass boat with regular marine enamel?
Why do some bottom paints work for one boater but not another?
What’s the biggest mistake people make with fiberglass paint?
How many coats should I apply?
Final Thoughts: Buy the Paint That Matches Your Fiberglass Reality
The smartest fiberglass paint choice isn’t “the strongest one.” It’s the one that matches your exposure zone and your willingness to prep and cure properly. When you choose by reality—sun, water, abrasion, chemicals—you stop repainting the same surface every year.
Here’s how to turn this guide into one confident purchase:
- Want the best all-around topside finish for fiberglass above the waterline? Start with TotalBoat Wet Edge (White, Gallon). It’s the “looks professional without professional tools” pick.
- Want the cleanest, smoothest foundation under your topside paint? Pair your topcoat with TotalBoat Marine Topside Primer. Primer is what makes gloss look expensive instead of textured.
- Need a hybrid bottom paint that avoids heavy layer buildup? Consider Interlux Fiberglass Bottomkote NT for a durable underwater system with polishing behavior.
- Want copper-free antifouling for underwater metals or aluminum-adjacent setups? Look at TotalBoat Krypton Copper-Free, a strong choice for outdrives, trim tabs, and copper-avoidance strategies.
- Boat lives in tougher fouling conditions and you want more serious multi-season intent? Choose TotalBoat Spartan and apply it with “system thinking” (mixing, film thickness, and wear-zone strategy).
- Prefer a more livable bottom paint application experience? TotalBoat JD Select is water-based and easier to clean up while still behaving like a real ablative antifouling.
- Want a durable seasonal bottom paint that’s straightforward and practical? TotalBoat Underdog is a reliable single-season workhorse for frequent-use boats.
- Painting fiberglass that stays immersed (pool steps, pool surfaces)? Use an immersion-ready epoxy like Olympic Zeron and respect pot life and cure timing.
- Refreshing a fiberglass RV roof? Use a roof-specific flexible coating like Dicor RP-FRC-1, built for roof movement and sun exposure.
- Resurfacing a fiberglass tub, sink, or bathroom surround? A dedicated refinishing option like BEKOMN Tub & Tile Spray can deliver a dramatic upgrade when prep and cure discipline are handled like a pro job.
- Need a straightforward above-waterline primer alternative? Rust-Oleum Marine Wood & Fiberglass Primer is an easy, classic adhesion helper for many small projects.
- Doing smaller topside jobs or touch-ups? A quart like Wet Edge (White, Quart) makes maintenance and repairs far more practical.
- Need a small-can option for quick fiberglass patch jobs? SENVEN Marine Boat Paint can be useful for small repairs and utility refreshes when expectations match the job.
If you take one thing from this guide, let it be this: the “right” choice is the one that matches the surface you’re painting and the way you’ll use it afterward. Pick the best paint for fiberglass for your real exposure zone, do the prep like you’re protecting your future weekends, and you’ll get a finish that feels solid, clean, and satisfying every time you see it.